Actually some trub is healthy for yeast.
1 Like
The basket in the fermenter is for dry hopping. It’s a standard add on called the Depth Charge for the Big Mouthed Bubbler. I have one
I realize that. What I am suggesting is to recirc through it to remove the bigger chunks before sending the wort through the chiller…
Purée wort as opposed to chunky wort? Maybe? And seeing as how it won’t be needed until it’s DH’ing time, there’s time to clean it up.
Sneezles61
So since I started this let me clarify. My question was, if I decided to use my 800 micron grain basket, ALSO as a hop spider, will it catch enough pellet hop material to prevent clogging my pump and valves? The 800 micron basket would be dual purpose, a grain basket and a hop spider. I realize that after the boil when I turn on the pump, there will be considerable pellet hop material in the wort, and I’m asking if anyone has recirculated under these conditions and did it clog your pump or valves. At that point, the end of the boil, I would recirculate and catch any remaining hop pellet material, at the return connector in my keggle, in a different 400 micron filter, and then proceed to routing the wort through the plate chiller. Sorry about the repetitive statements but I’m trying to be perfectly clear what my question is. Maybe nobody has done this. I am trying to avoid the cost of a second basket as a hop filter, but 800 microns might be too coarse of a mesh to keep enough pellet material from clogging my pump and or valves.
Whatever the mesh is on the depth charge is too fine IMO. Whatever it is I would go up/ more open a notch as far as dry hopping goes. I think I’m going to go back to free range dry hops after using the depth charge a dozen times.
It will definitely catch hop material if that’s what you want.
Oh well I already bought the depth charge, arriving this week. So you apparently see a difference in hop utilization when dry hopping with the depth charge?? Did you try increasing the amount of hops you are putting into the depth charge? I am already sensing buyer’s remorse for my recent purchase.
And on that note let me add. It seems to me that if hop utilization was very good during the boil process (and flameout too of course) then dry hopping would not be necessary. Just seems that dry hopping, and hop teas, are just band aids for inadequate hopping during the brewing process. Maybe I don’t know what I’m talking about, but then again maybe I’ve hit on something. I am going to try to get the very best hop utilization during brewing, and also dry hop with the depth charge if I have to, but hopefully I won’t have to and I can sell this depth charge new in the box. Anybody care to comment on the matter please jump in. Cheers!
I will still use it for some things. The concept is great. I think I could augment it to open it up a bit. You need to use the plunger they give you to mix up the hops. That helps with utilization. Considering using the non plunger side as well as a simple stir stick.
Ok squeegeethree thanks for the tips. What are the “some things” you will use it for? I was considering using it for making Green Chile beer, and possibly a fruit puree beer recipe. Augment it how to open it up? Thanks, and cheers!
I’m not going to say you don’t know what you’re talking about but I will opine that you are incorrect.
During fermentation volatile aromatics obtained via the boil or steeping are blown off with CO2. In addition, hop oils attach to yeast and settle out during clearing. Dry hopping allows these aromatics and oils to be reabsorbed.
Yes, utilization of hops during the boil is very important but dry hopping isn’t a band aid. Correctly dry hopping is just as important than hops in the boil.
2 Likes
Ok fair enough, band aid was over the top…I’m fussy about it because I’ve had problems with hop utilization during the boil and not much luck with dry hopping (or hop tea), but then again maybe it is my equipment/process. I decided that, actually, and so I’m moving towards more exposure of the hops to the wort during the boil, and with my new depth charge I’ll increase the amount of hops if I don’t get what I want with the recipe. If in the end the depth charge just does not fill the bill, I’ll throw the hops directly in the fermenter and then work around them when I bottle. I think I’m following a well worn path sometimes. Cheers!
DH’ing a tangible process… How well it does… or doesn’t work becomes a process of your brewing/timing. Read all you can… But actually doing, perhaps even following a regiment that has been described by some of the readings you do, will help guide you to your process… Loopie, being a pro-Brewer, has his hands on these very processes daily… I’ll bet he gets input from the imbibing public that my help their brewery “tweak” a process…
IMO, cooping hops, however you do it, will help to eliminate a plugged pump. Hands on will lead you to your answer… Because what I do doesn’t mean it will fit your process…
The word “process” shows up quite a bit… That is the key… I/we aren’t being snarky… I promise, by doing and figuring out stuff, you’ll perfect your path, and I believe brew some of the best beer that’ll ever pass through your taste buds.
Sneezles61
1 Like
Dry hops give a diferent aroma profile from any hops using during or immediately after the boil due to the temperature difference. Definitlely not a bandaid for utilization issues. Split a batch and do one with DH, one without. You’ll see a big difference in aroma.
1 Like
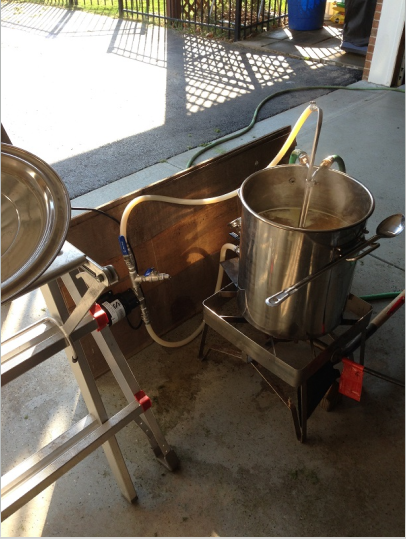
As I’ve been lurking along following this thread, I thought I would add my two cents. I use a whirlpool immersion chiller set up for my hop forward beers with hopstands at flameout. I let my hops freely circulate and have never had my pump clog in the process (I use exclusively hop pellets, never tried leaf). I first set it up to brew the Off The Topper Kit from our hosts in 2015 which calls for a 20 min hopstand below 180 degrees. I followed the principles found in This article and bought something similar to This, which I clamped to the center of my immersion chiller. I use This Pump from our hosts. I’ve been using this setup for all hopstand beers for several years. I’m no BJCP certified expert by any means but I definitely noticed an improved aroma using this method which makes it worth the extra work to me.  Here is a pic of my original setup. I start the pump with 15 mins left in the boil to sanitize everything internally.
I cover the top with aluminum foil during the hopstand and chilling process. After transferring to the carboy, I give a decent scrub down of solids off the kettle and chiller, then fill the kettle with PBW solution, heat to 120 and recirc for 20 mins. Then I drain and refill with fresh water, heat to 100ish and recirc for 10 mins.
FWIW I dry hop in muslin sacks (typically at room temp for 3-5 days tops) and leave them in the keg until the beer kicks.

Rad
2 Likes
Thanks Rad that was downright informative; I appreciate the pics and links! So if I read this correctly you just throw pellet hops directly in with no basket/filter of any kind, recirculate at the end of the the boil using the whirlpool chiller - which causes the wort to whirlpool so the hop material/trub collects in the center of the brew pot, and when you transfer/chill the wort the trub is left behind. Do I have that straight? Are you using 3/8" silicone tubing in your setup? Cheers!
Correct, I have a Blichman kettle which has a 90 degree elbow port similar to yours on the inside that goes just above the lower tier at the bottom of the kettle. With the whirlpool pump recirculating, a good portion of the break and hop matter does stay in the middle, but I do inevitably get some in the carboy, I’ve never had any off flavors or effects from that as far as I can tell. As others have discussed taking the pump fully apart, I have never disassembled my pump. I may be short-sighted and lazy but I am assuming the flush/recirc with PBW and then freshwater, coupled with 15 mins of boiling wort ahead of time both cleans and sanitizes my pump and hoses etc.
I use 3/8" tubing when I use my CFC for non-hopstand brews and 1/2" tubing with my pump for this recirc hopstand setup. The 3/8" tubing fits perfectly over the outside port on my kettle and clamps nicely onto my CFC, the 1/2" requires a clamp for all 4 connection points because I got the 1/2" QD’s for my pump. Also, I got the Silver Serpent chiller free from our hosts as part of a sale a few years back, I may upgrade that eventually for better cooling speed, but it works well despite being undersized for my kettle.
When I eventually upgrade to 10 gallon batches (I am TOTALLY jealous of @loopie_beer’s new rig …someday  ), my next kettle I will spec out with a whirlpool port specifically designed for this purpose, but this was a nice way to modify and utilize my existing equipment with a few additions.
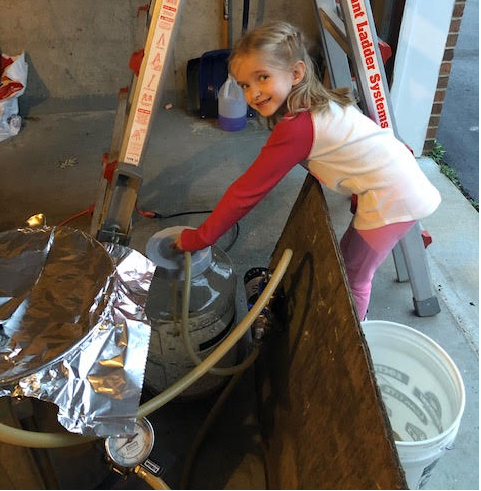
Here is a pic of my brewing assistant helping with the transfer to my BMB, with a view of my HIGHLY engineered custom lid for my kettle.
Also, FWIW, I used nearly a full lb of Citra pellets in my last Pseudo Sue clone attempt and didn’t have any clogging issues despite the ridiculous amount of hops in the kettle. YMMV.
Rad
2 Likes
With that much citra… Sure it didn’t turn out to be an Odell’s IPA? That’s what mine became… Very tasty brew too!!
Sneezles61
So in that first article the author is pumping the hot wort over his immersion chiller in a new vessel? I’m confused.
The immersion chiller is in the boil kettle. The whirlpool arm recirculates the hot wort in a whirlpool through the chiller coils. Usually, when I run mine, I turn on water to drop temp to 200, then shut the water off for the hopstand. Once the hopstand is complete, I turn the water to the chiller back on to drop to pitching temps.
Rad
1 Like
I used to swirl mine as it chilled… I think I cut off about 15 minutes… Now if I had a recirc way back then…
Sneezles61
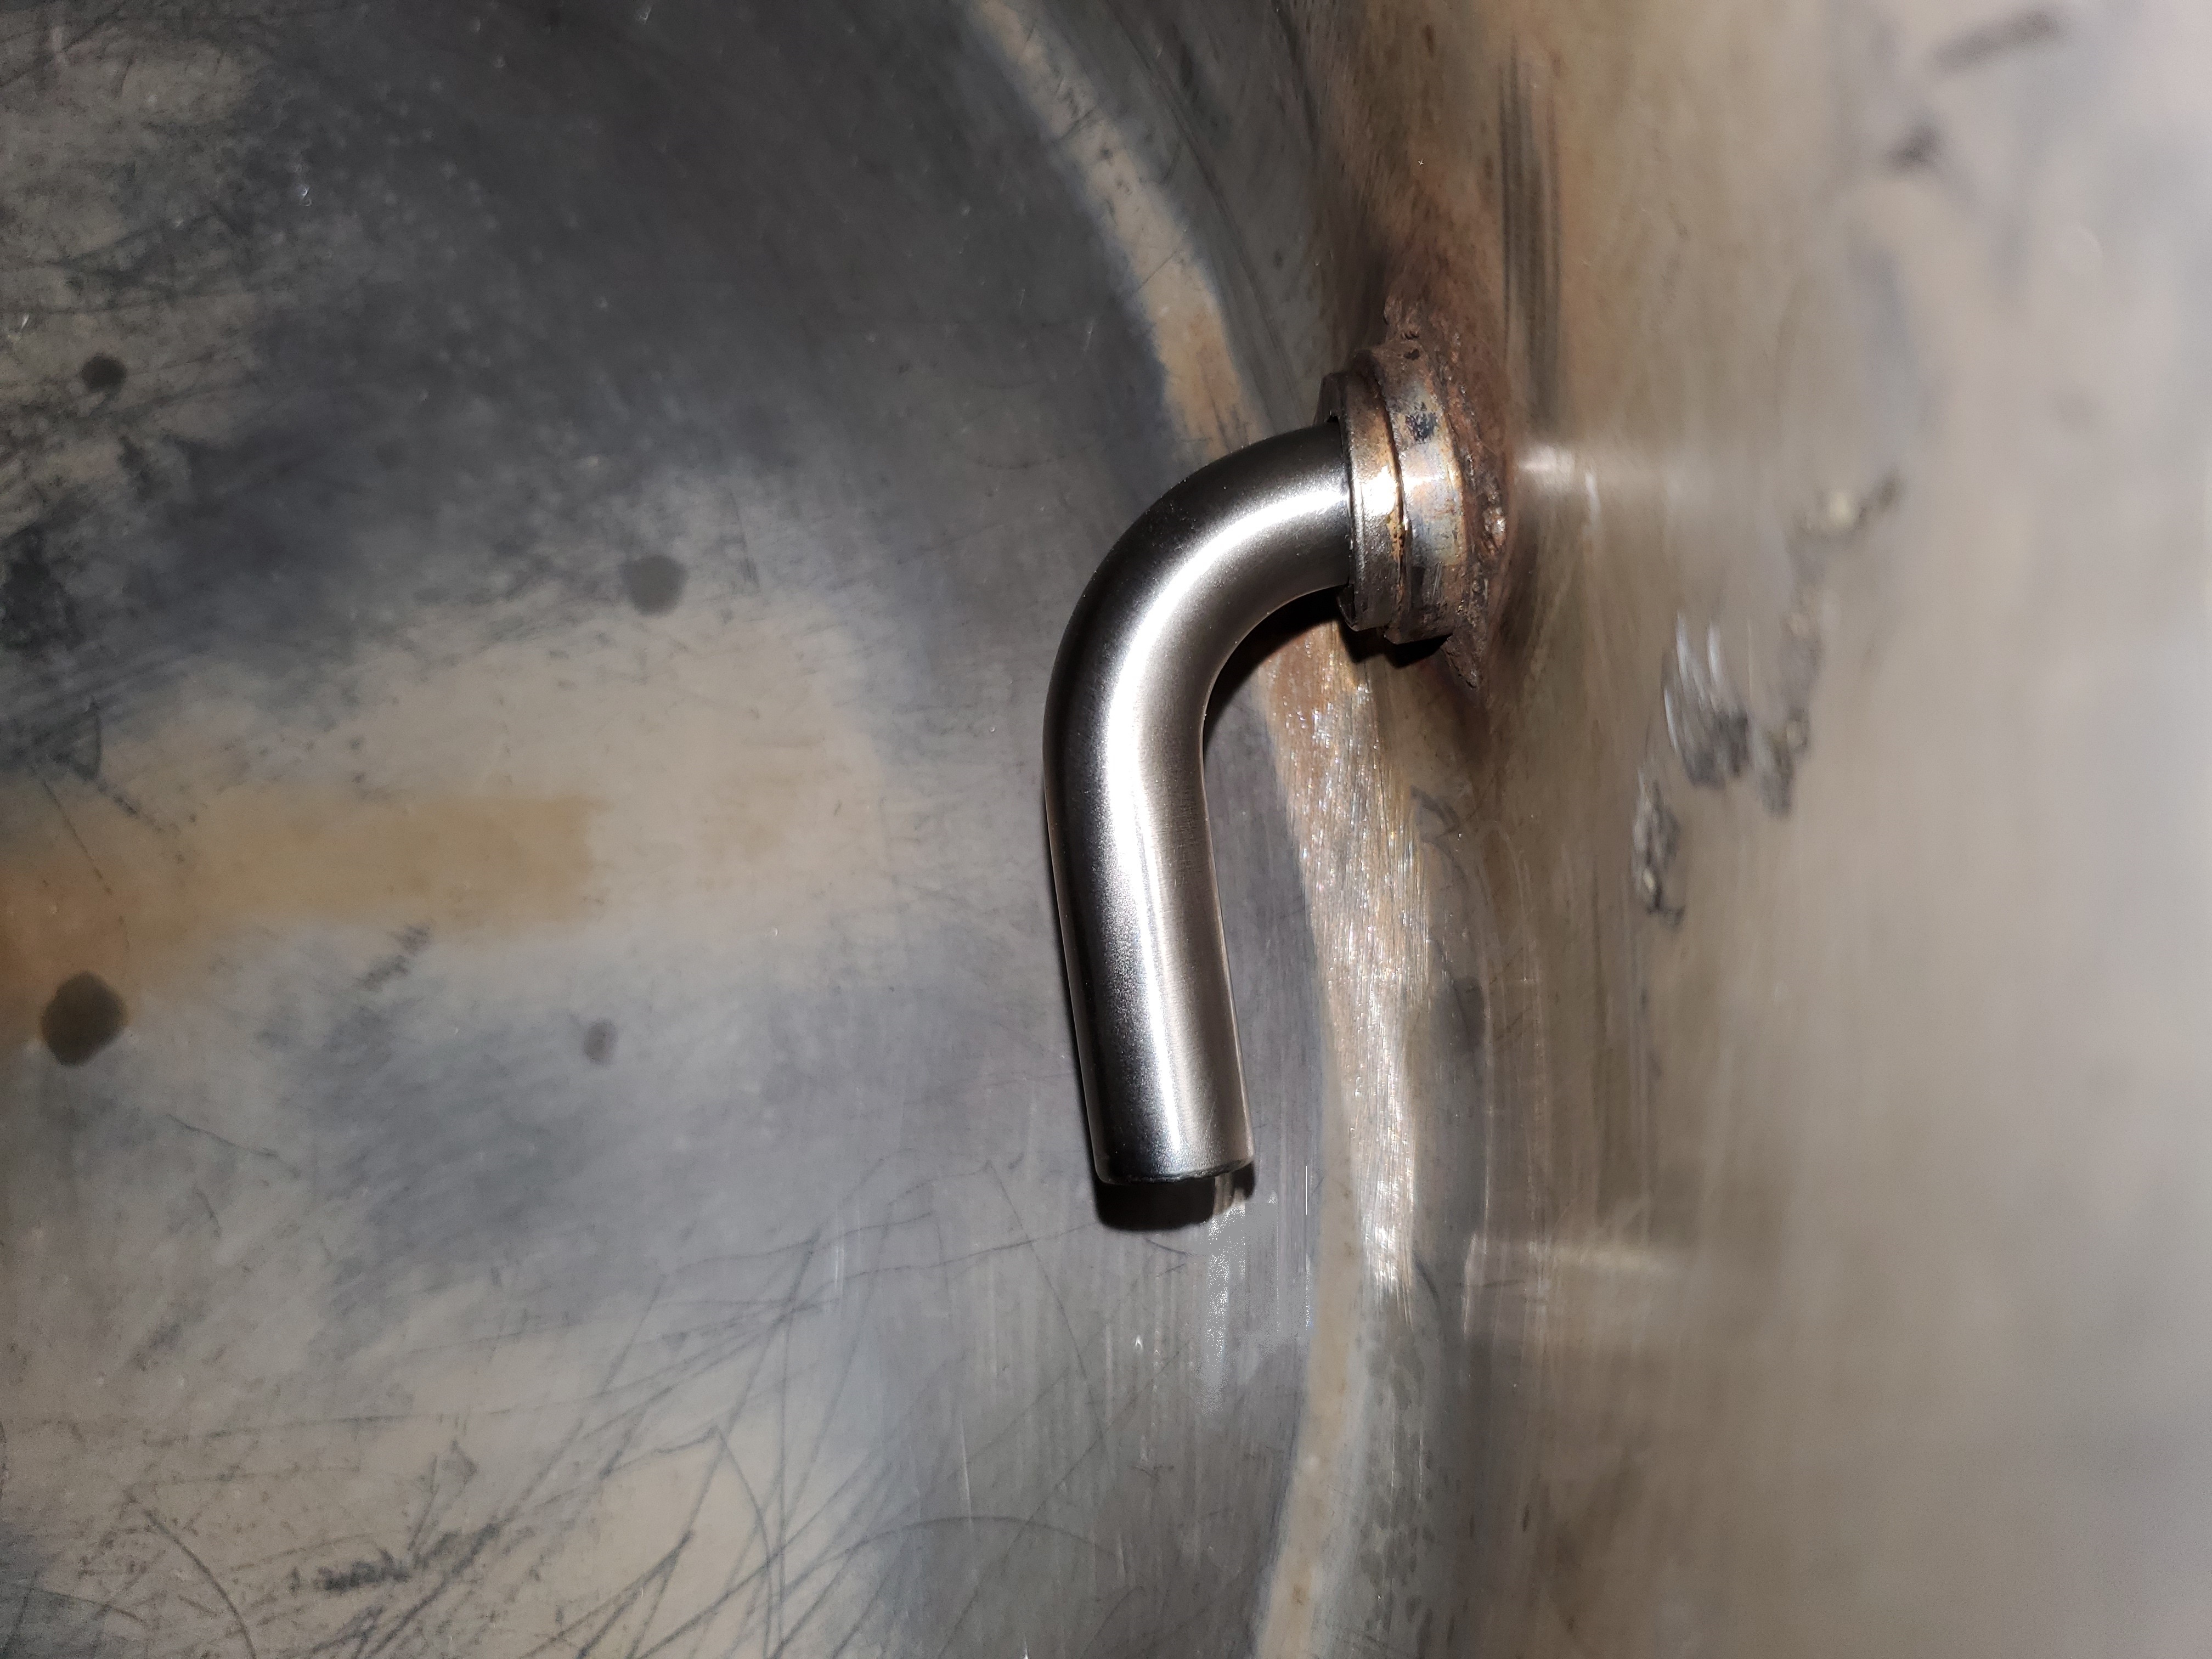
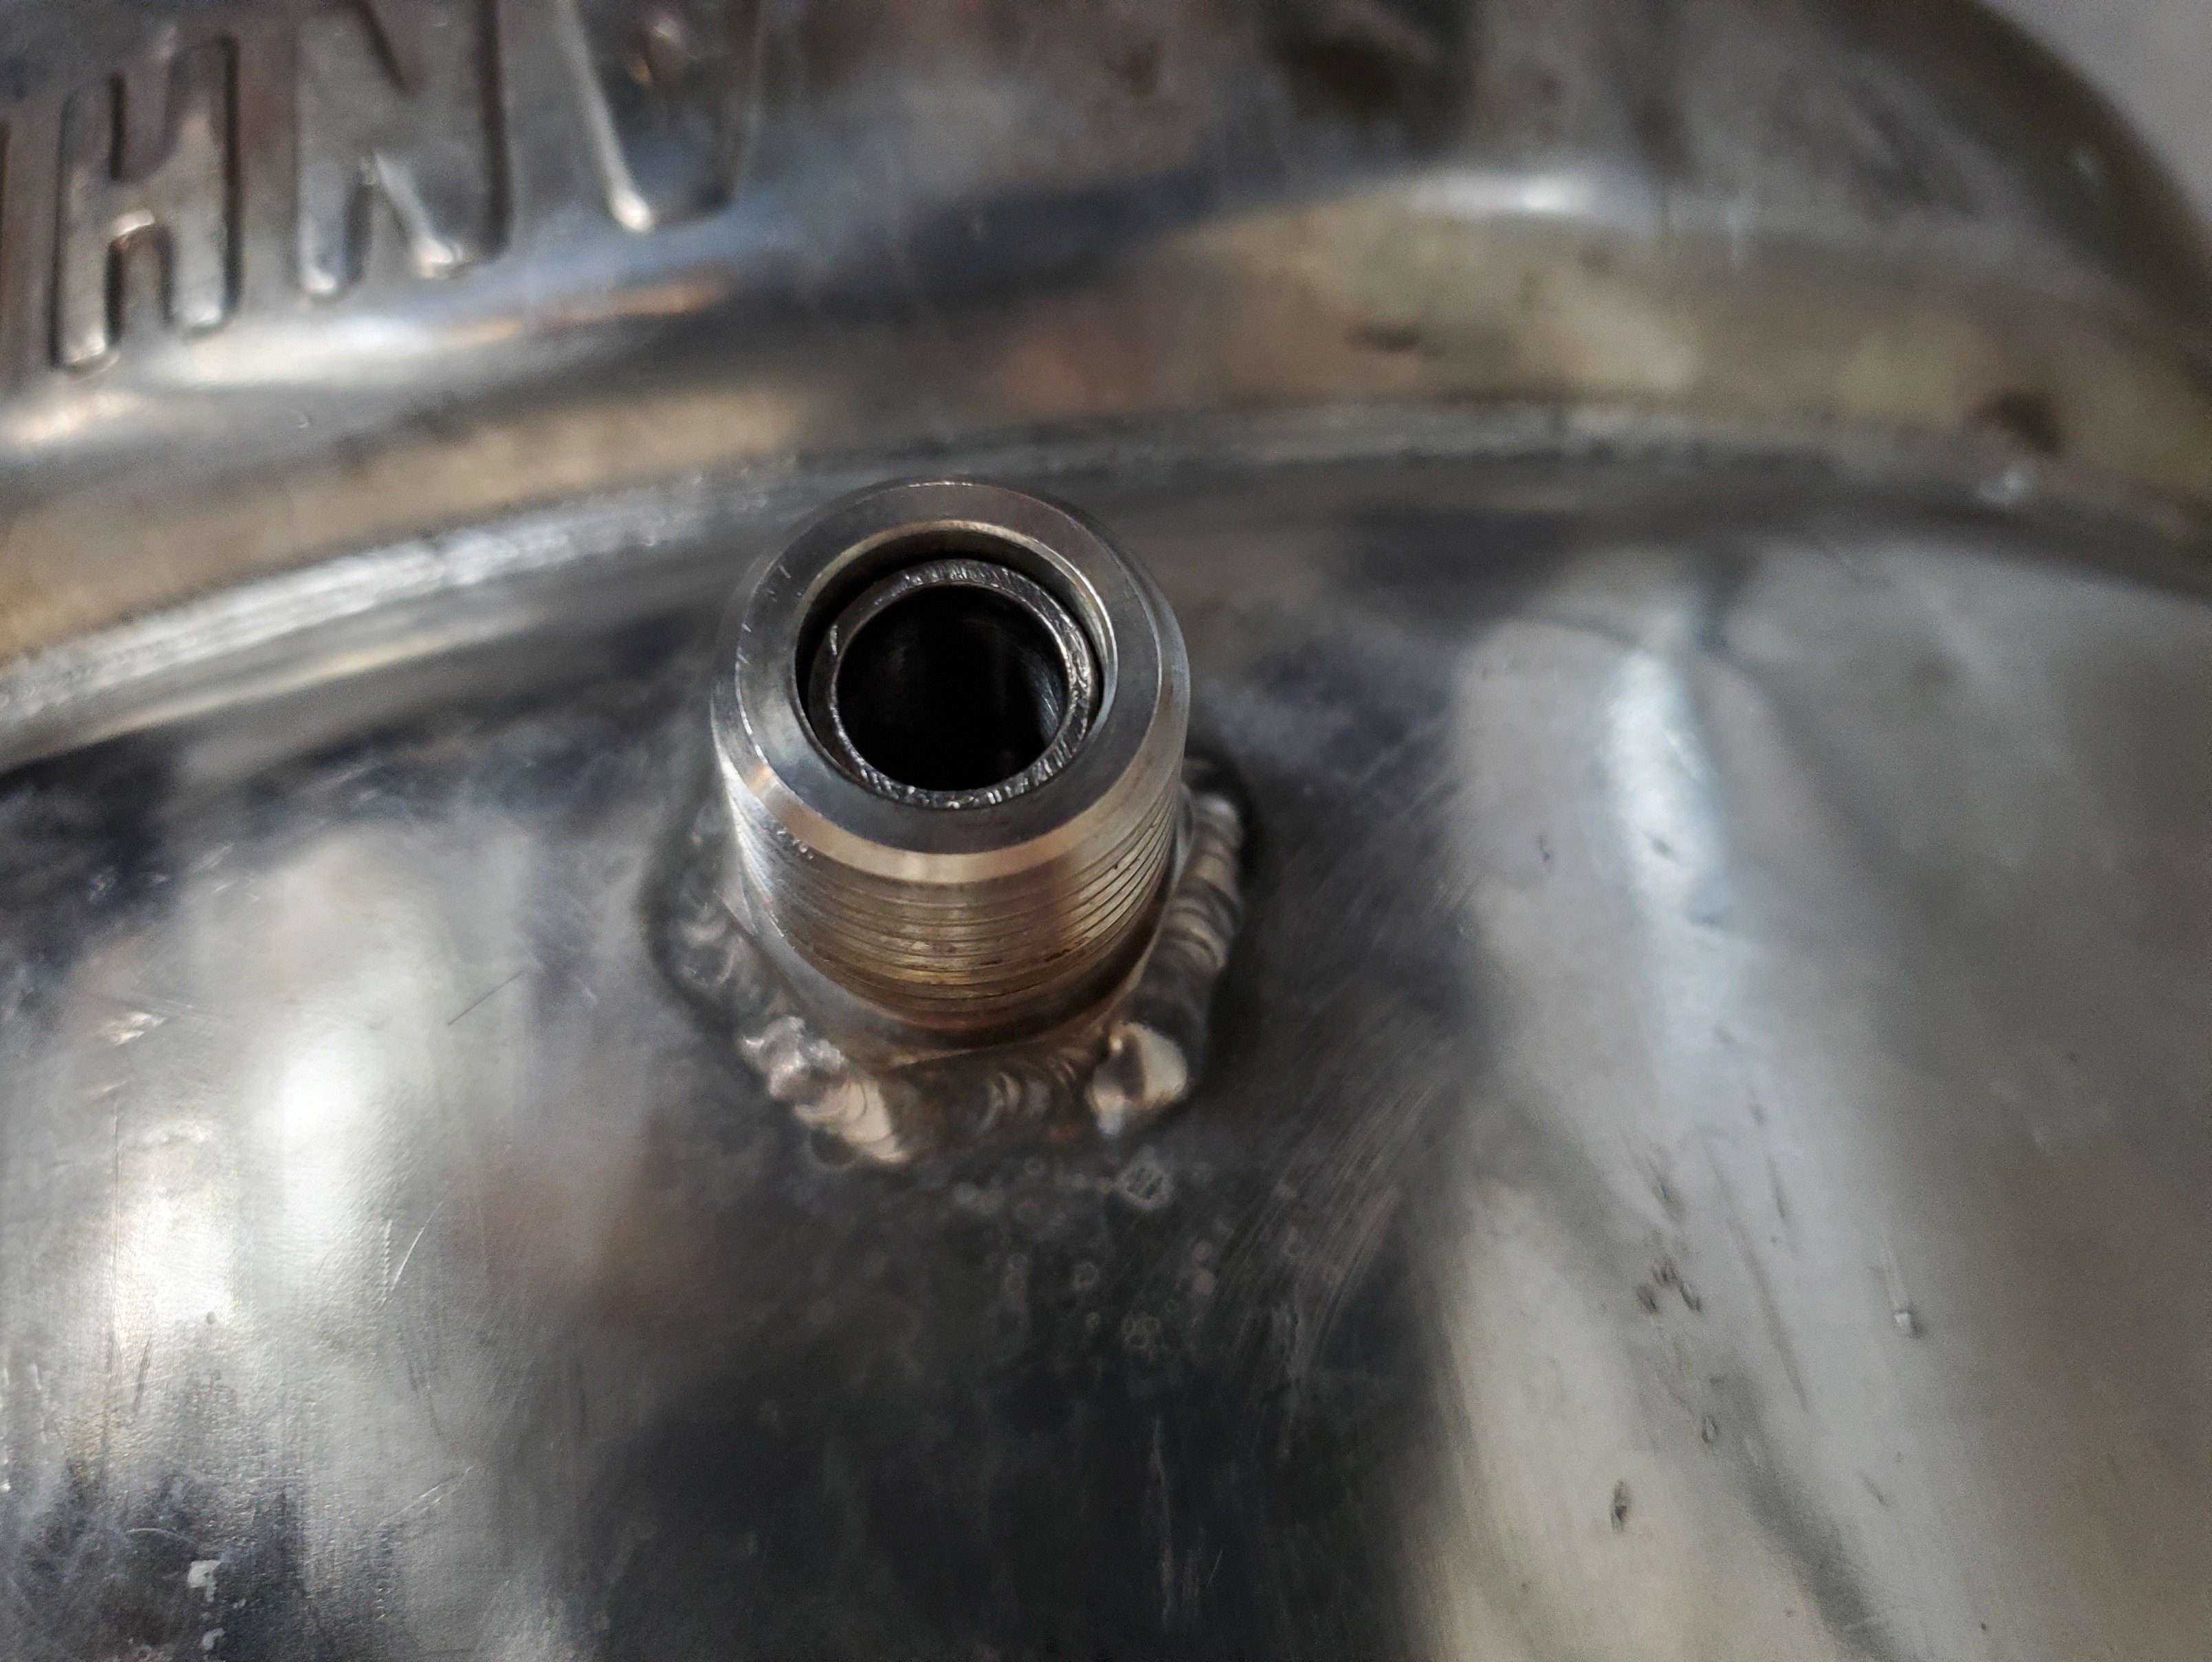
Well I finally got around to installing the stainless steel elbow as a dip tube. Here are the pics. The SS nipple ID was 0.5" and the SS elbow OD was 0.5", but not quite round (we are talking very small variations here) so it would not fit into the nipple. I drilled out the nipple with a 1/2" drill bit, and now the SS fits nice and tight and I’m going to leave it that way. It is not quite an interference fit, but pretty close, I had to tap it gently to get it to seat fully in the nipple, but I can work it out by hand if I need to. Did not need to solder after all. I forget what the SS elbow ID is, but it is larger than my system silicone tubing, which is 3/8", so I did not compromise the flow rate I currently have, which is very good. I am very happy with this result. I can attach a piece of silicone tubing as an interface if I want to run a tube the rest of the way to the center bottom of the Keggle, or if I end up whirlpooling this dip tube will work fine for that.
2 Likes