Hey Brew Cat, post the picture of you iteration of the portable keezer! Sneezles61
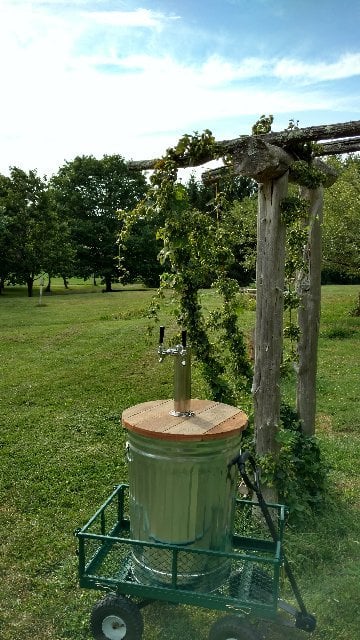
YUP! Thats the… cats meow! Sneezles61
Oh crap, I didn’t capitalize the C in cat… an English form of respect… Brew Cat!
Thank you guys. i met with the fella at the brewery. He is all hyped about me making stuff for them and actually agrees for me to do some signage for their pub. He wants some server trays made and I am going to do a very basic cooler with the cooling system just like you guys showed me. I think this is going to be an awesome partnership between him and me. I can’t thank you guys enough for the help.
1 Like
Just keep posting all you build… per haps we’ll get some other inspirations! And of course, to Brew Cat… thats one of the coolest neighborhood gizmos! Sneezles61
LOL I will thanks. Right now nothing huge just some serving trays and a few signs for his pub. He told me that they will be opening a second location. I might be able to get in on building some benches and tables for him. That would be awesome.
1 Like
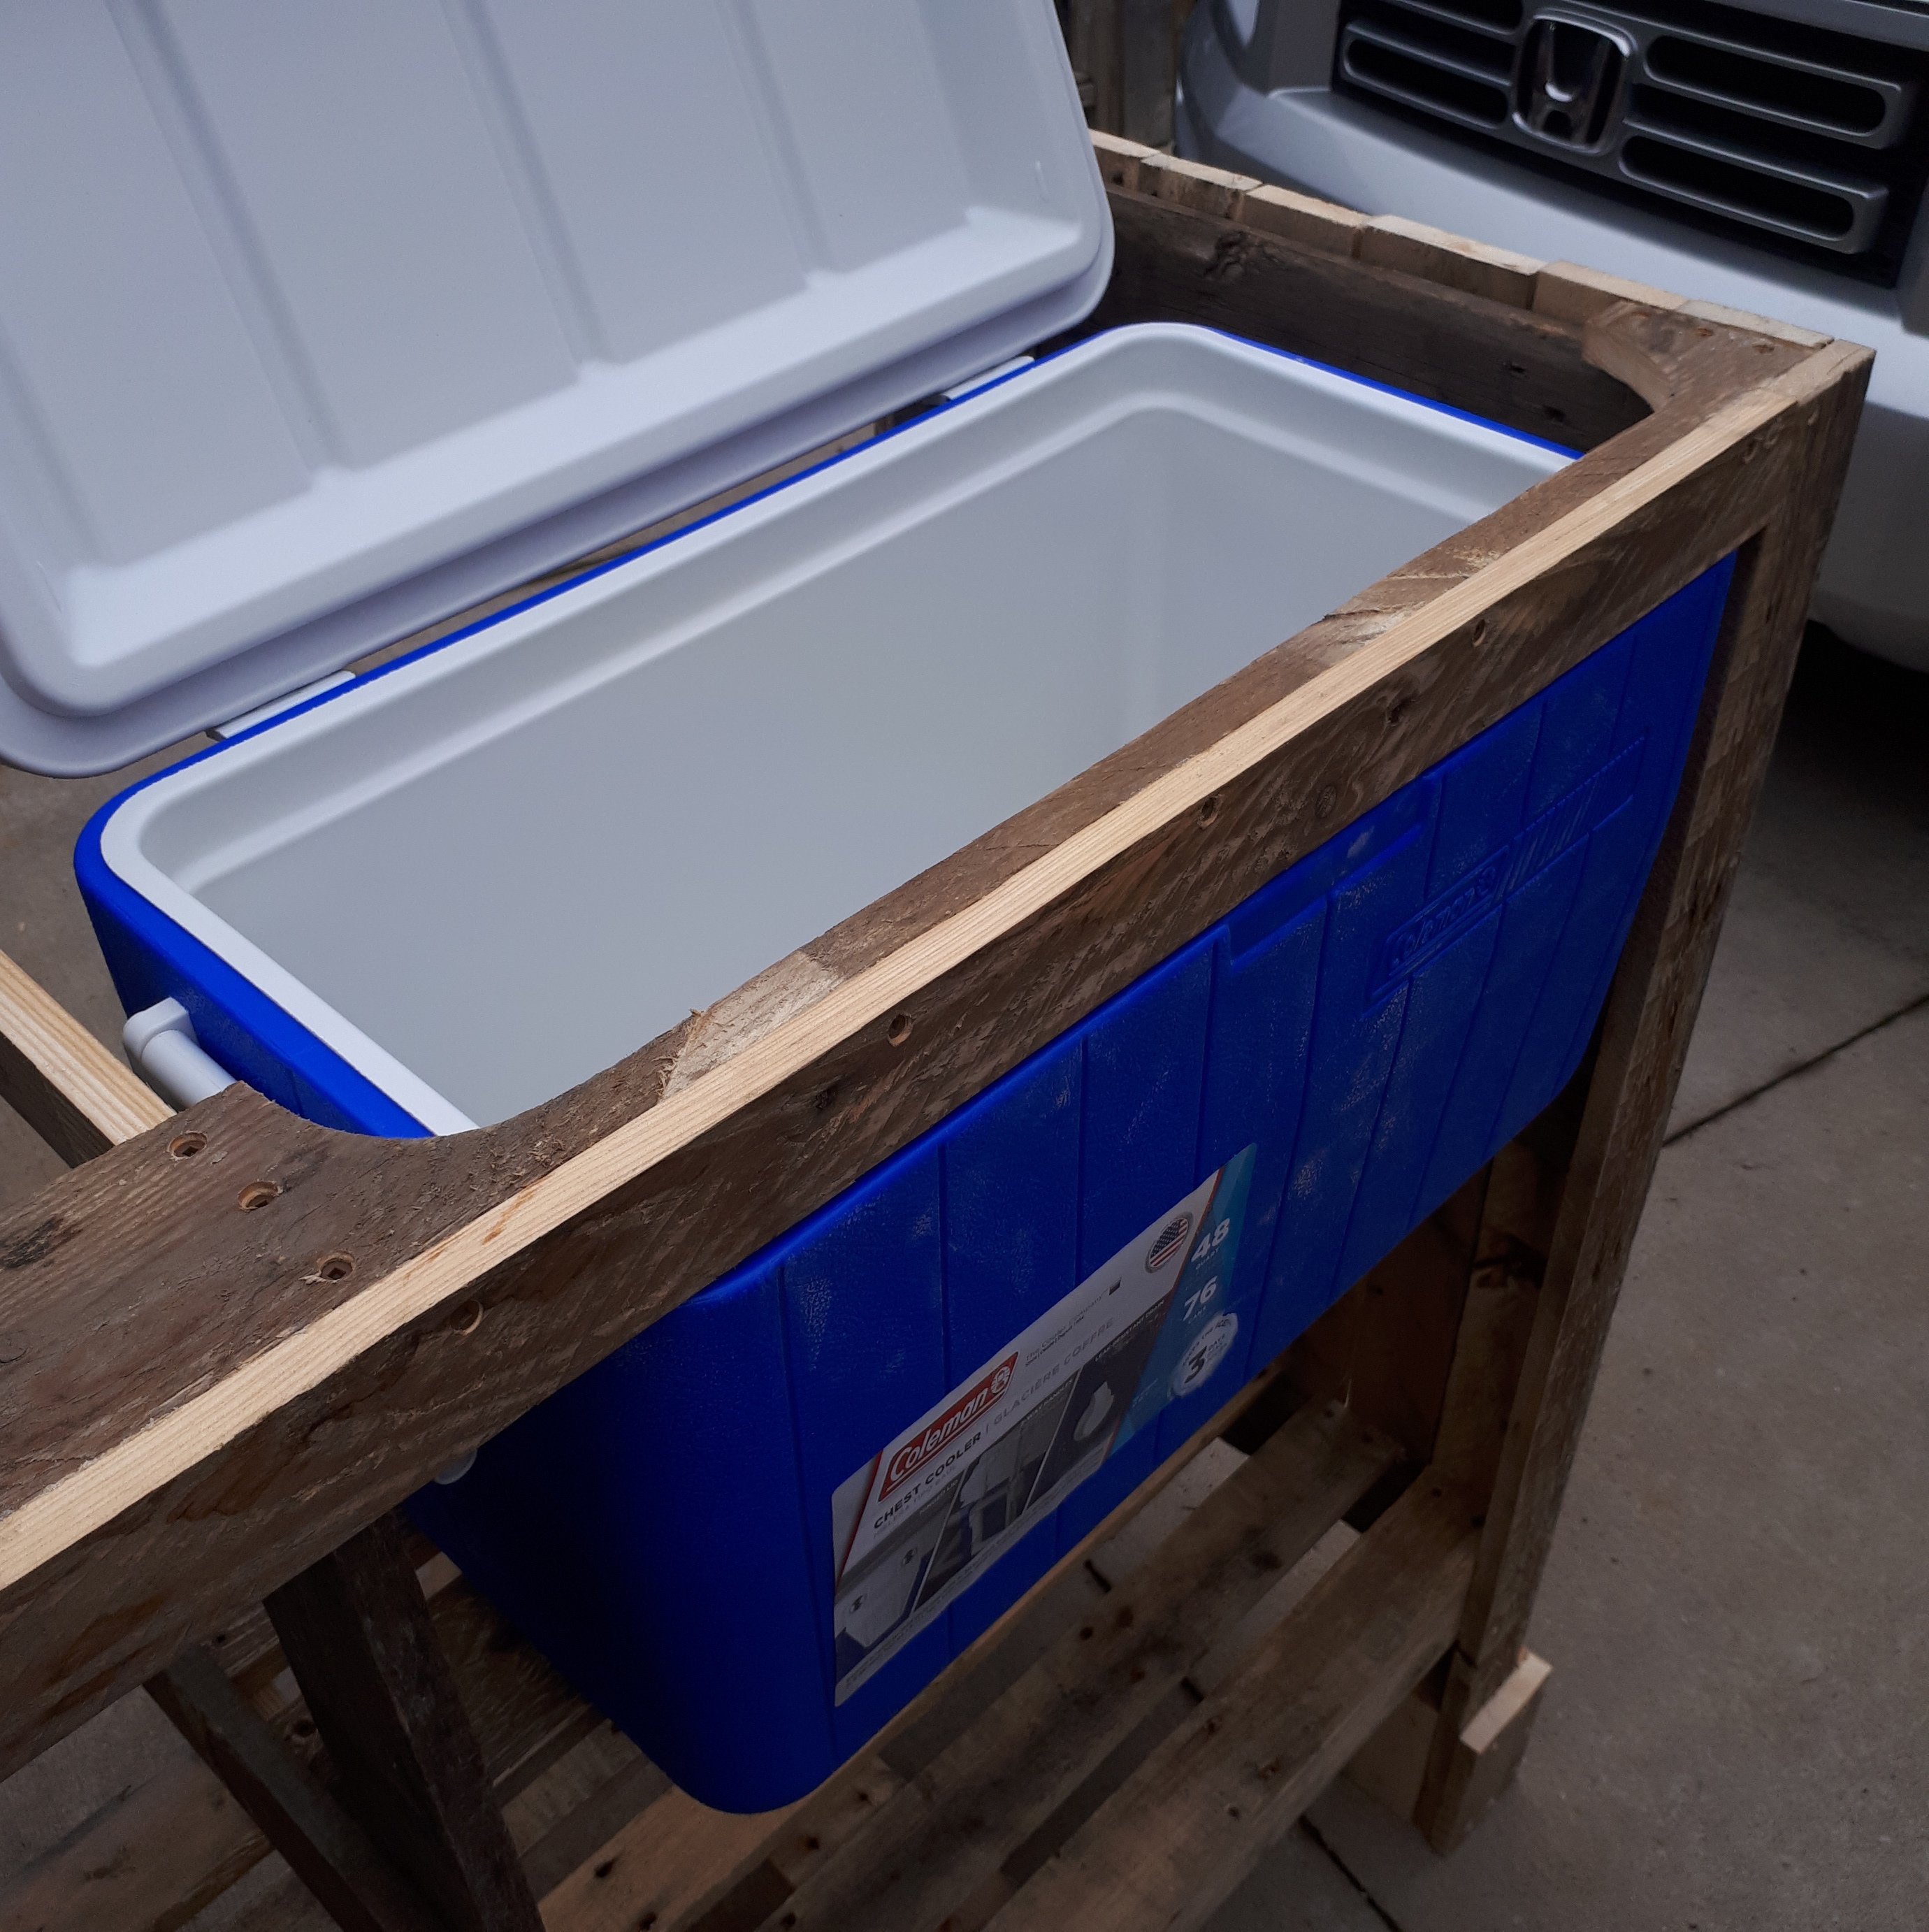
Hi guys. I have started a prototype for a brewery and I will post some pics of the inner frame and shell as I go. This will be after its all done though. It will be the same dimensions as the one in the pic above but 44" tall. This way I am hoping they can fit 3 1/2 kegs inside and lay the canister of gas down under the cooler. The taps will be at a comfortable height for the servers. The back will be open for them to work the taps and pour the beers. Pics will come later in the week. Almost for got the cedar top will lift up to allow the cooler to drop in and for adding ice. This way the cooler will not fall out the back of the frame. Hope this works out like I think it will!
1 Like
A word of cation, laying the gas down may cause the “liquid” side of the CO2 to be expelled… So as it comes out, it’ll be at like -90 degrees… Gumpucky up your regulators… I don’t know how/if it will mess with the brew. Sneezles61
1 Like
Good advice. It would be a better idea to hang the CO2 tank on the outside. It won’t look as nice and might be in the way but will work better and the high pressure gauge will work. They read low if the tank is cold.
1 Like
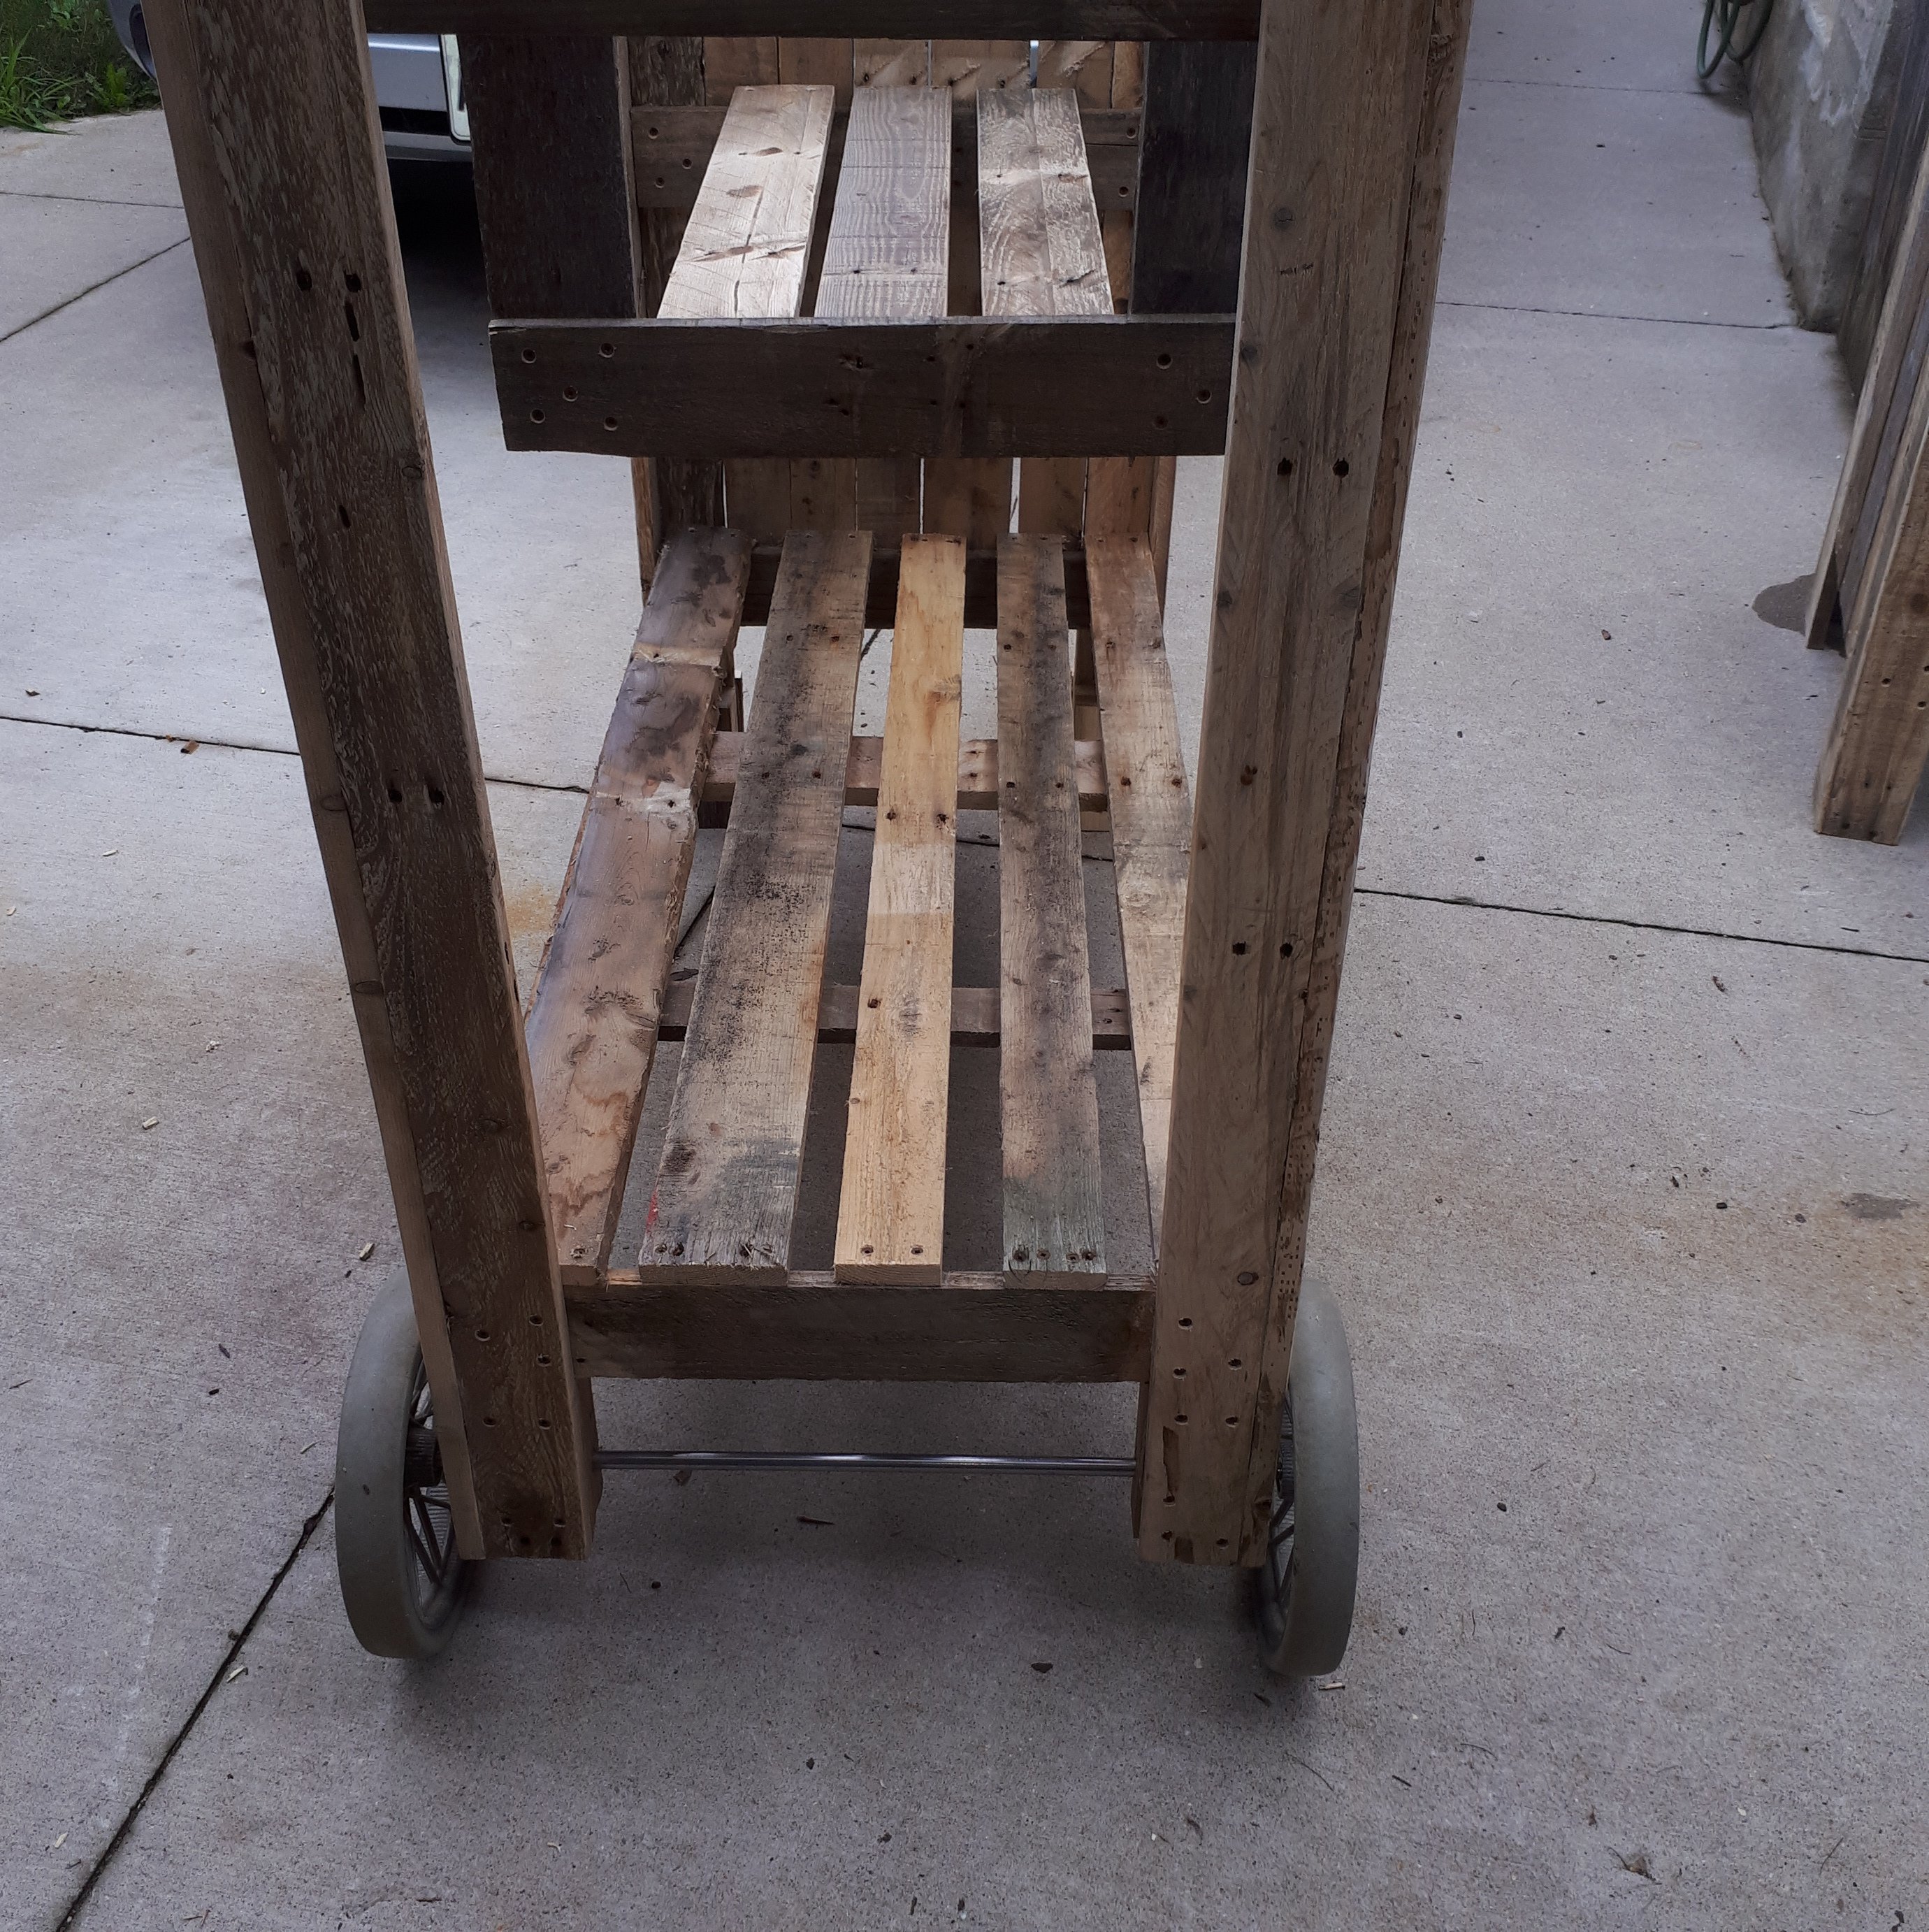
Oh ok didnt know that thank you. Here are some pics of the frame for you guys.
Ok lost the upload pics button darn. LOL.
Found it.
So with that info then I would have to make this at least a foot longer to get the gas canister inside it plus 3 20 liter kegs.
I will find out tomorrow for sure. I will be taking it to the brewery to see what they think.
Make a small shelf, about the size of the footprint of the tank? Attache to either end of your cart and use some sort of strap, to secure it to the cart? A bungee cord type gizmo? Sneezles61
In addition there are smaller paint ball setups that you could use to save room.
I have to make it to fit what they have at the brewery. They buy their gas supplies and regulators and I have to make it match up. I don’t want ugly stuff hanging off the end. I doubt they will too. I will post more pics later for you guys. Oh and this is a prototype so I expect some changes before the final product is up to snuff.
If I drop the lower shelf down they can get 1 full keg and 1 half keg under the cooler then a full canister of gas to the left of the cooler and a half keg. All they wouold hav eto do is swap the hose from keg to keg and they would have enough for a whole day in one Jockey cooler. Right on.
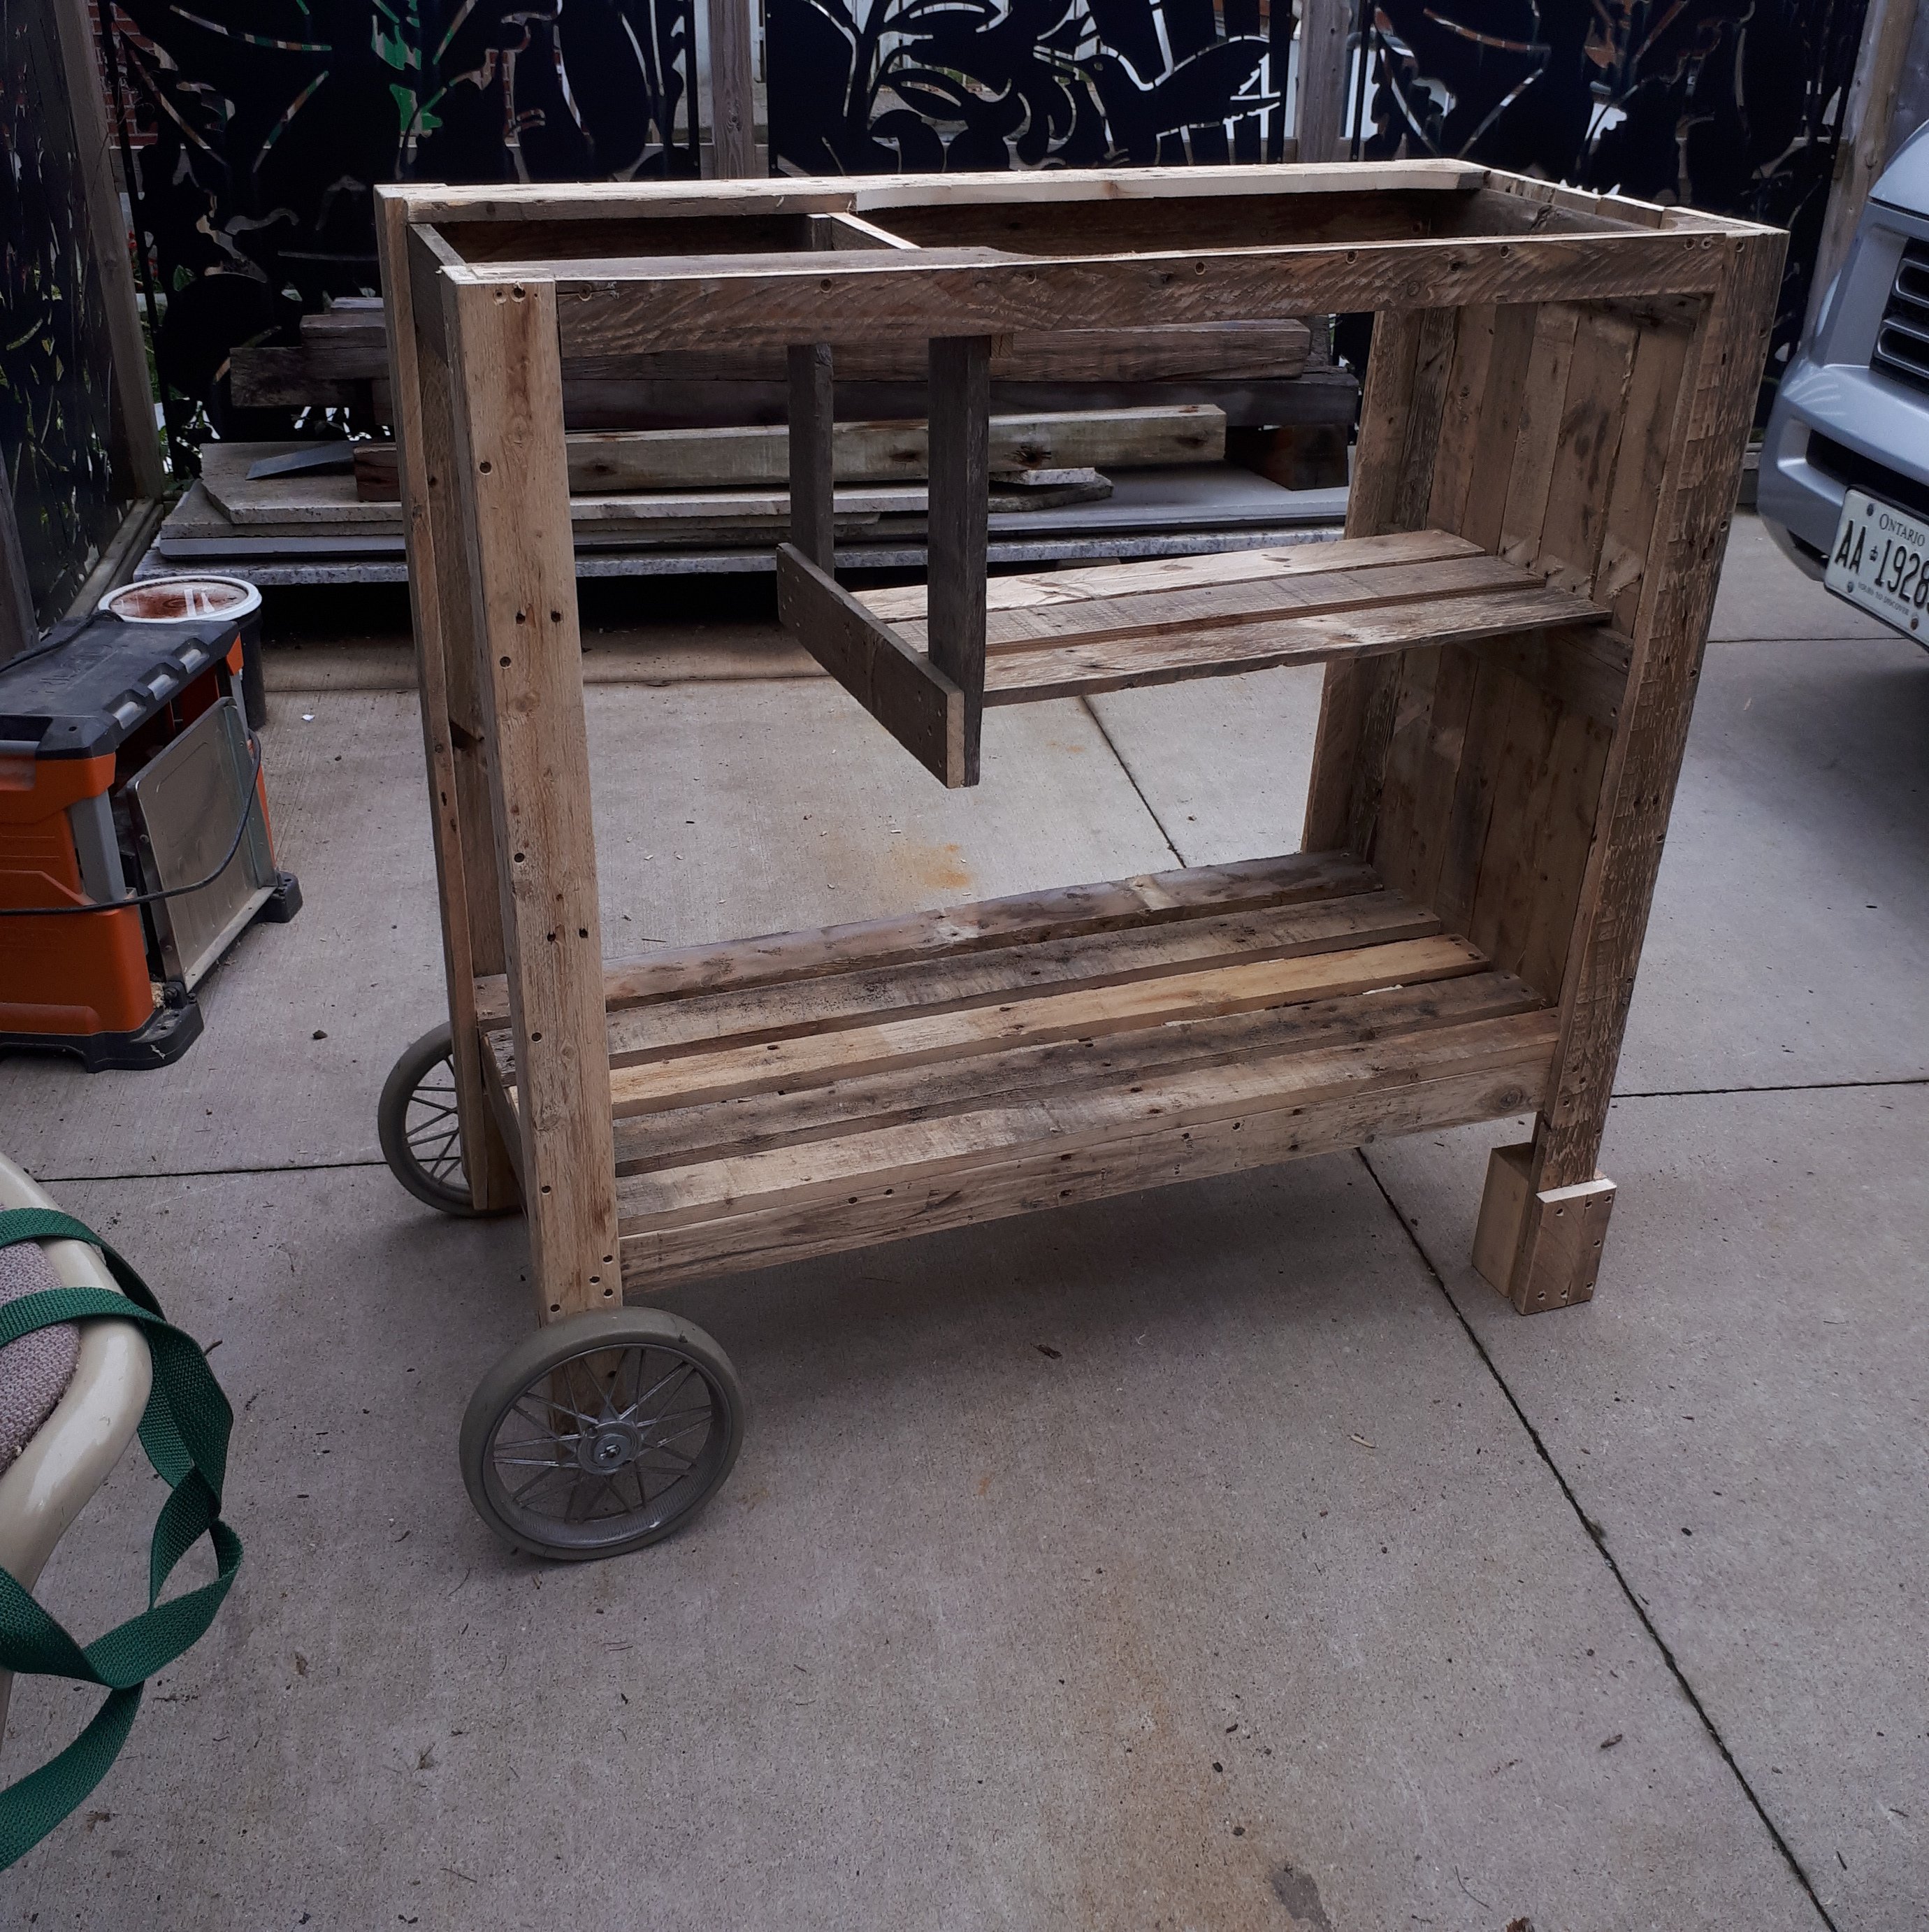
Here is the almost finished project. I only have 2 modifications I have to do. One add casters to the end with the handle and drop the lower shelf 4 to 5" yee haw. I will beef it up a little when I do that. It will be supporting a lot of weight. I should put a bar or chain across it too incase the kegs get jostled and want to try and fall out.
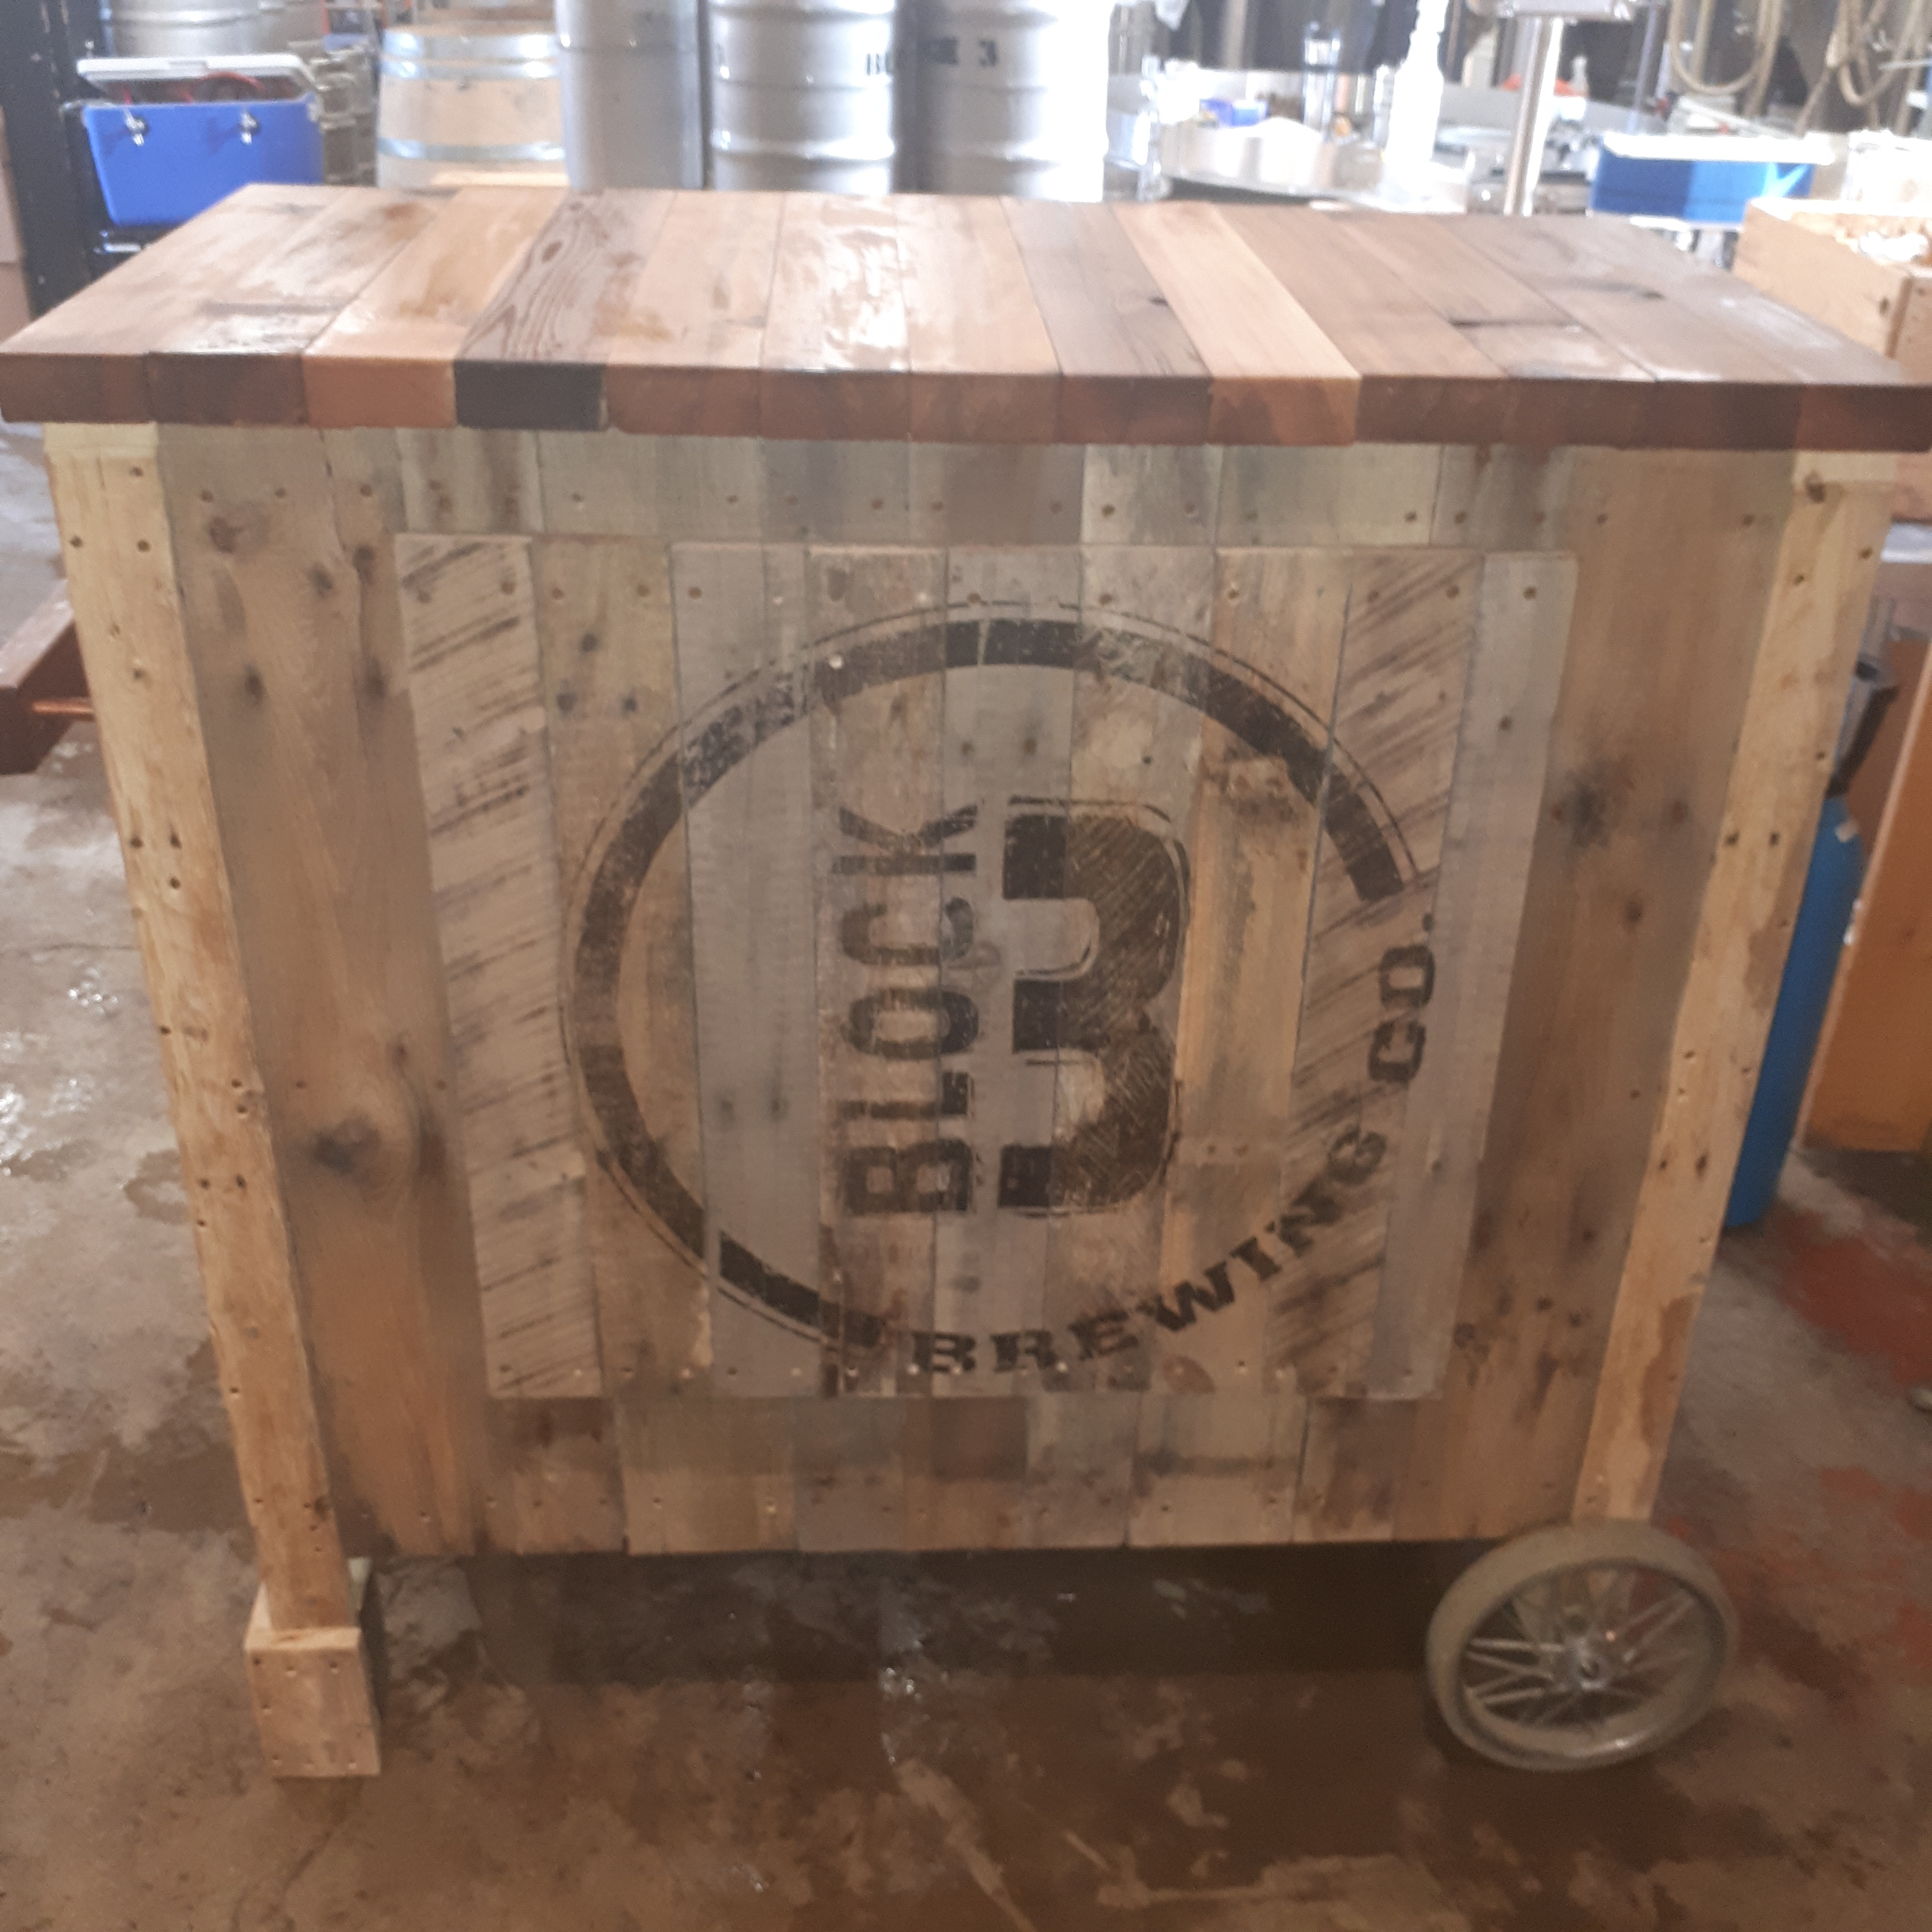
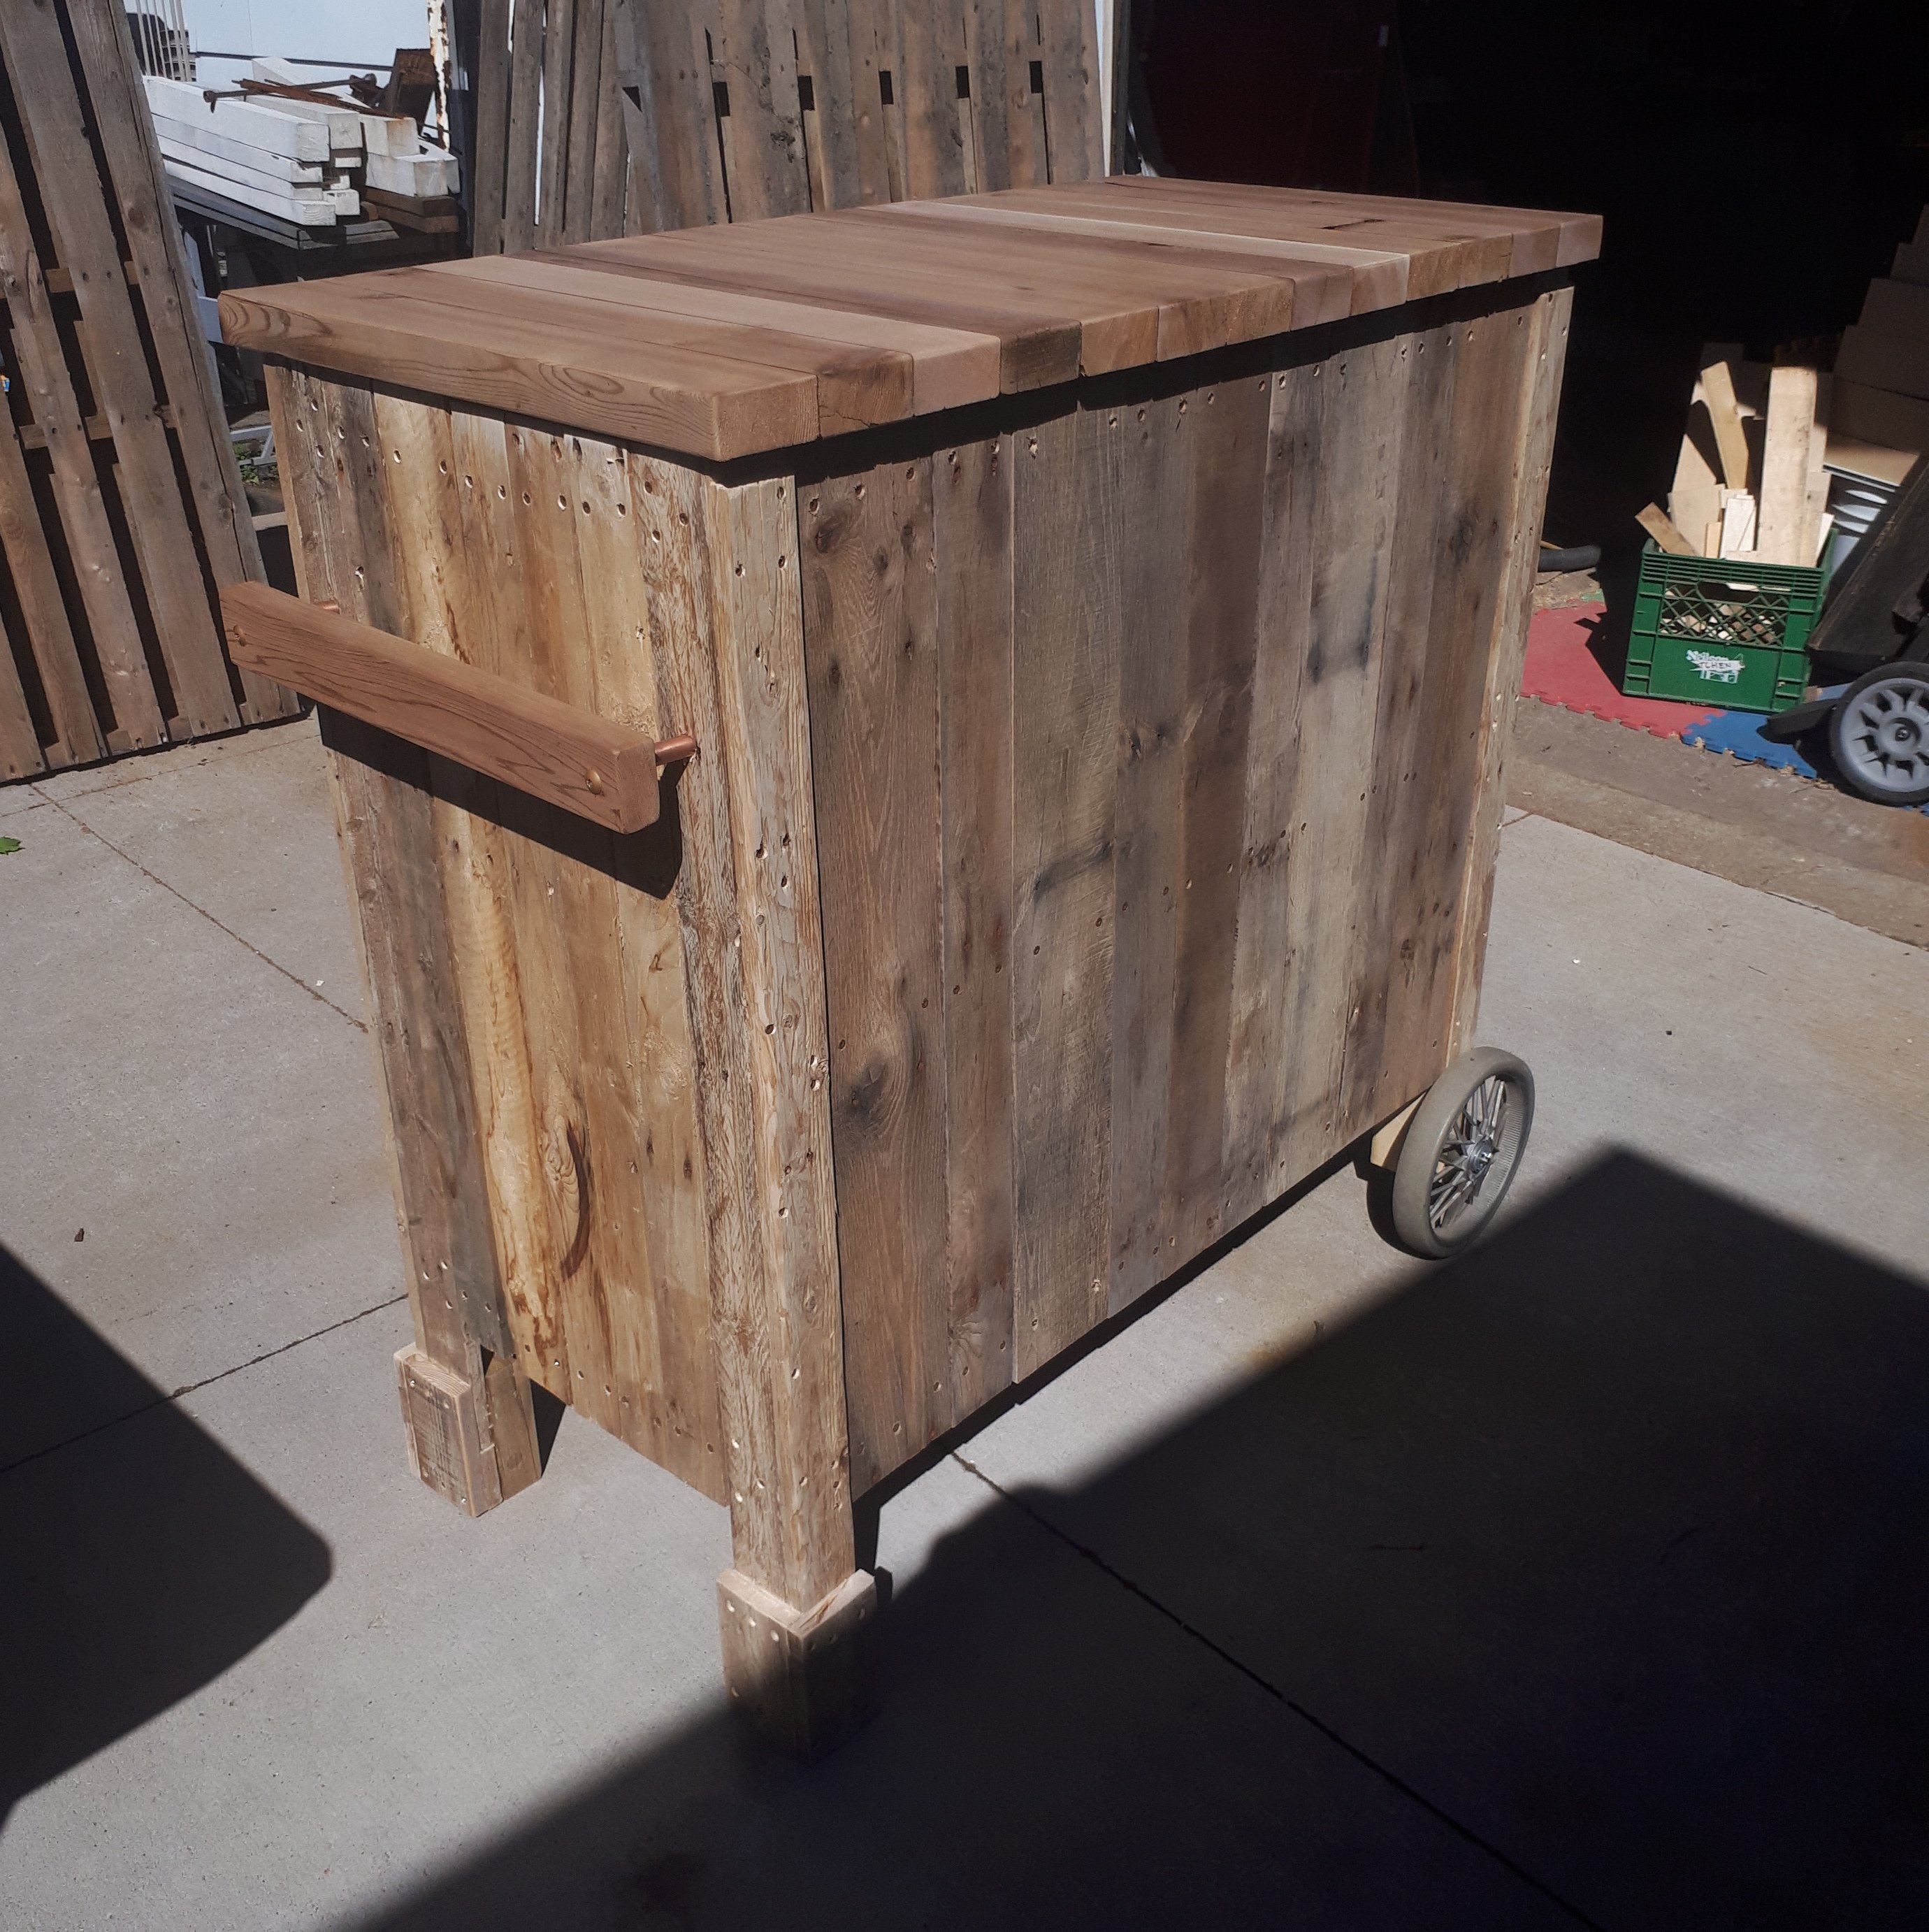
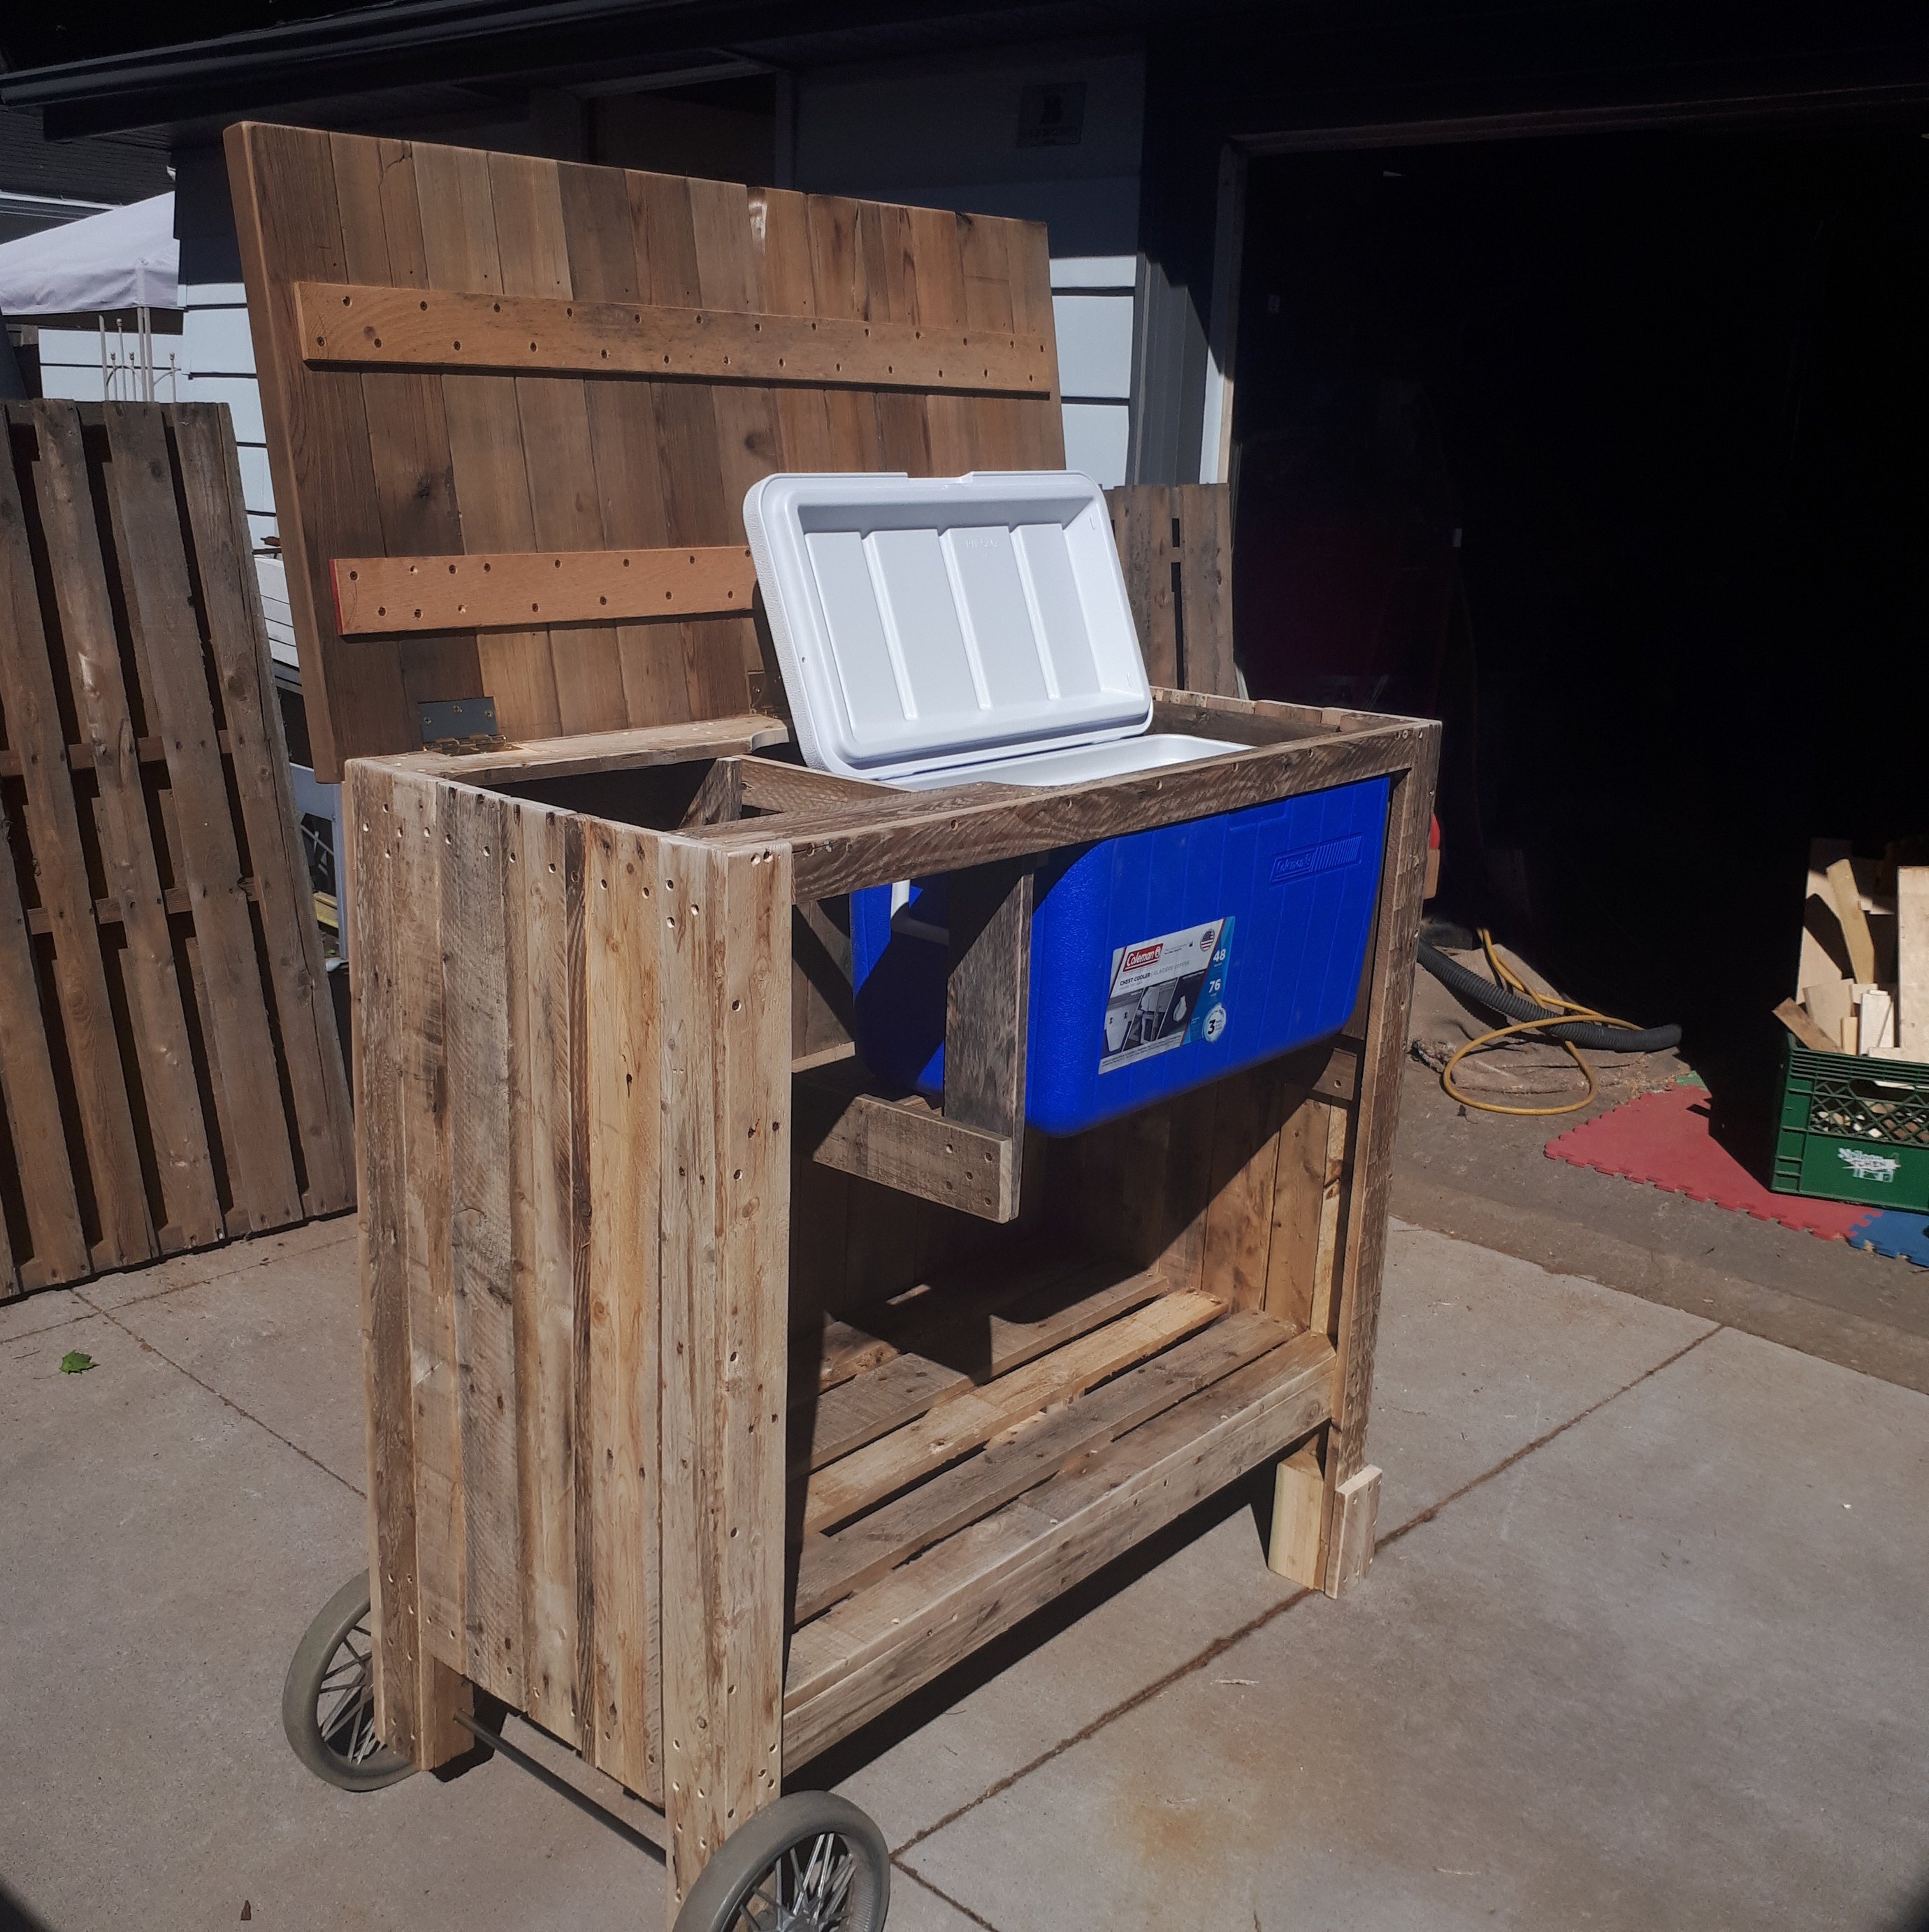
Once I drop that lower shelf they will be able put 2 full size kegs under it and a full canister of beer gas. They are pretty stoked. They will be able to drop it out of the unit out of the van and load the kegs and gas up and wheel it over the where they want it. I have to do the burn on the logo on the front tp but I think I like the stand off on the front for the logo. This was a fun and challenging build. I used 3 4" square corner hinges to attach the top. That way they ill it with ice easily.
1 Like
Thats a nice build there… Do you machine you 1X’s and 2X’s? It seems now that I have a planer, everything goes through it before use… Sneezles61
1 Like
how did you burn the logo? Freestyle or with a template or resist?
The cedar I resaw 4 X 4 in half as close as I could. Then ran the cut side through the planer to smooth them out. After I attached them to the cross members I sanded the top to 180 grit. Put 2 coats of teak oil on it. The rest of the material is from the slats as they come off the skids. All I do is sand them to take splinters off and leave the swirl marks from the original saw. For the burning I send the logos to a printer and get them to flip them in their software for me then print them to the size I need for the job. These are printed out with a laser printer and I use a pyrography tool to transfer the logo onto the wood then use the same tooling with different heads to burn it in. I use Wen electric soldering irons available from Lowes. I had to do a bit of thinking for this one. The logo is just transferred right now. It was a fun build that had me tackle a few thing I hadn’t thought about. Like the hinges having to be set in from the edge of the top.
1 Like
Ah, then had to make room for the hinges’ barrel on the lid… I just plain old like your crafty-ness… Sneezles61