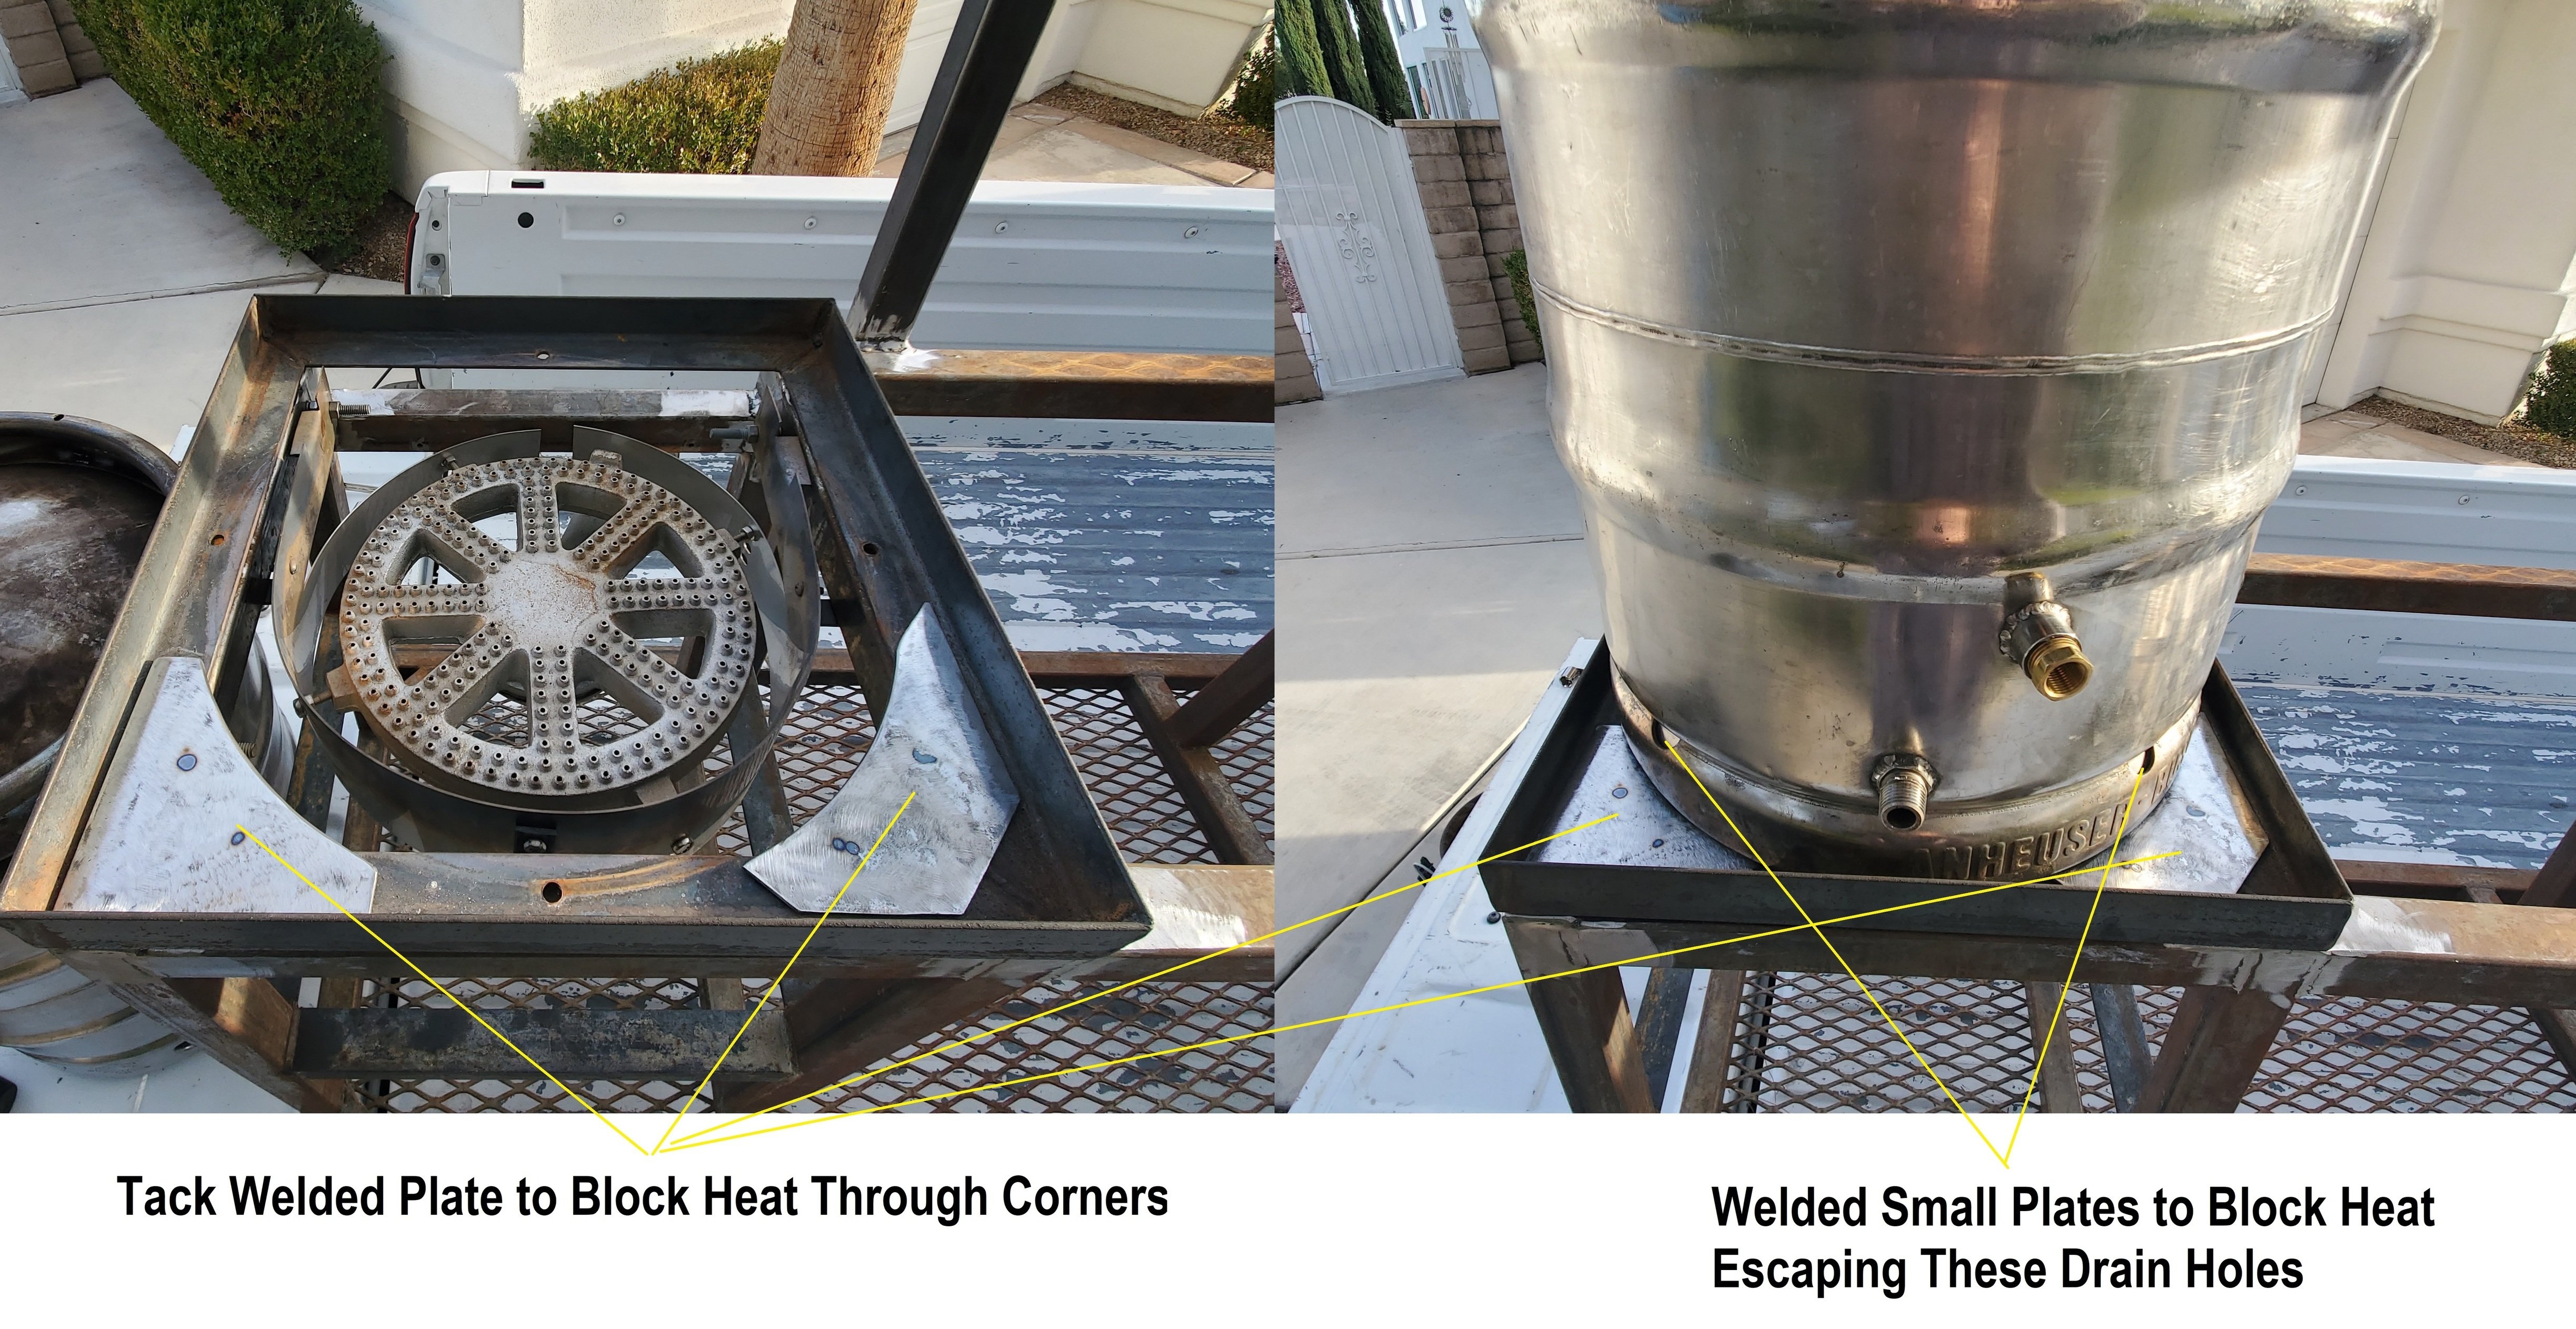
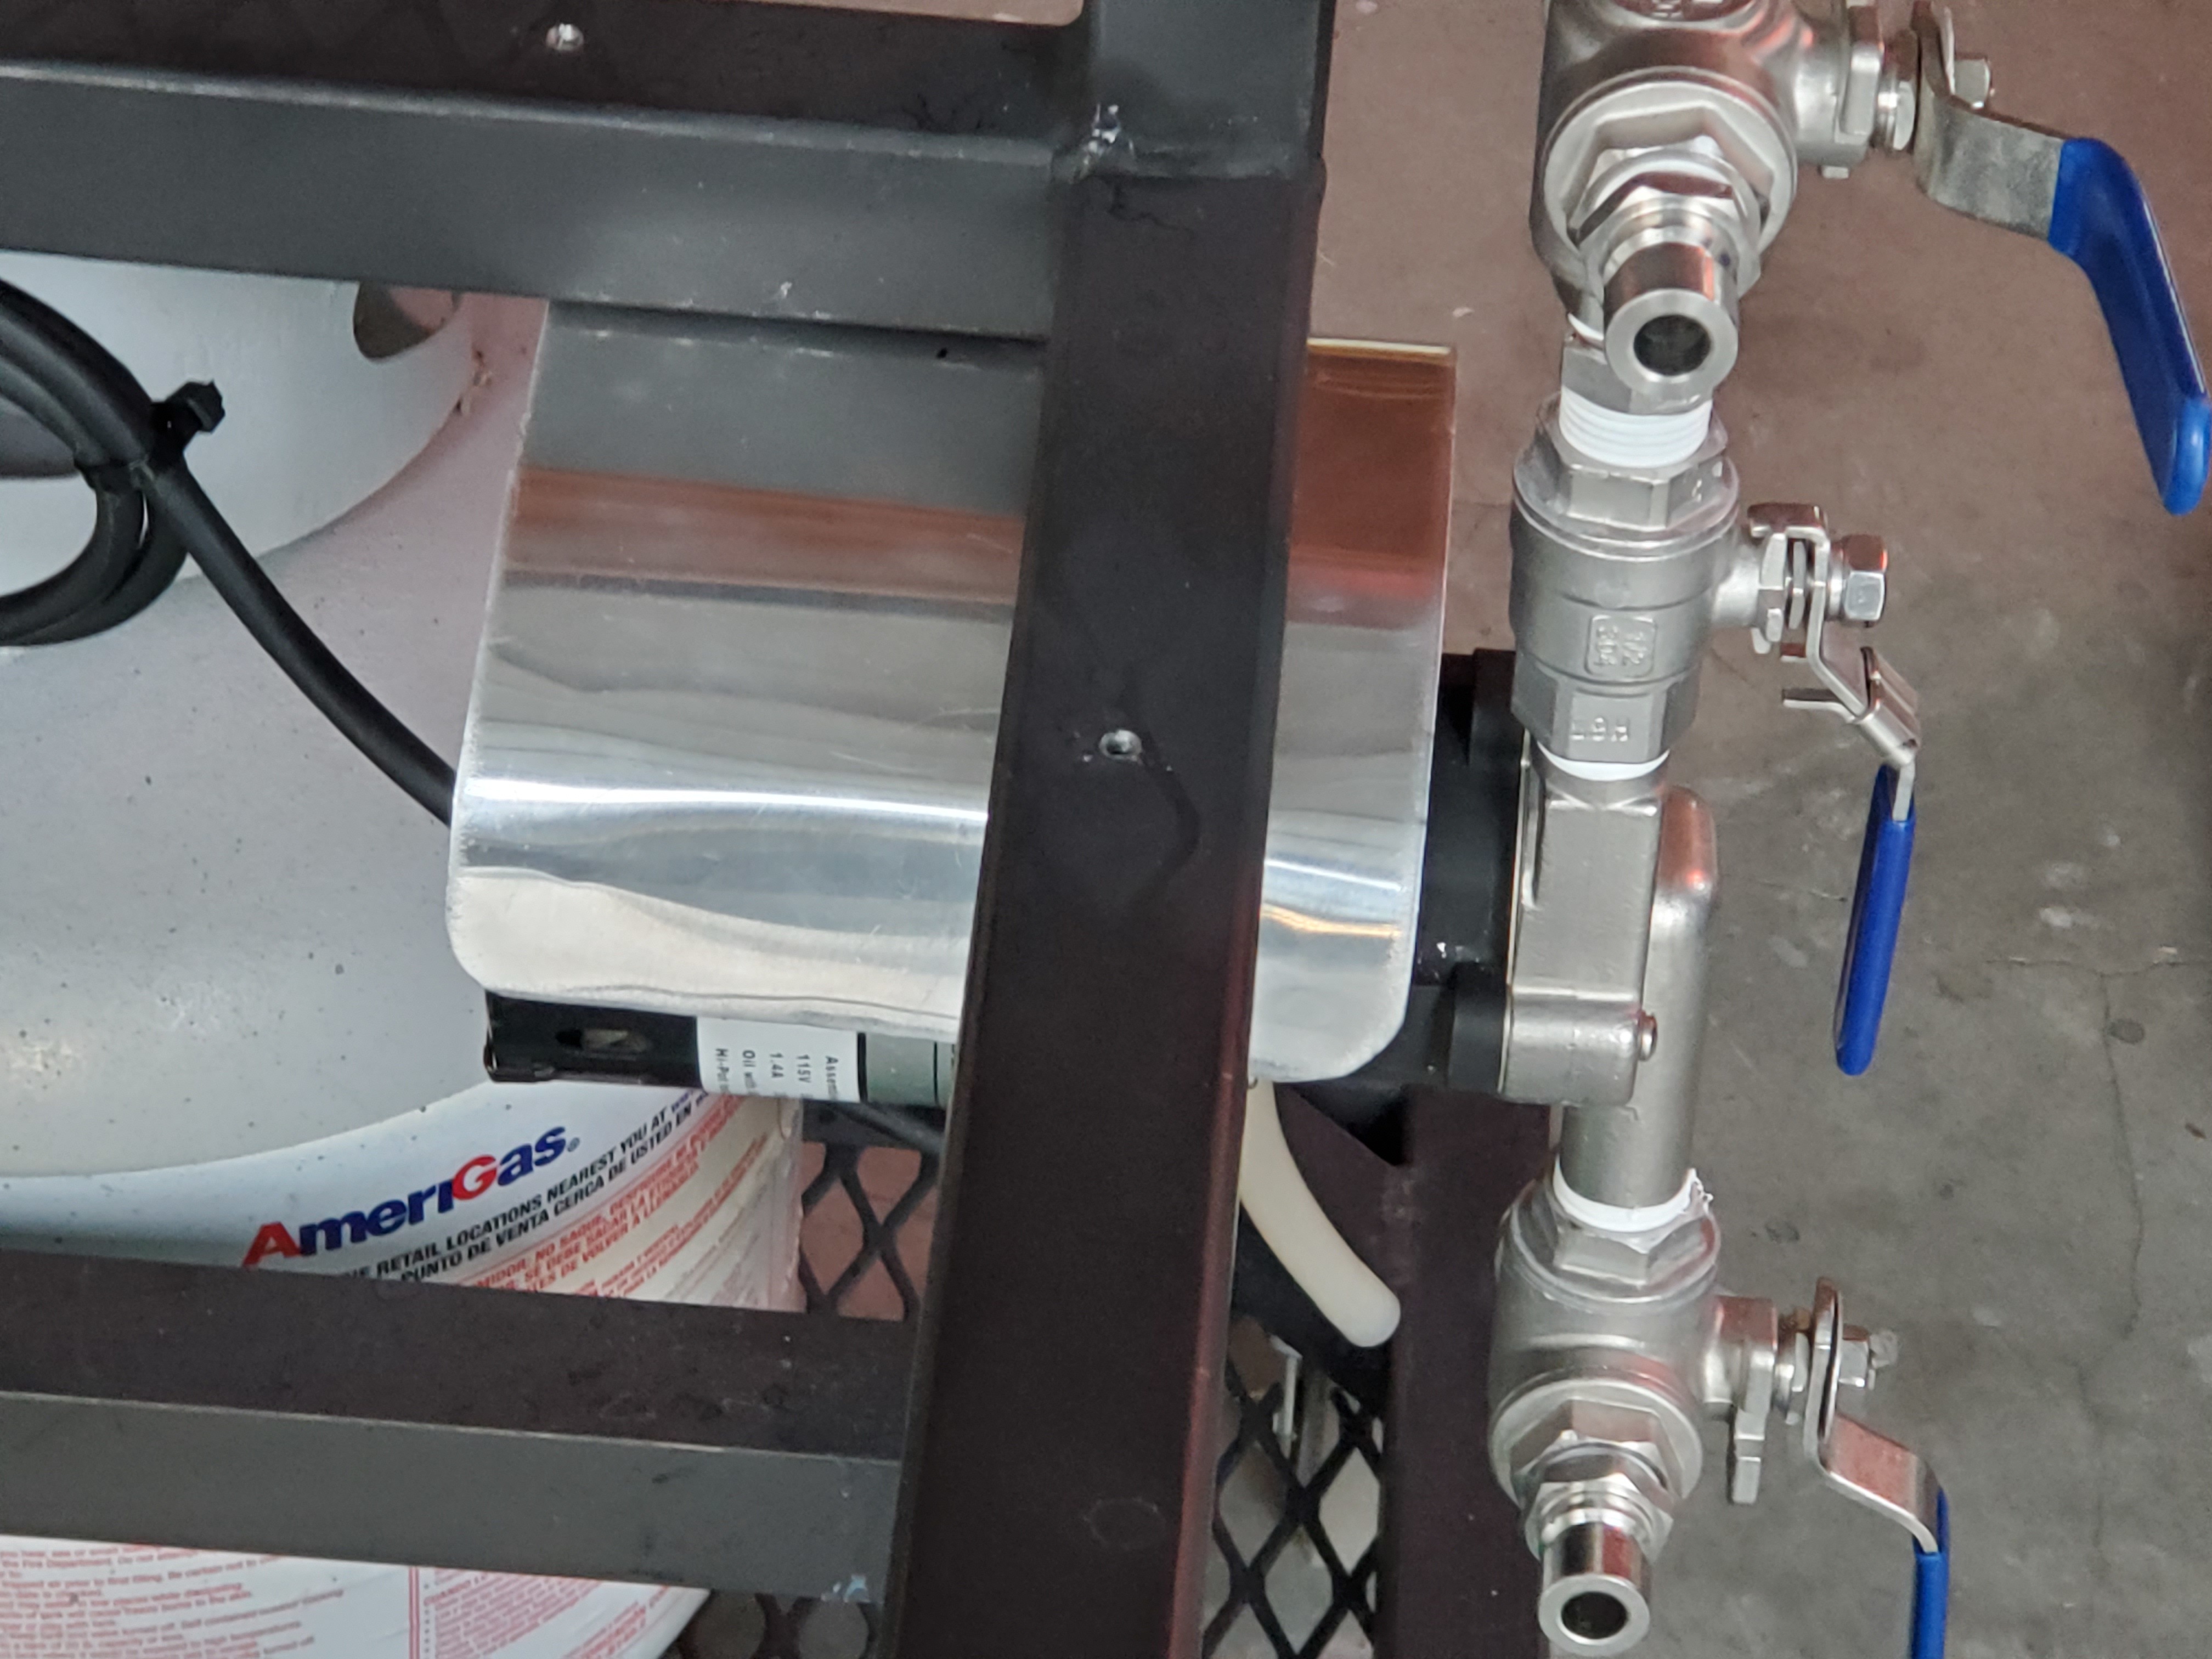
I finally fired up the unfinished system and did an extract beer. The modifications I made to the burner, and the Keggle, made a ton of difference in blocking the heat that washed up on the front side of the Keggle, heating up the drain valve handle and thermometer mounted on the front side. These turned out to be excellent improvements. Here is a picture of what I did.
4 Likes
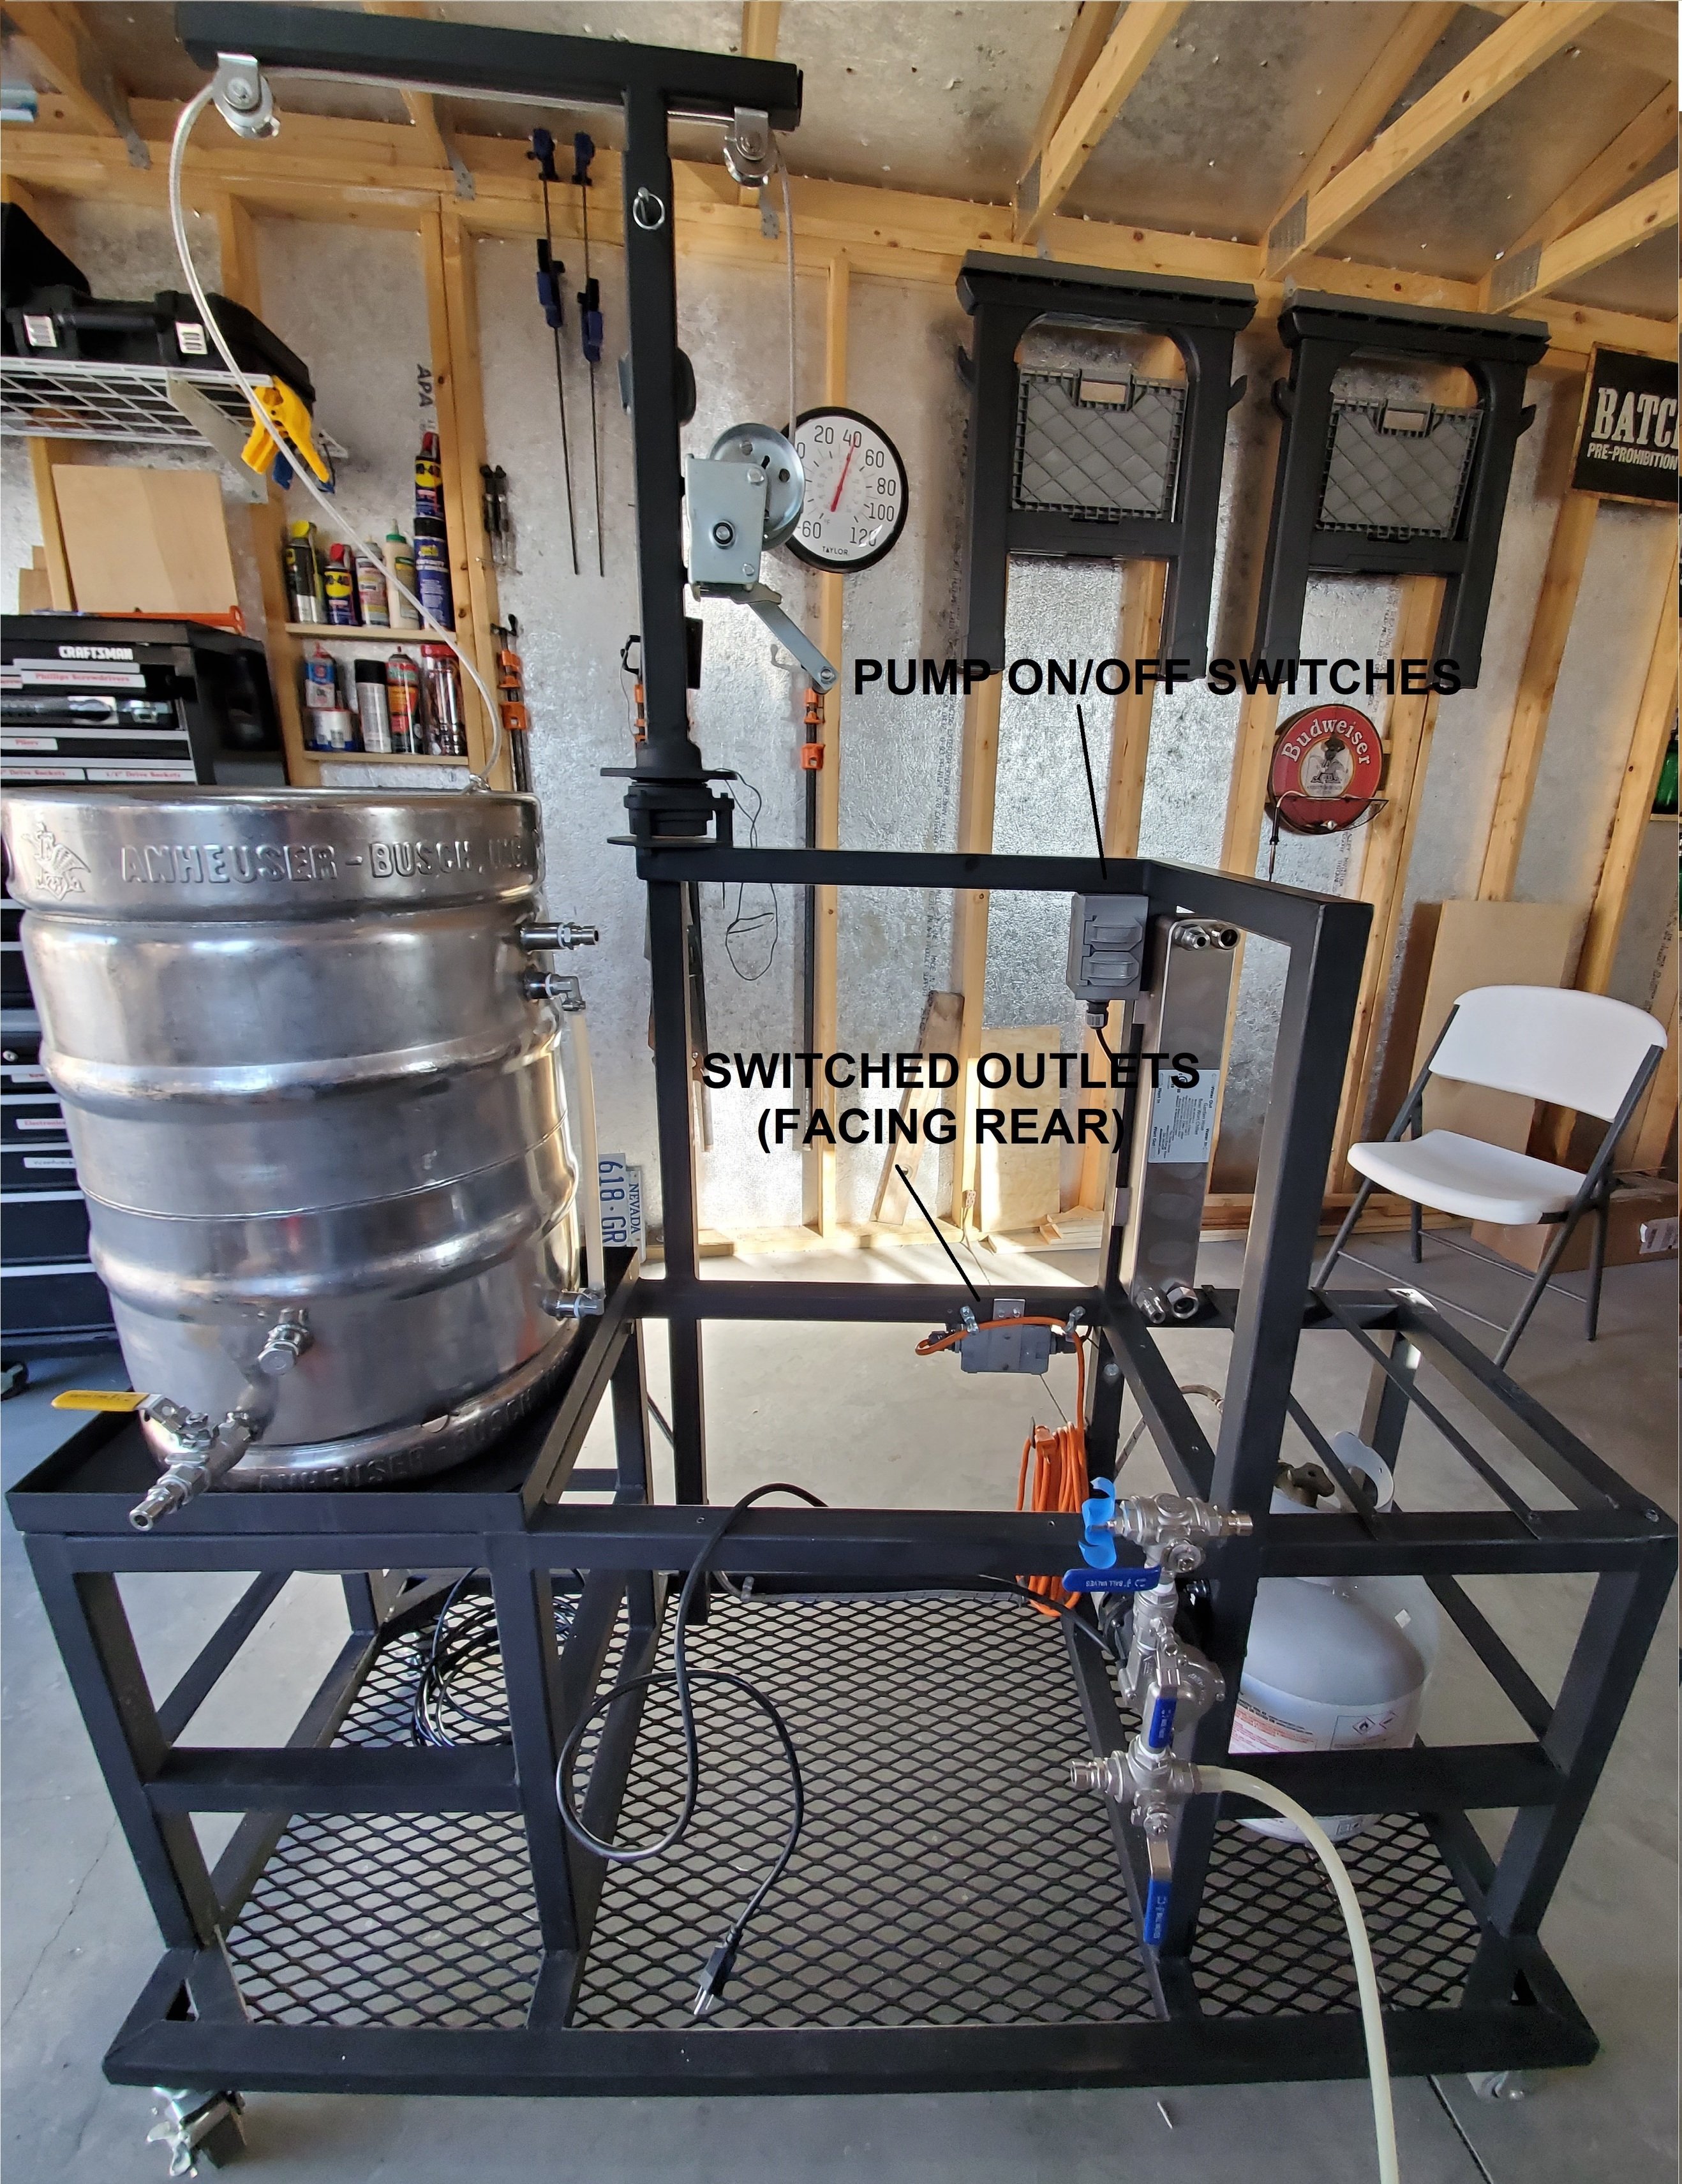
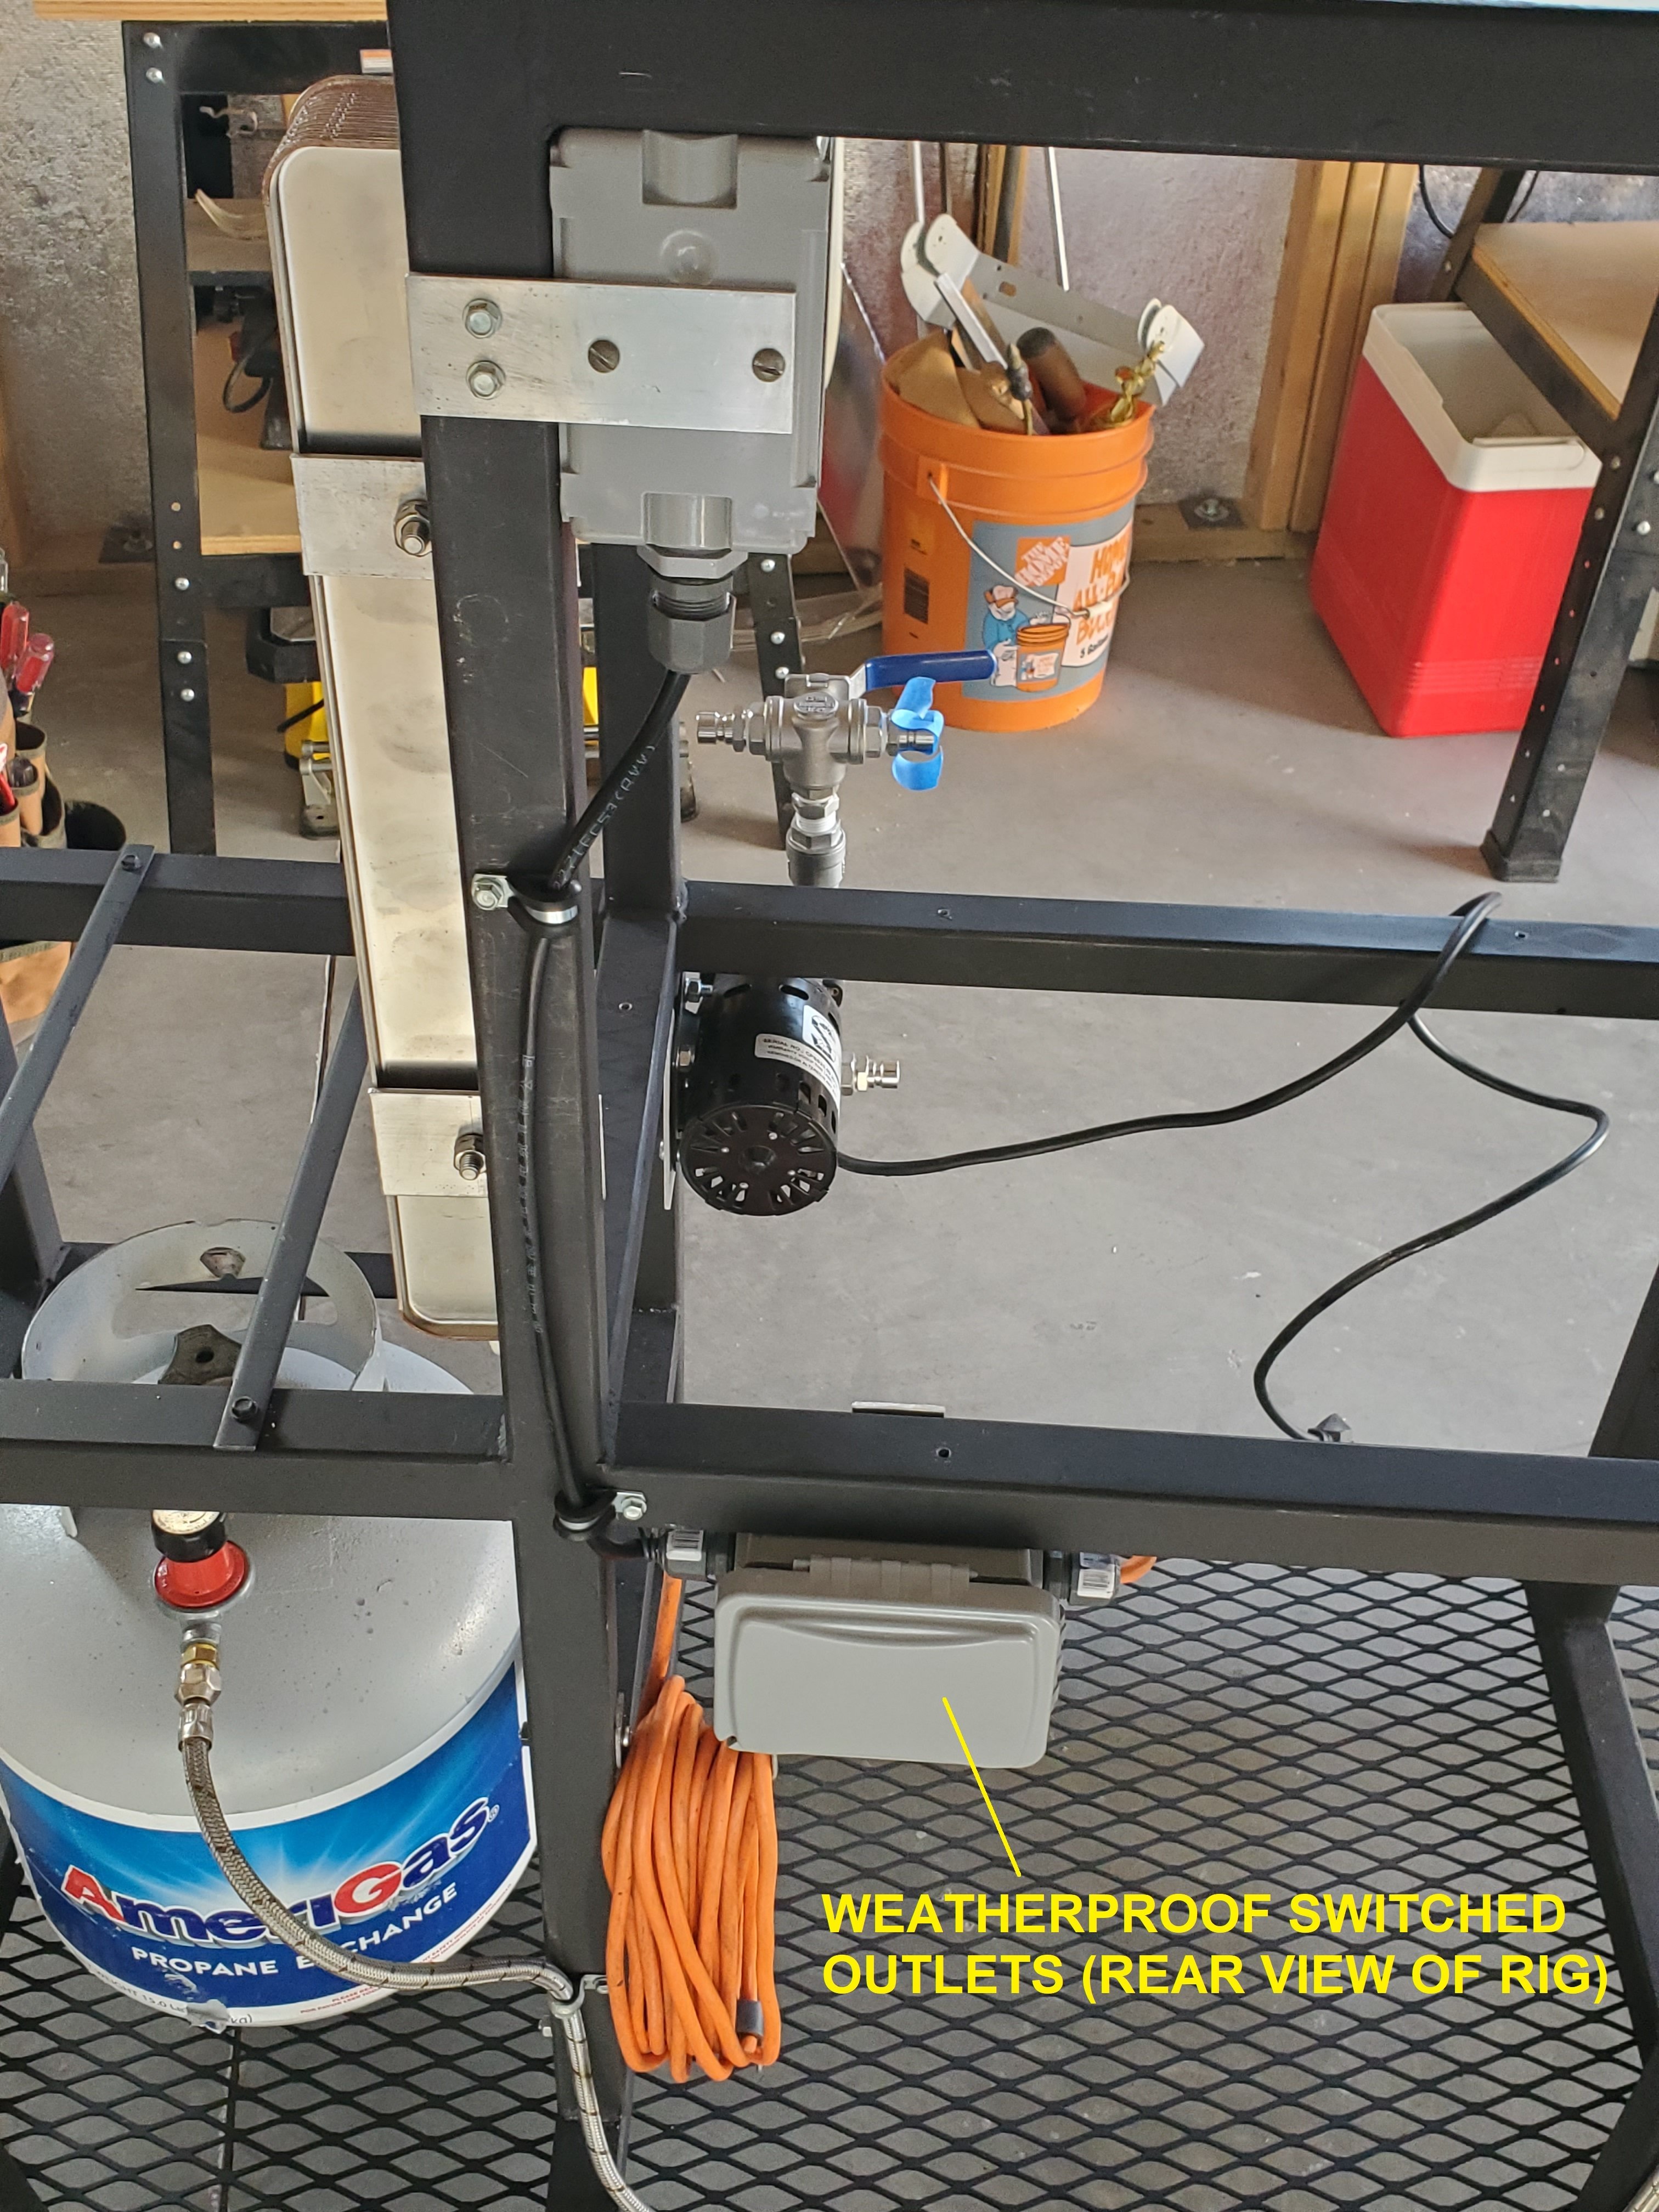
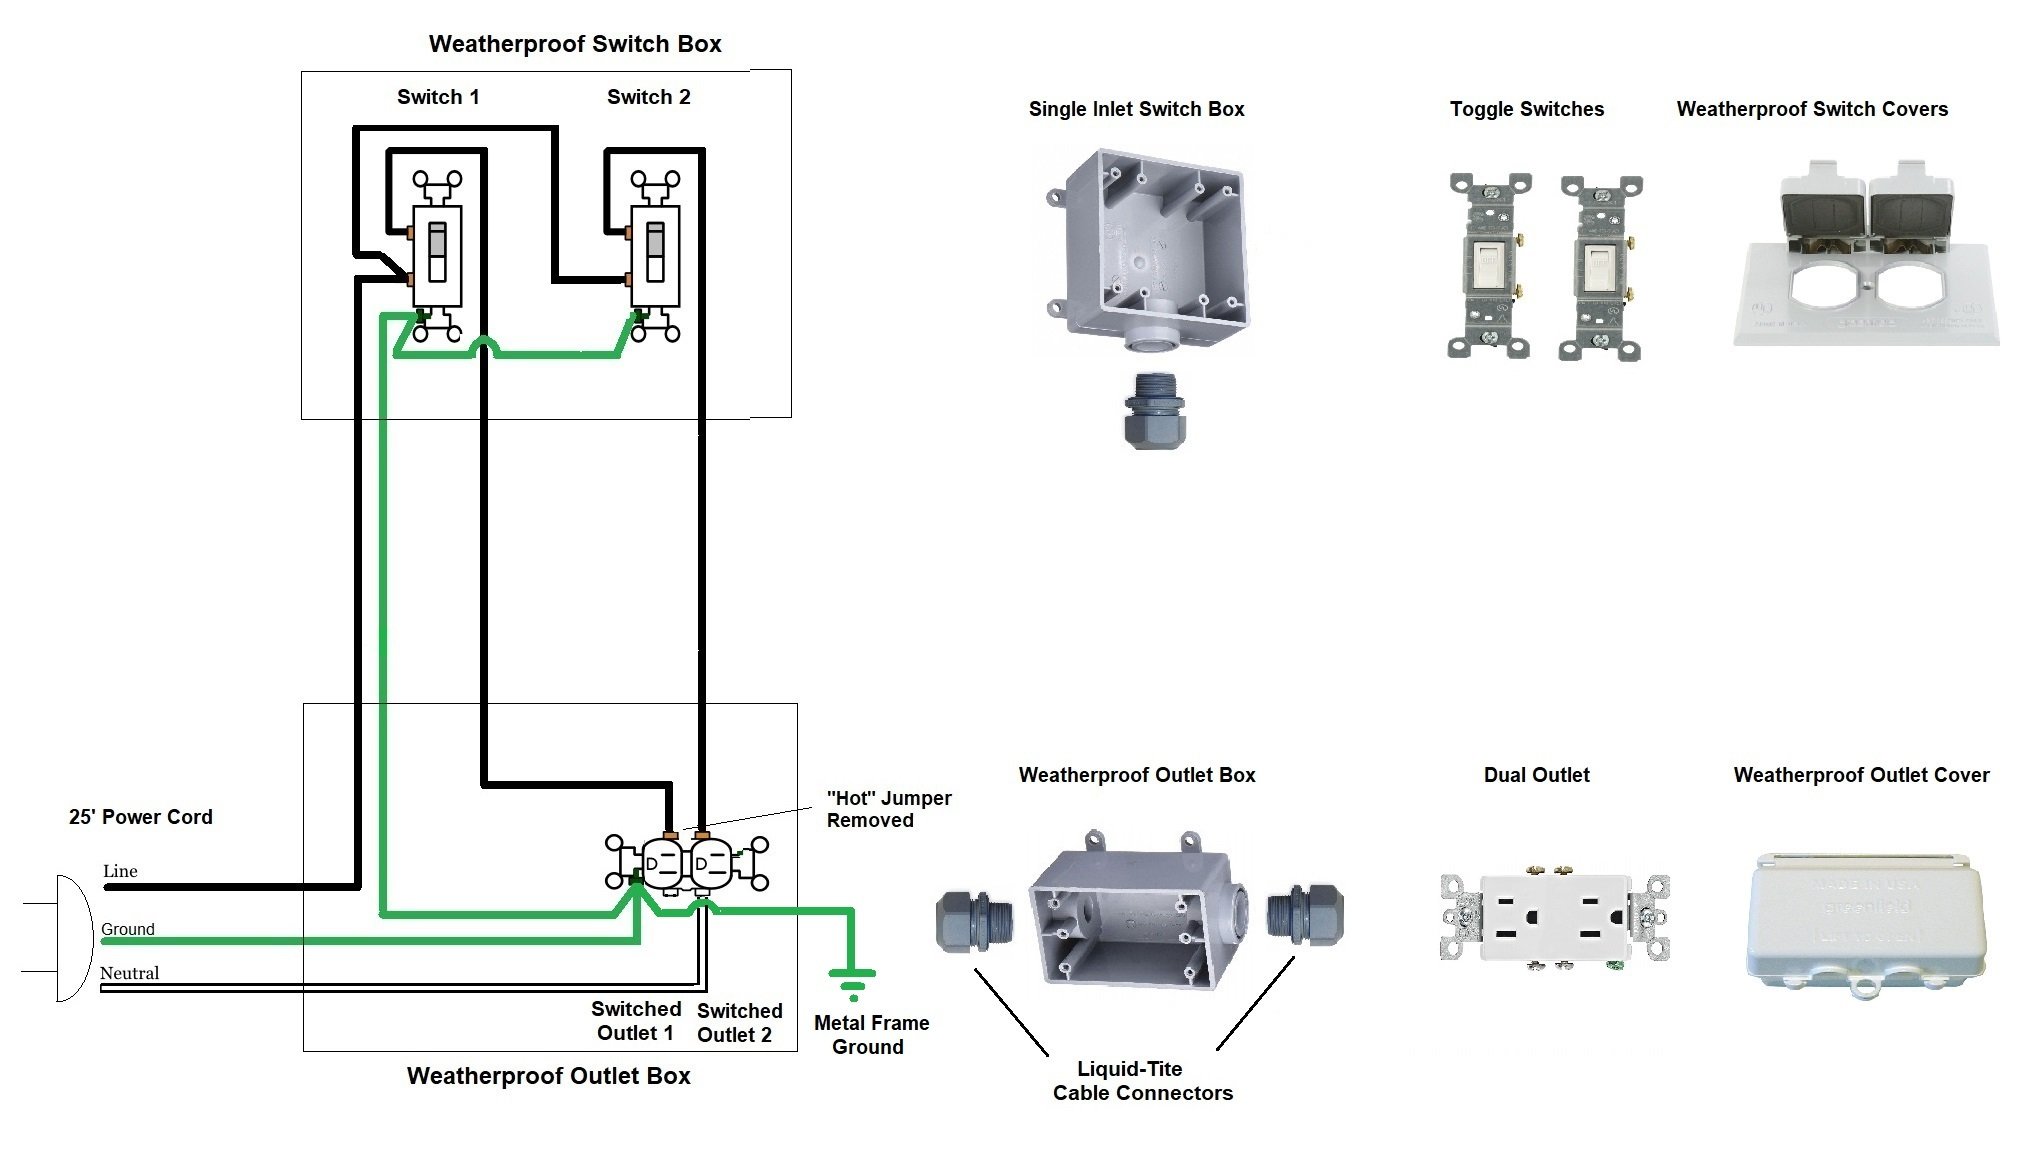
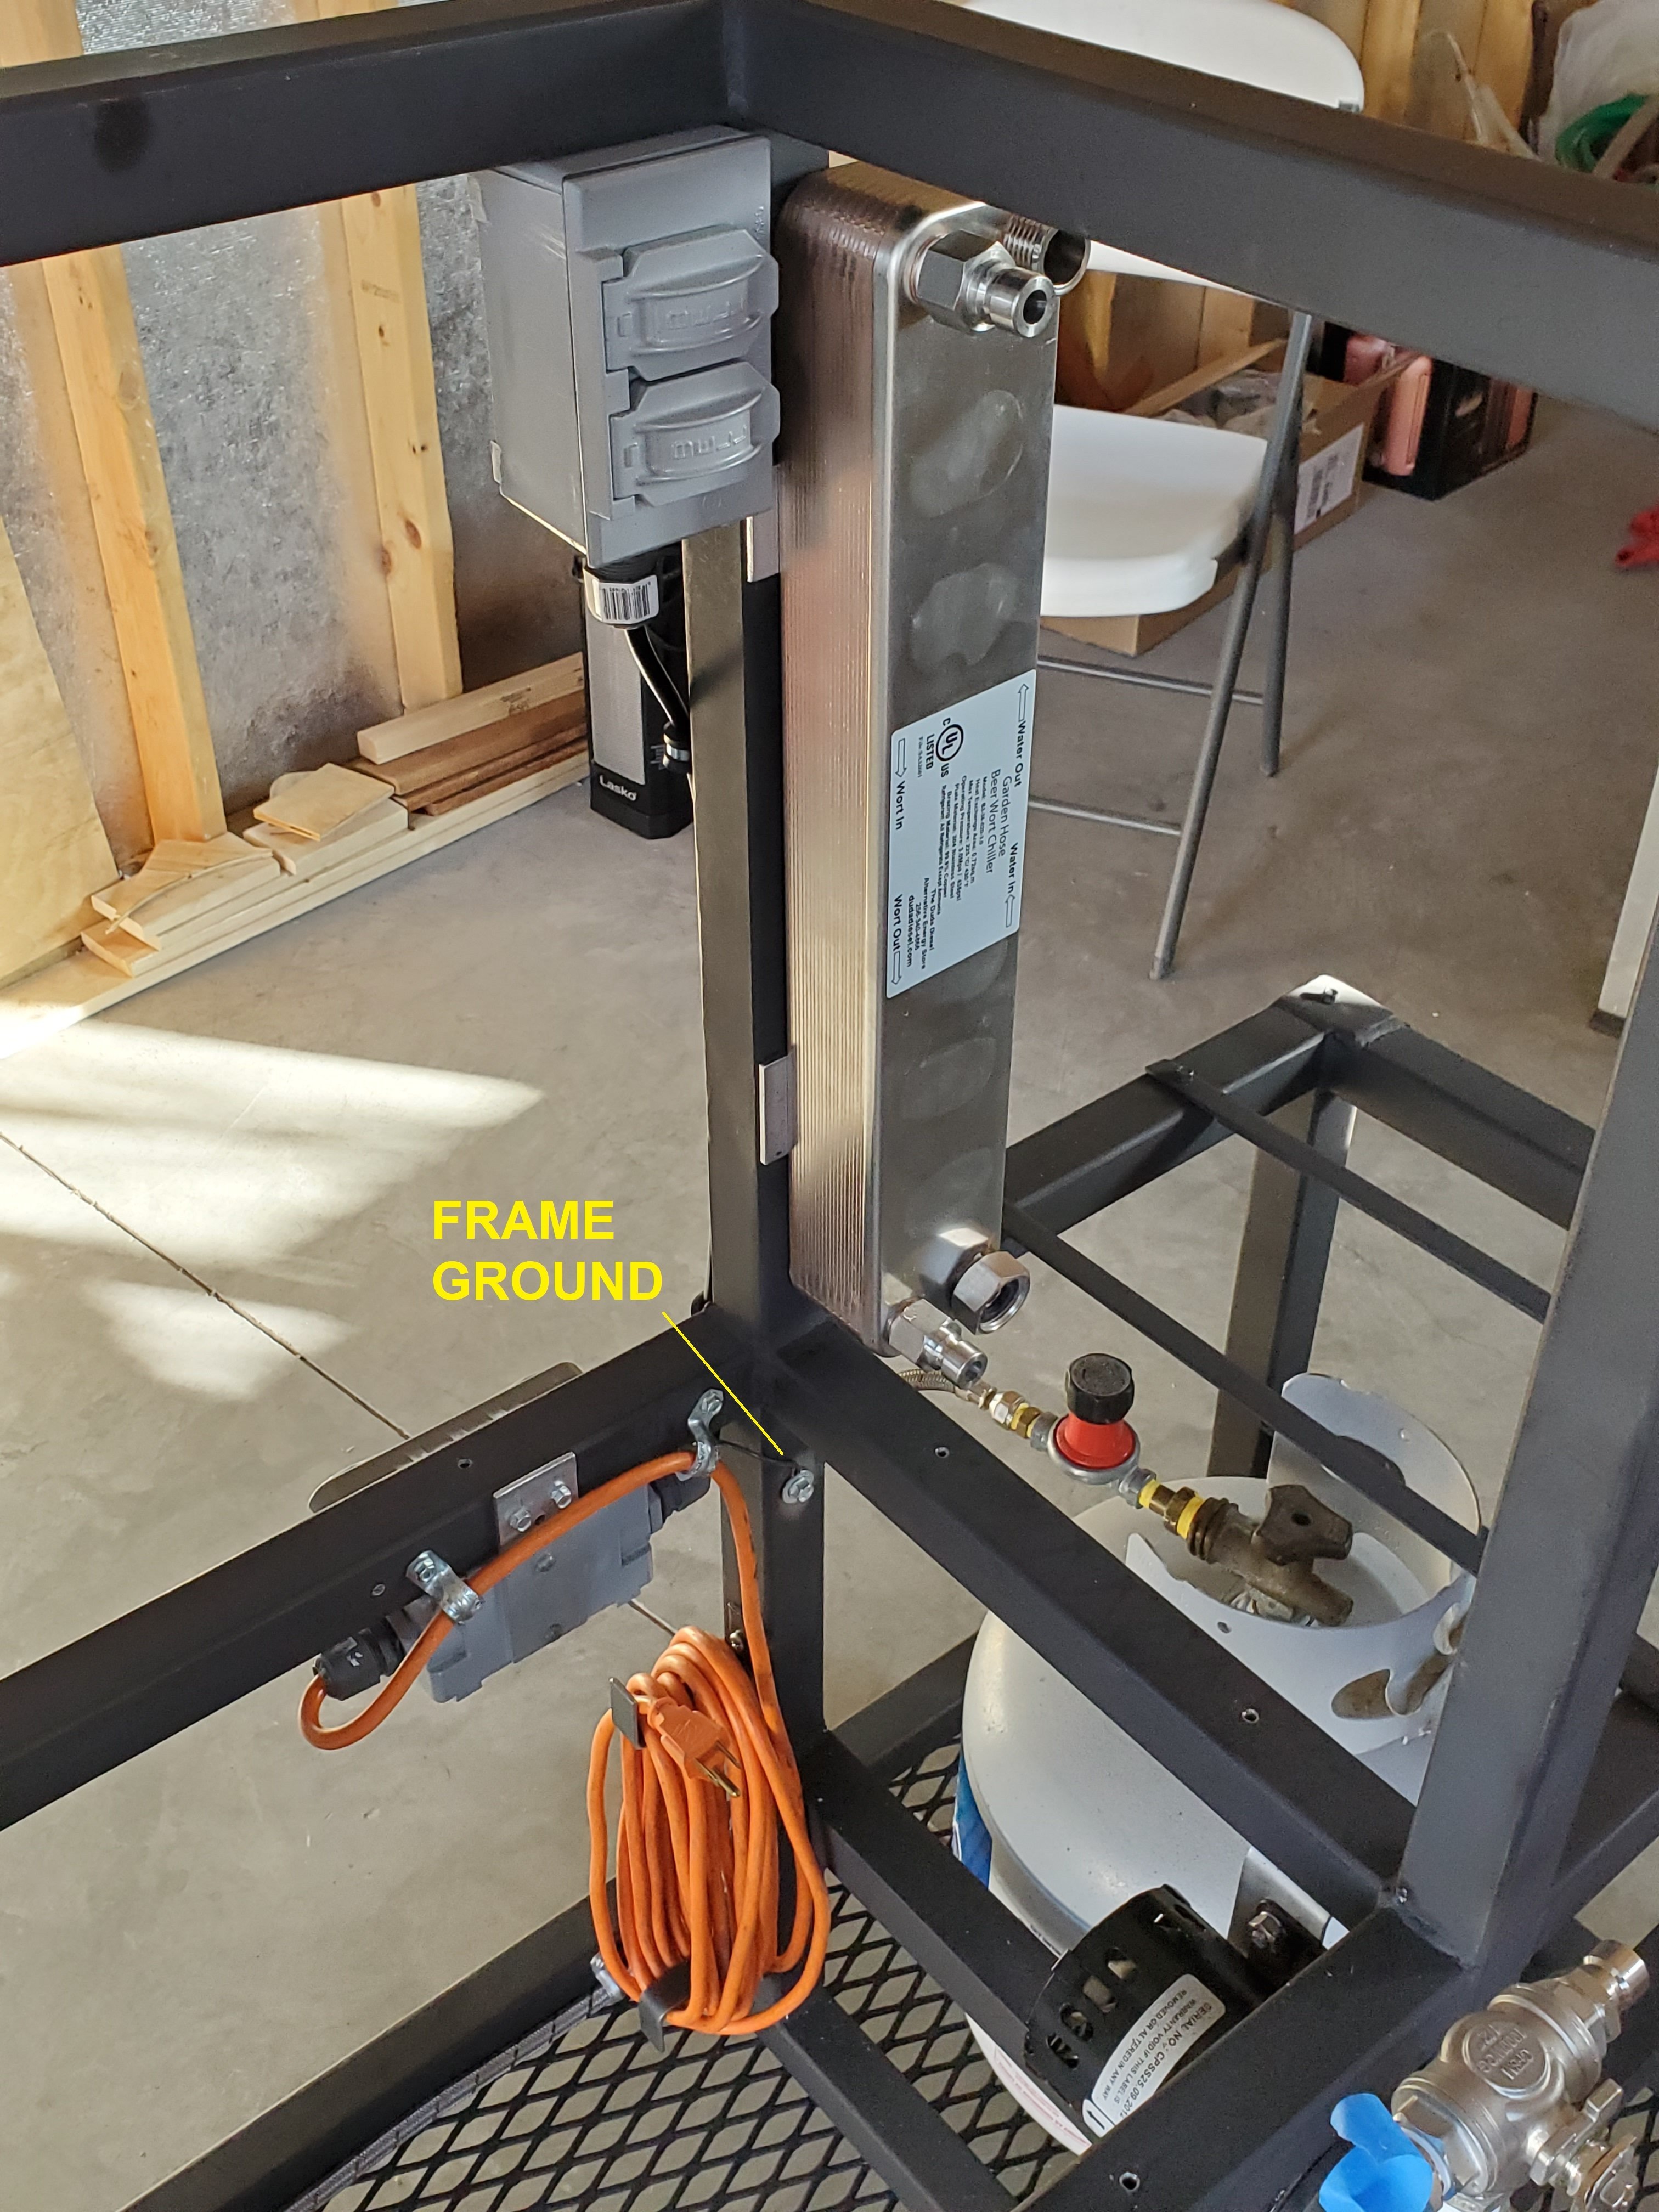
OK I’m gradually making progress getting my new rig built. The pump power control part of my build is done. Works great…I have two “switched” outlets one for the recirculation pump and the other for the chiller pump. (I decided, for now, to control mash temperature using my propane burner, so all I need is control of the recirculation pump).The toggle switches and the outlets are behind weatherproof covers with water tight connections so I can spray the whole rig down with a garden hose if I need to, without power applied of course. I grounded to the frame directly as shown in the picture. The rig power cord is orange, and about 25’ long. I made a couple of brackets from mild steel to wrap the cord on when not in use. I’m trying my best to keep this rig neat and tidy, I’ll be looking at it for a long time. Next I need to add the chiller garden hose somehow so it can be stowed when not in use, and not an eyesore. I might coil it up on a spool of some kind, or coil it in a bucket, dunno yet but it needs to look good and be functional both, that’s just me. I am still waiting on the custom grain basket I ordered.
1 Like
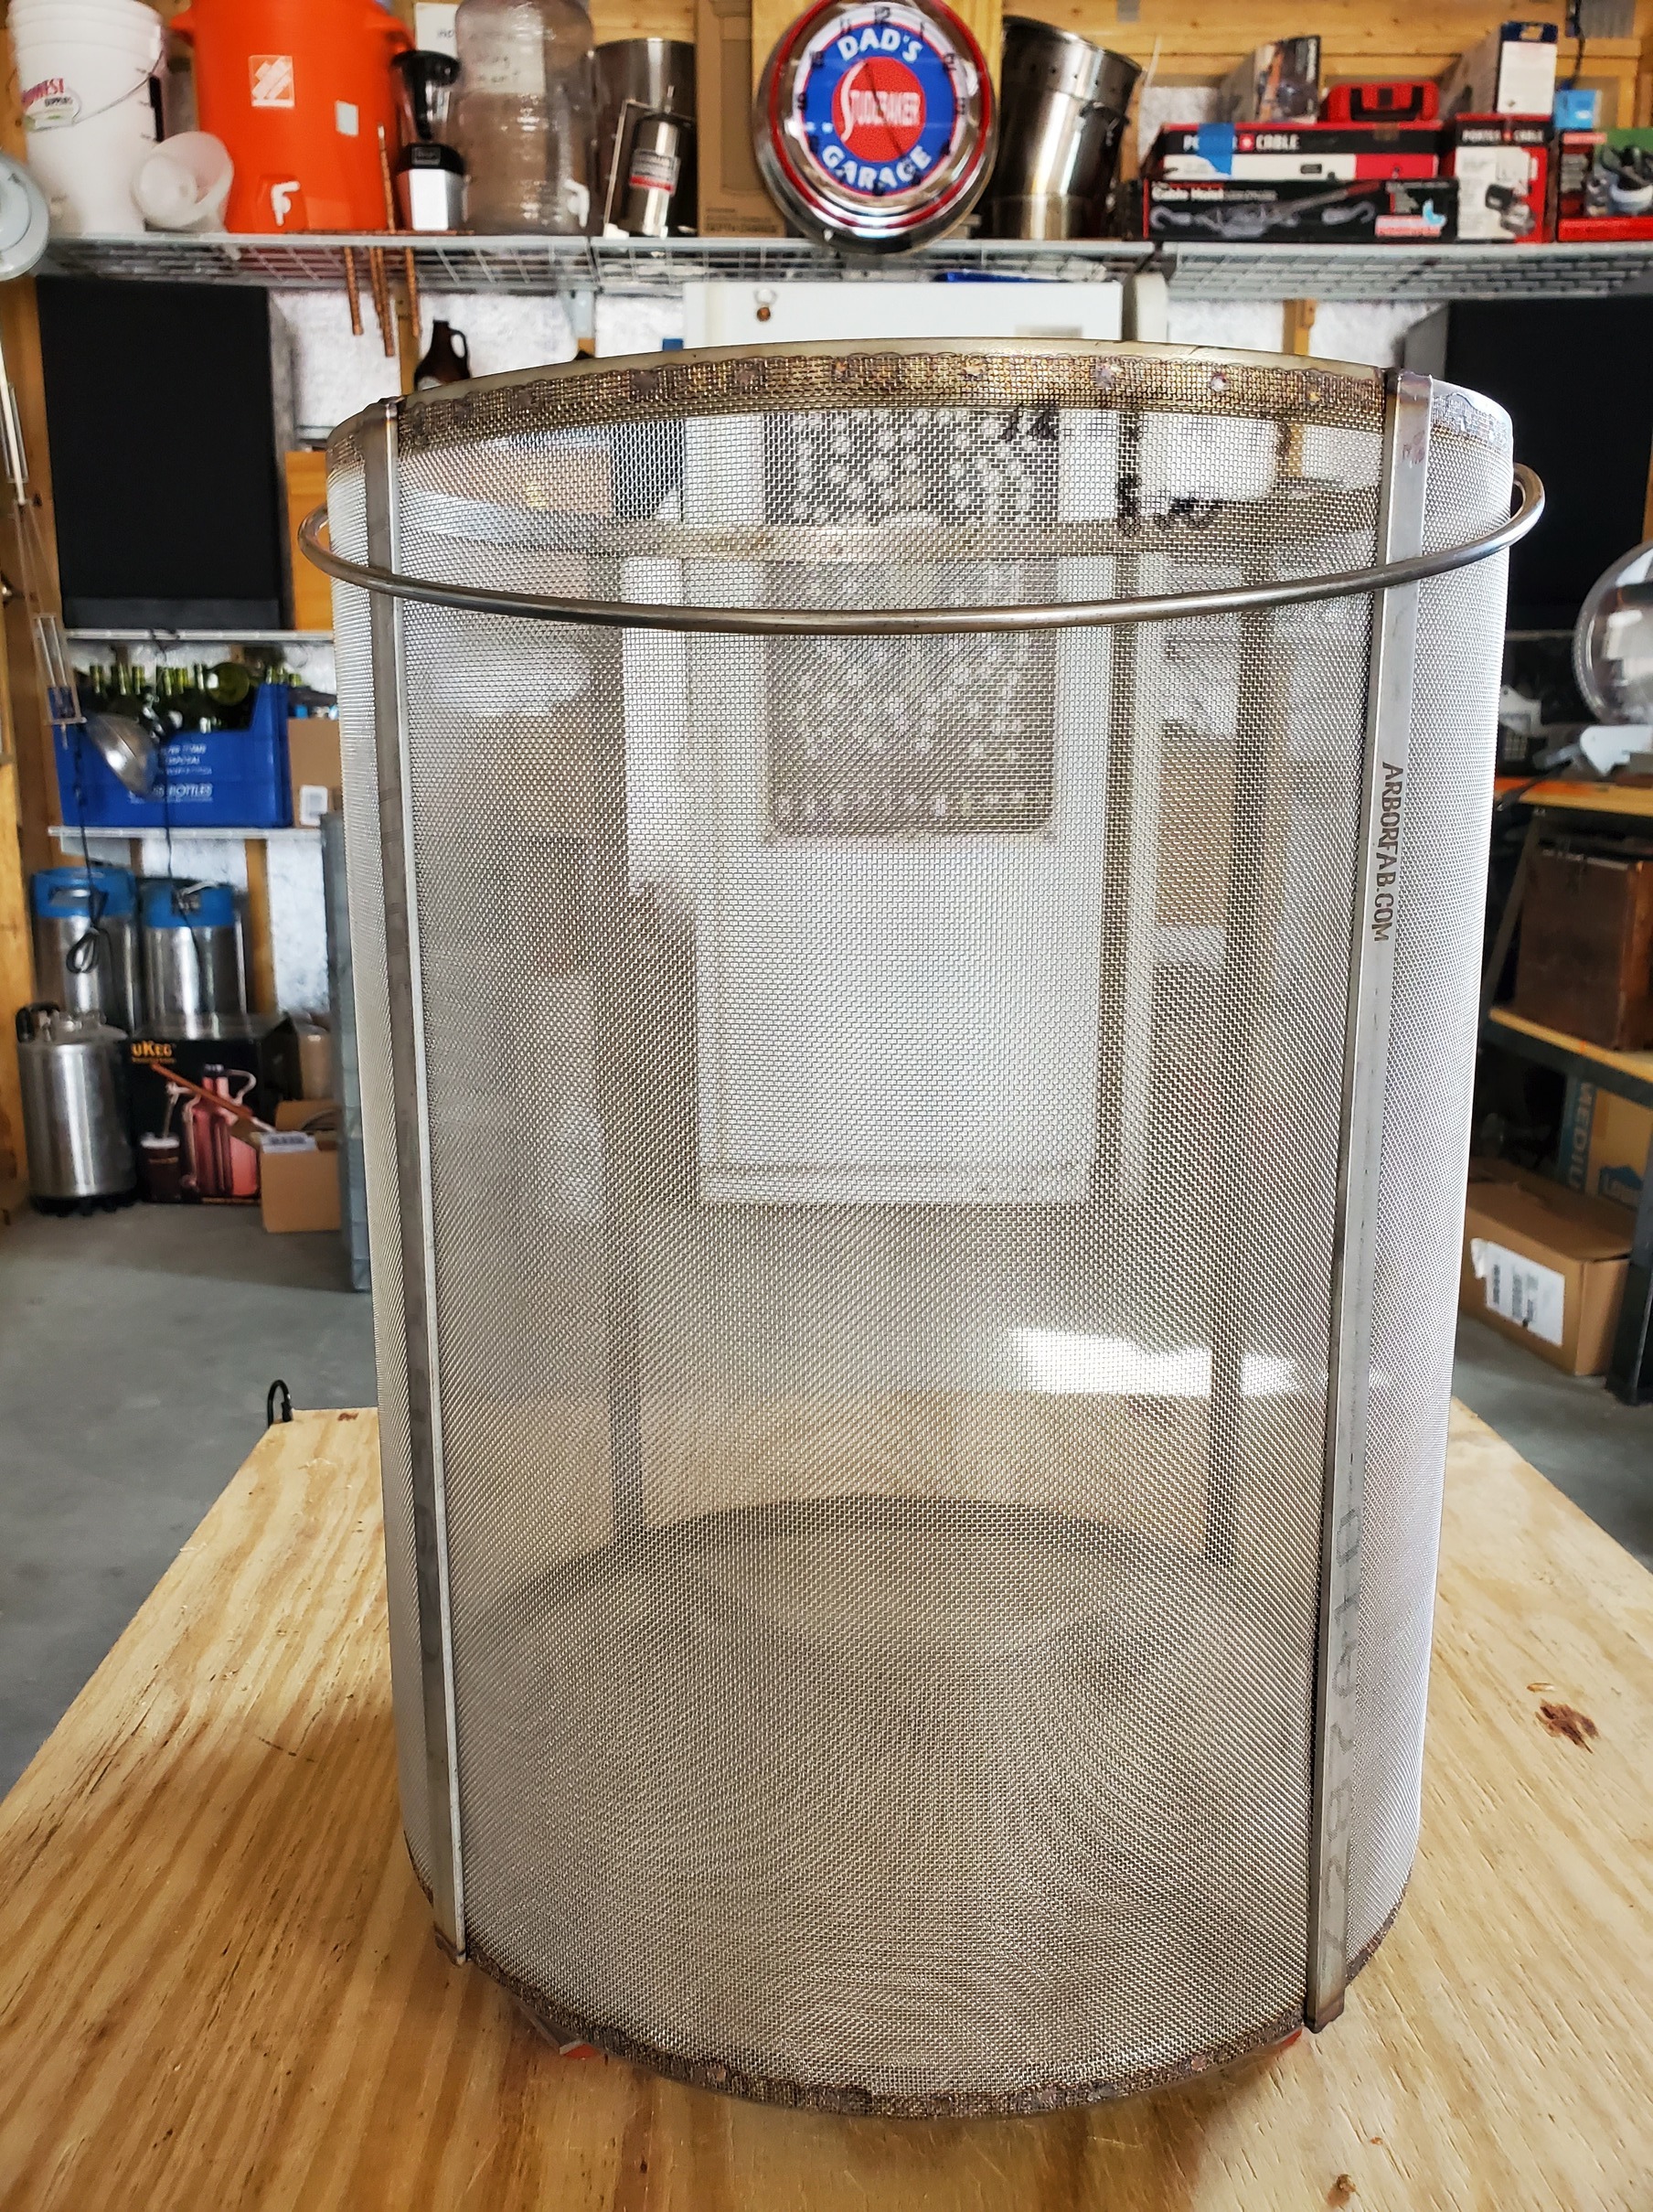
Progress report on my ongoing BIABasket build.
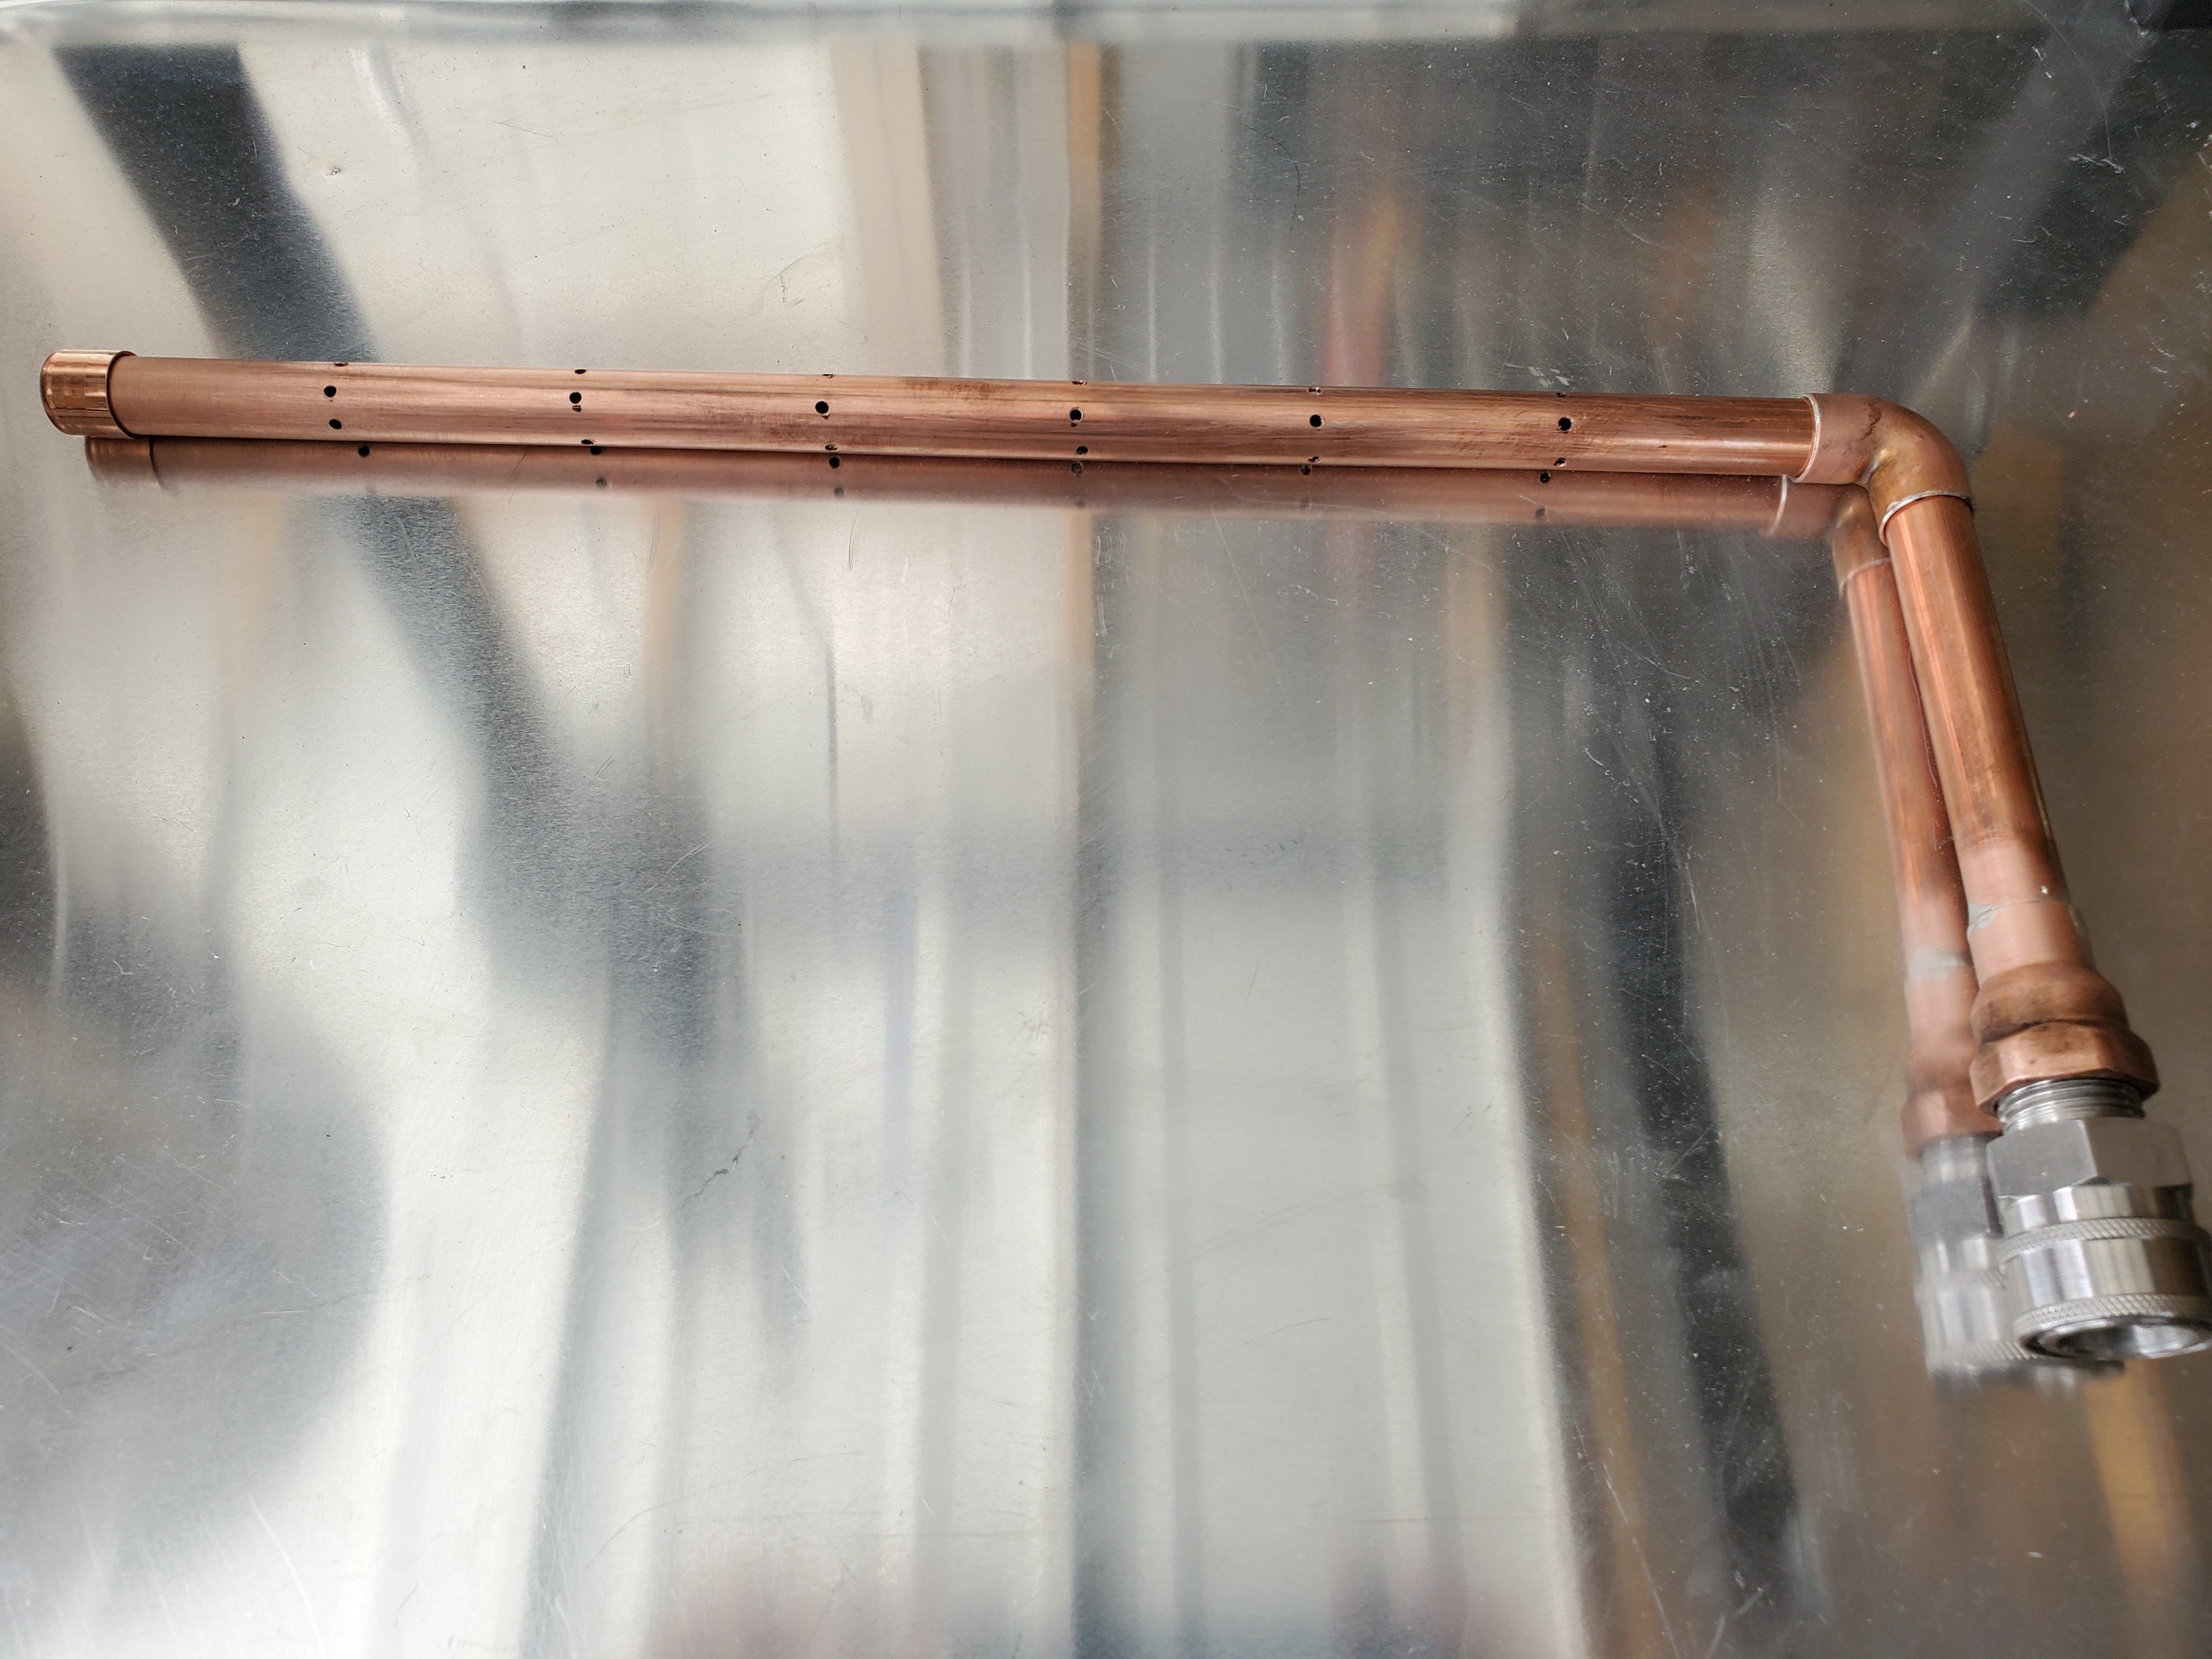
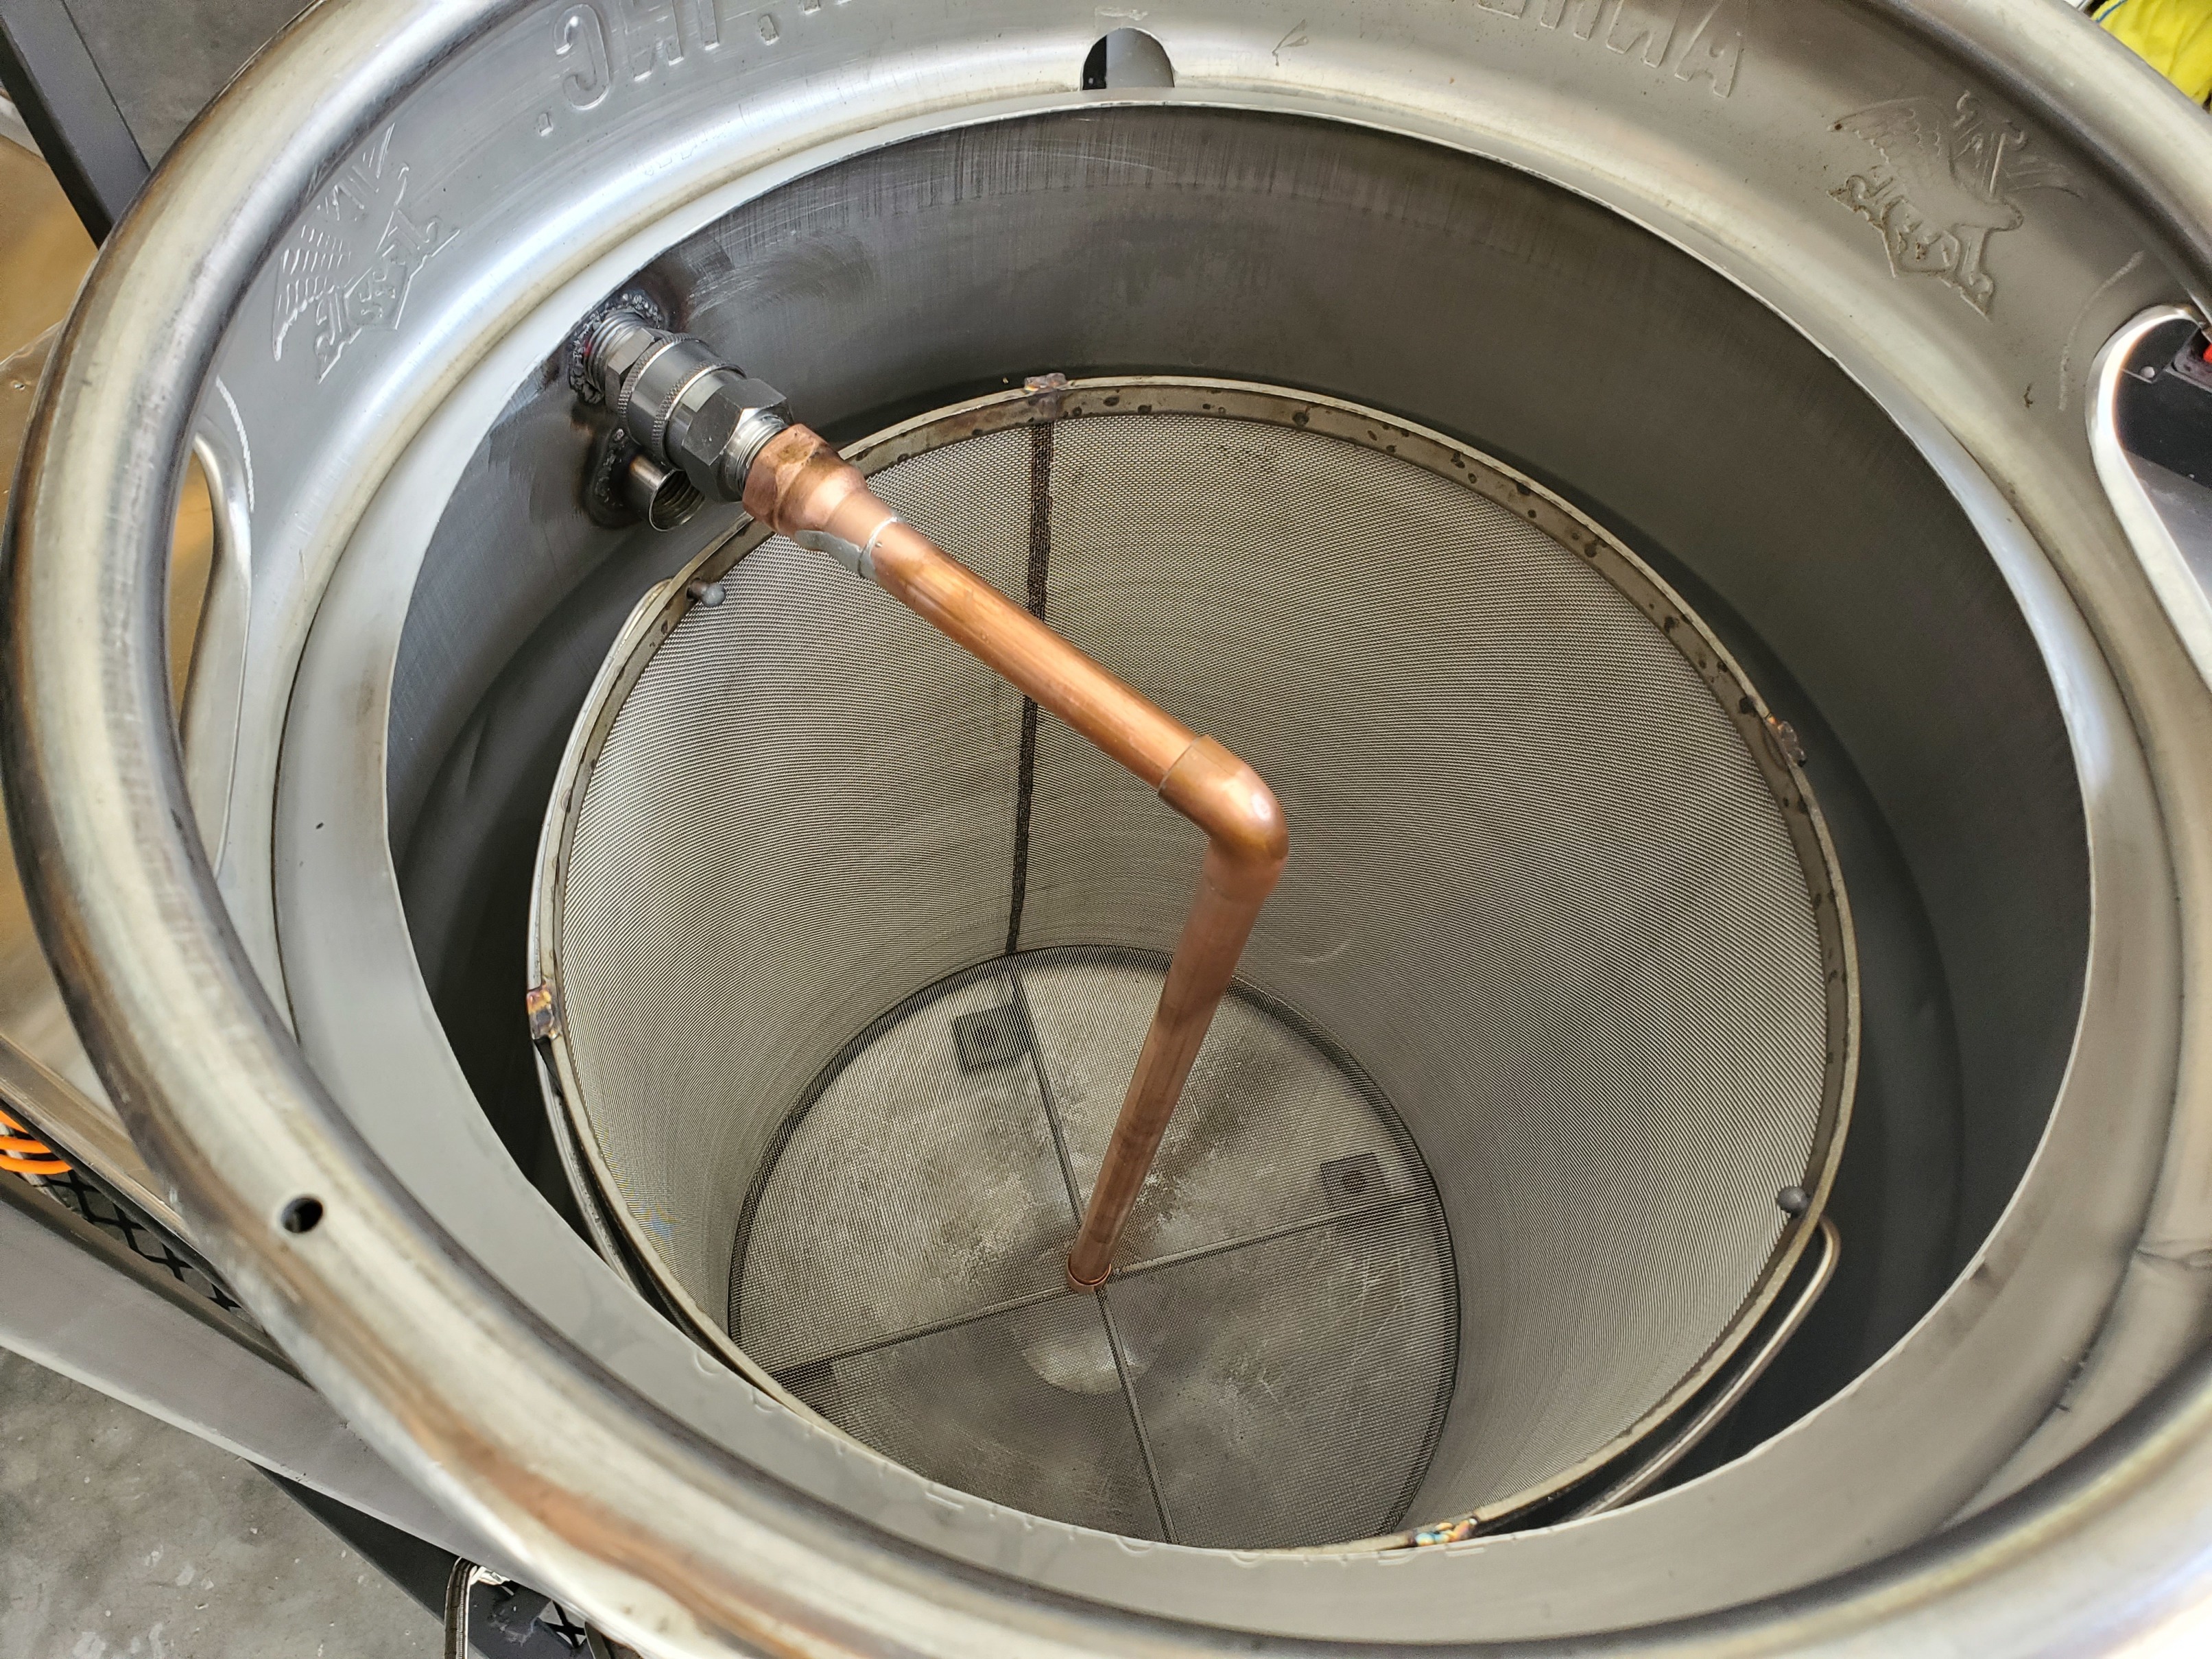
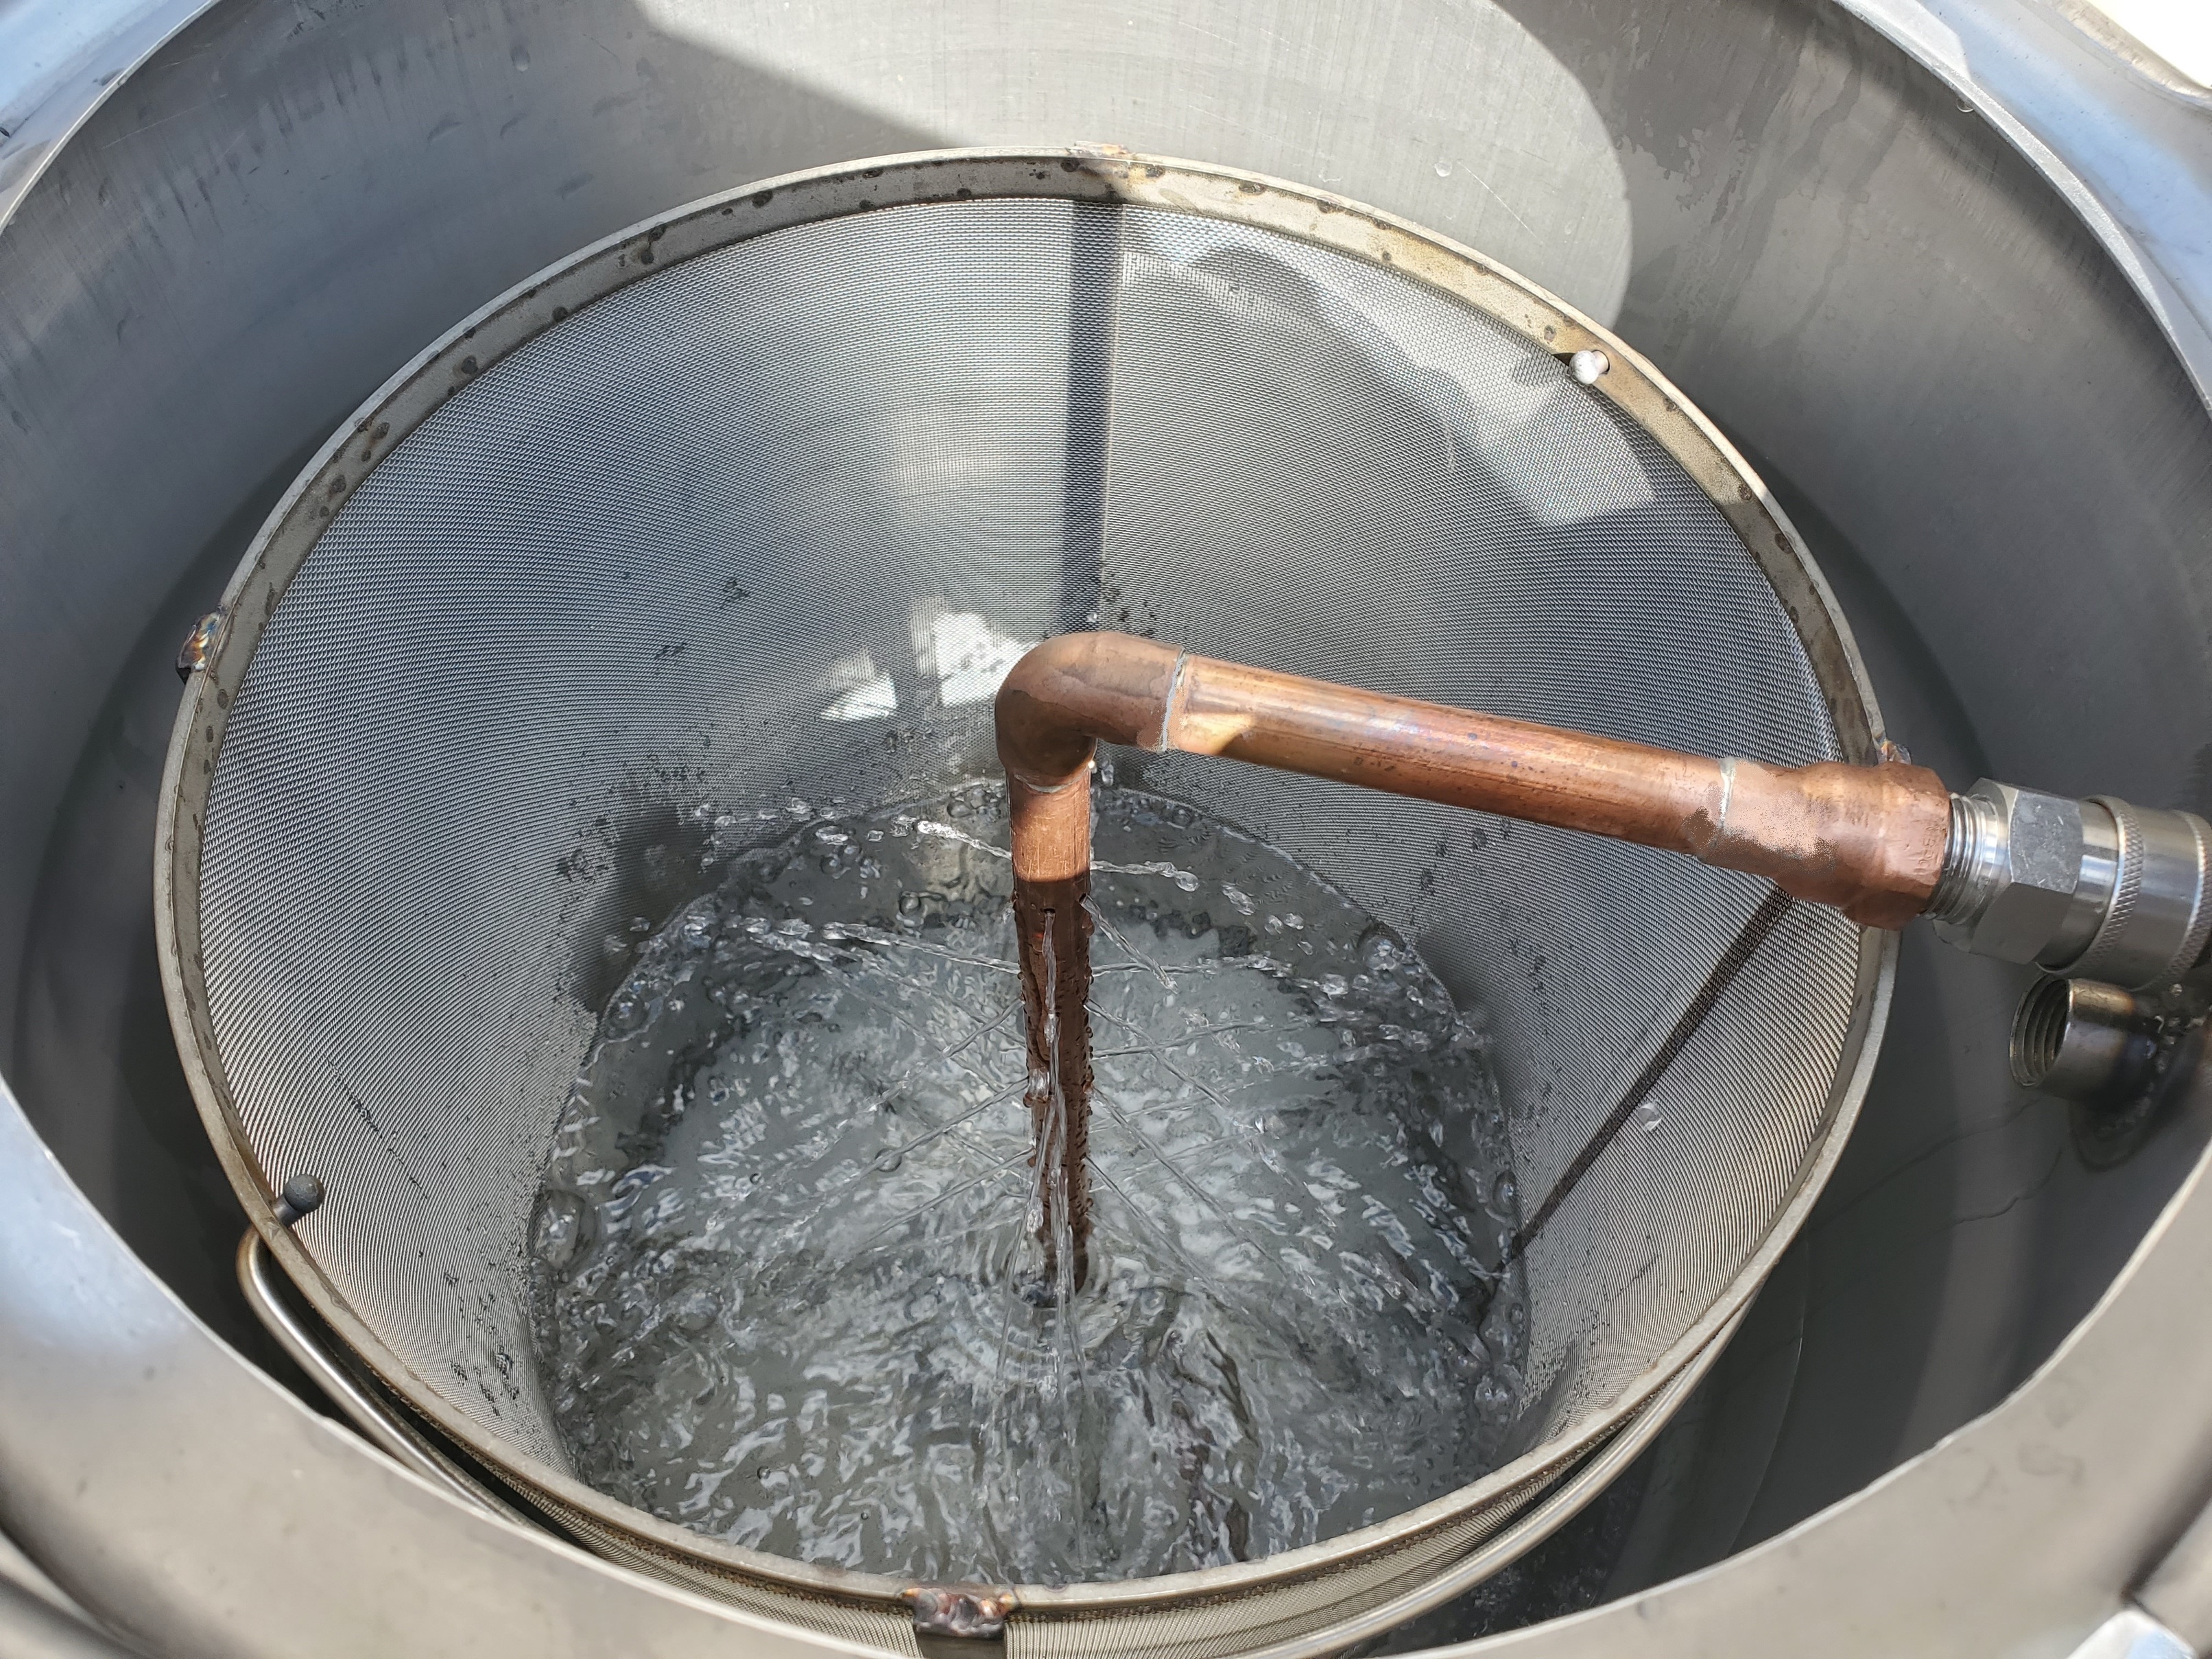
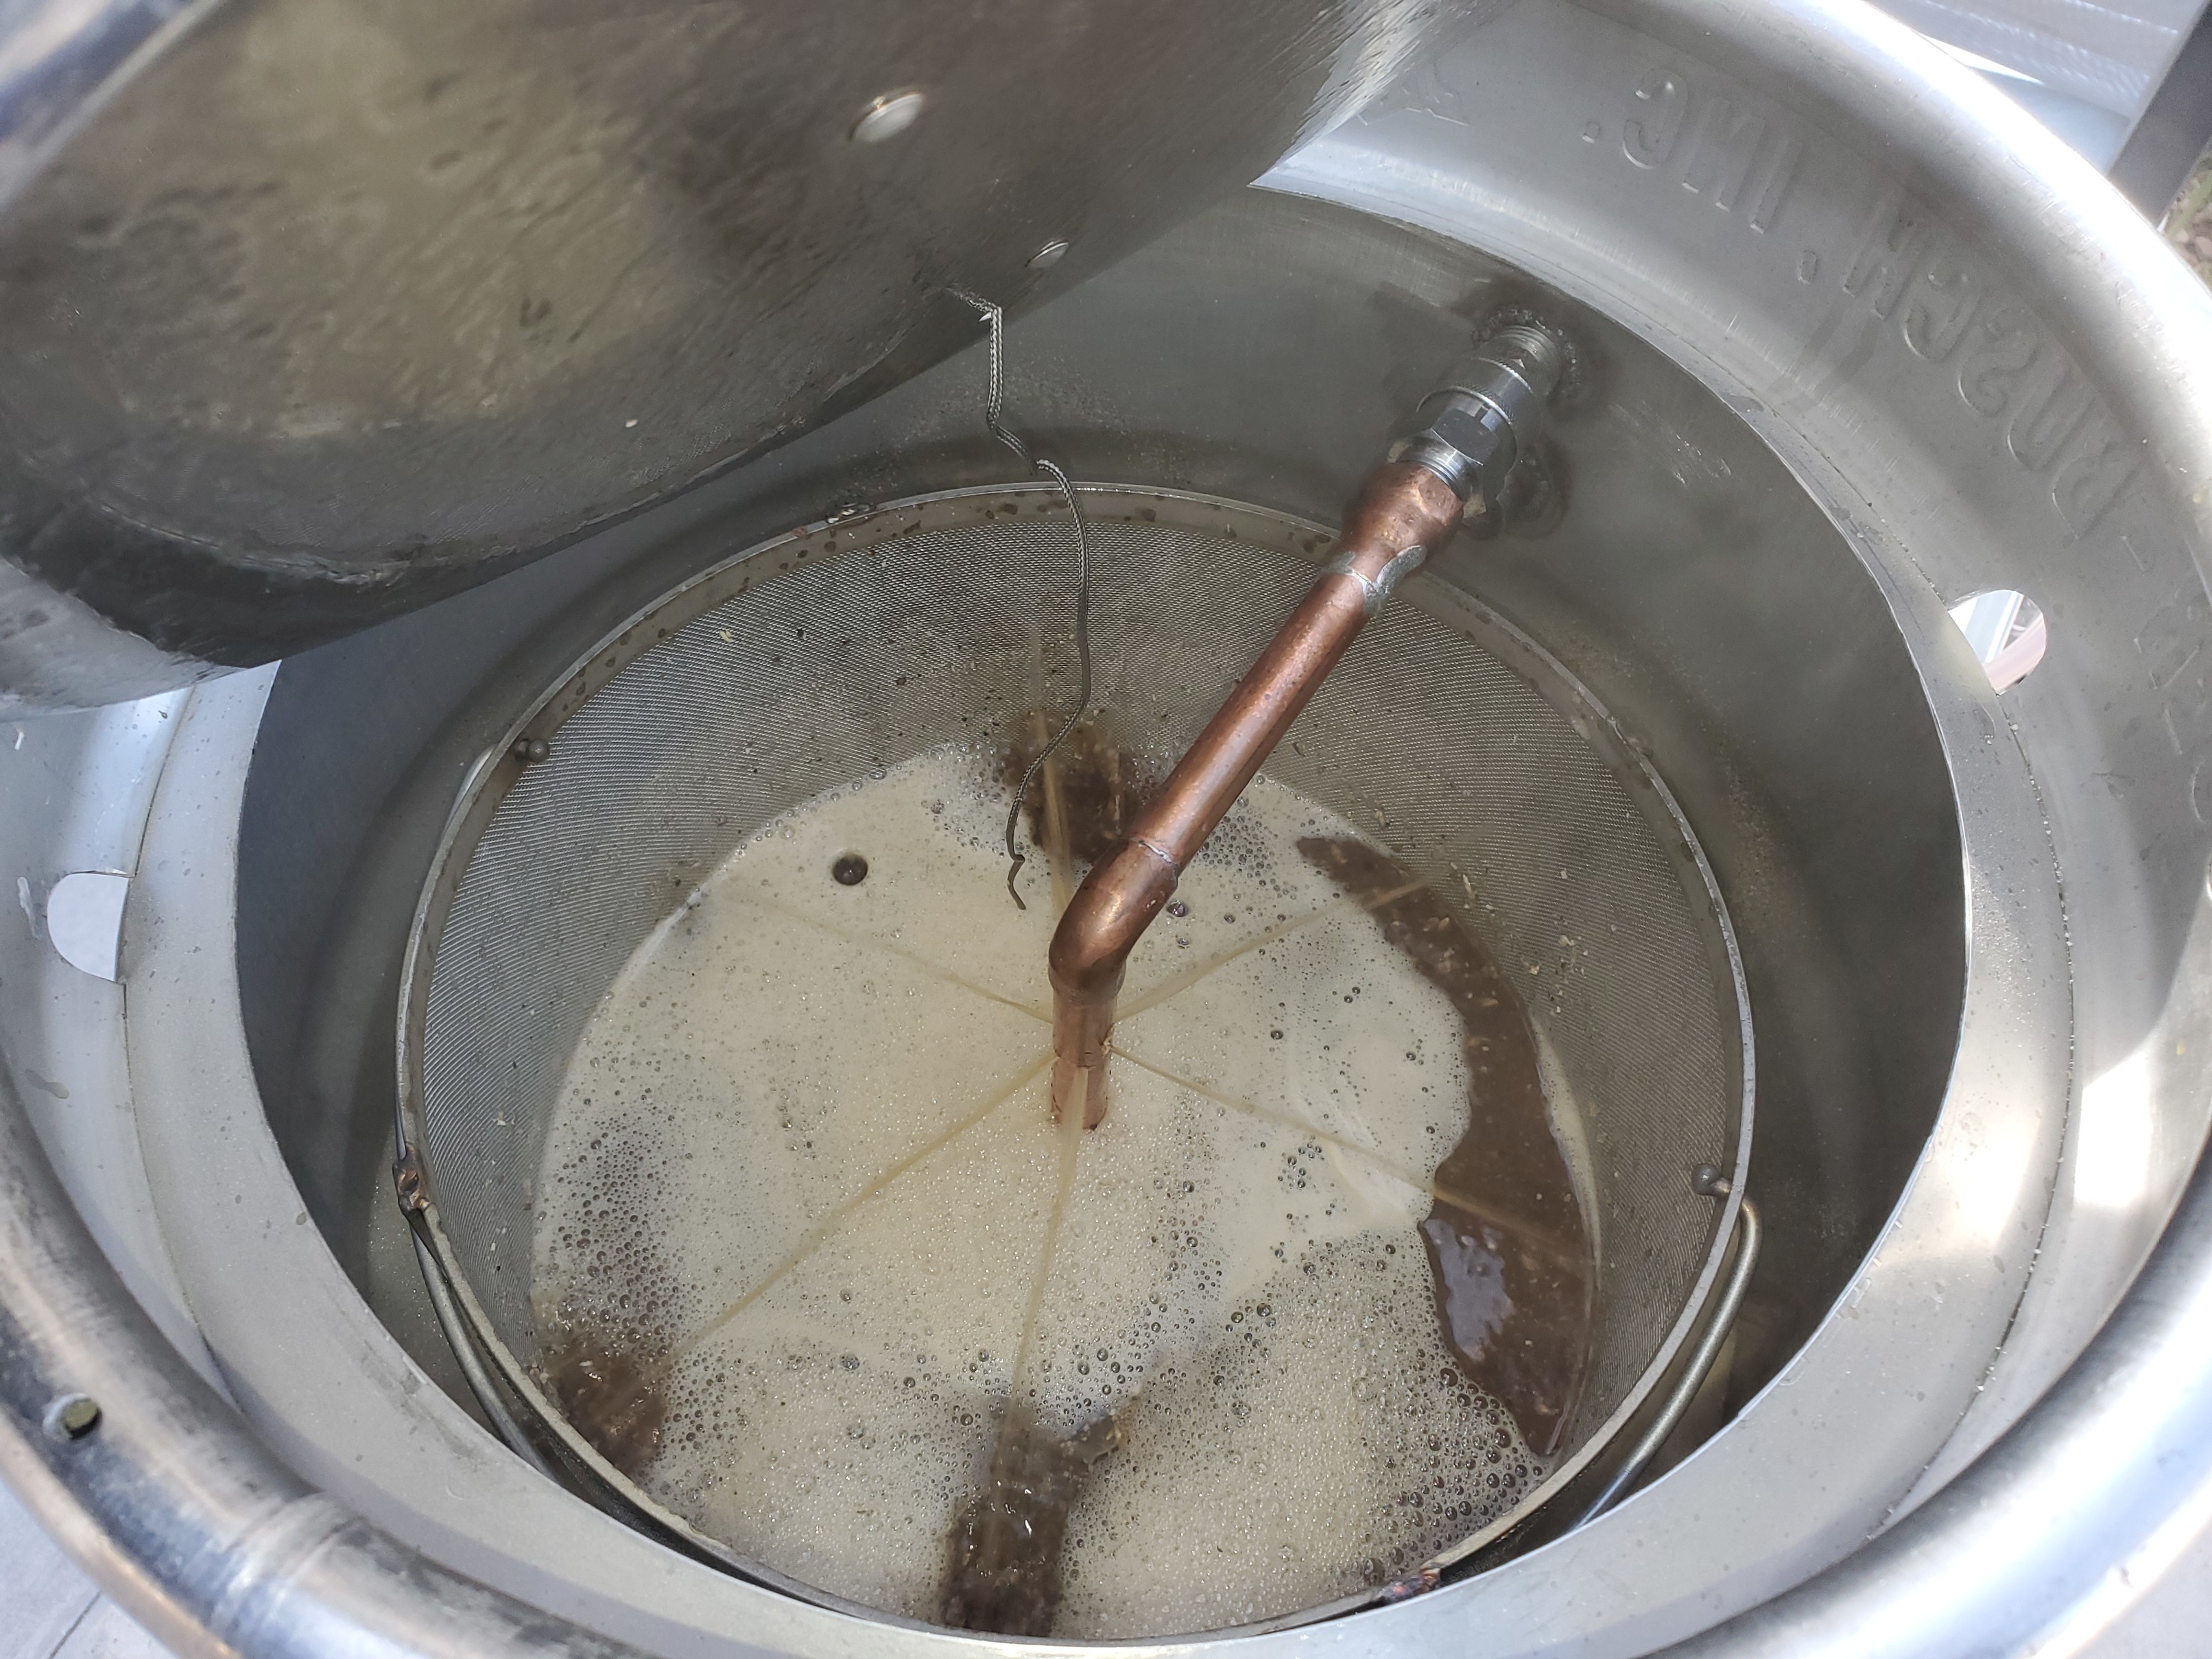
I received the custom grain basket, and it fits perfectly. I made the mash infusion tube so that is done… My approach to the holes; the total area of all the small drilled holes is approximately equal to the ID of the copper tube. That way I don’t introduce any additional flow restriction. Still a few things left to do before I can fire this up and make beer, but I’m getting close. To be honest this has been fun and I’ll be a little sad when I’m done, but then again I can always make adjustments forever and ever, right?
2 Likes
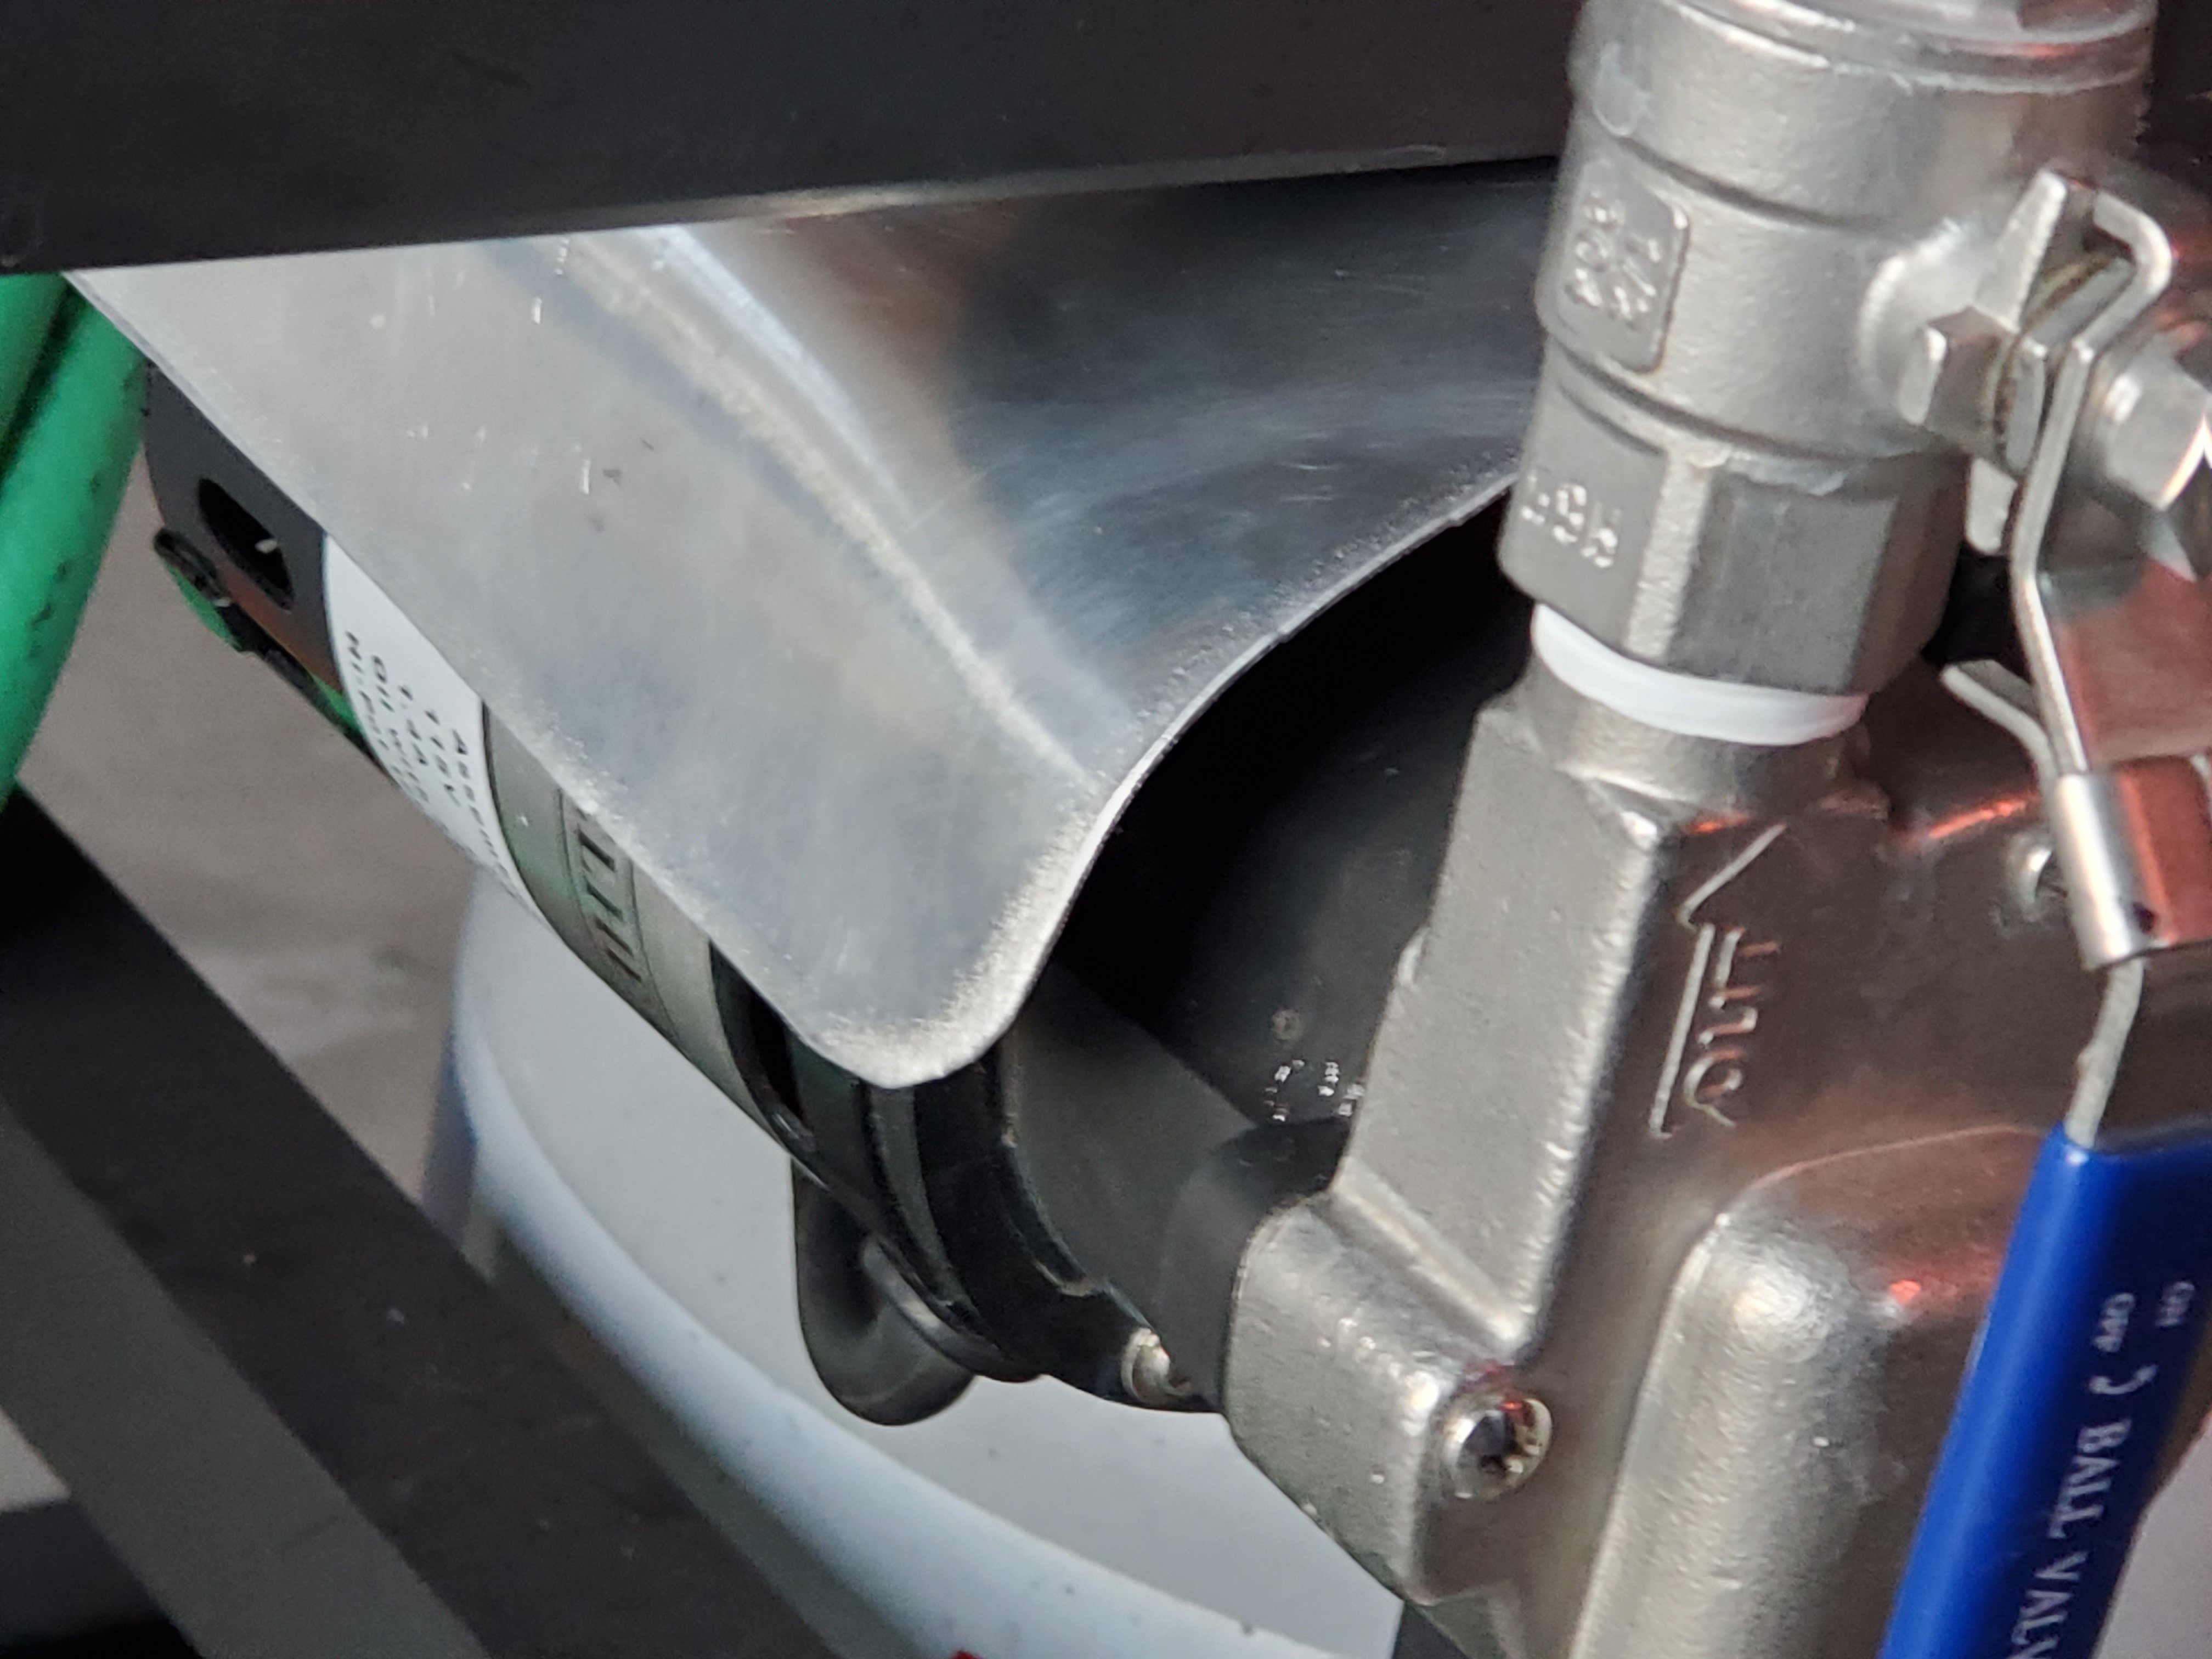
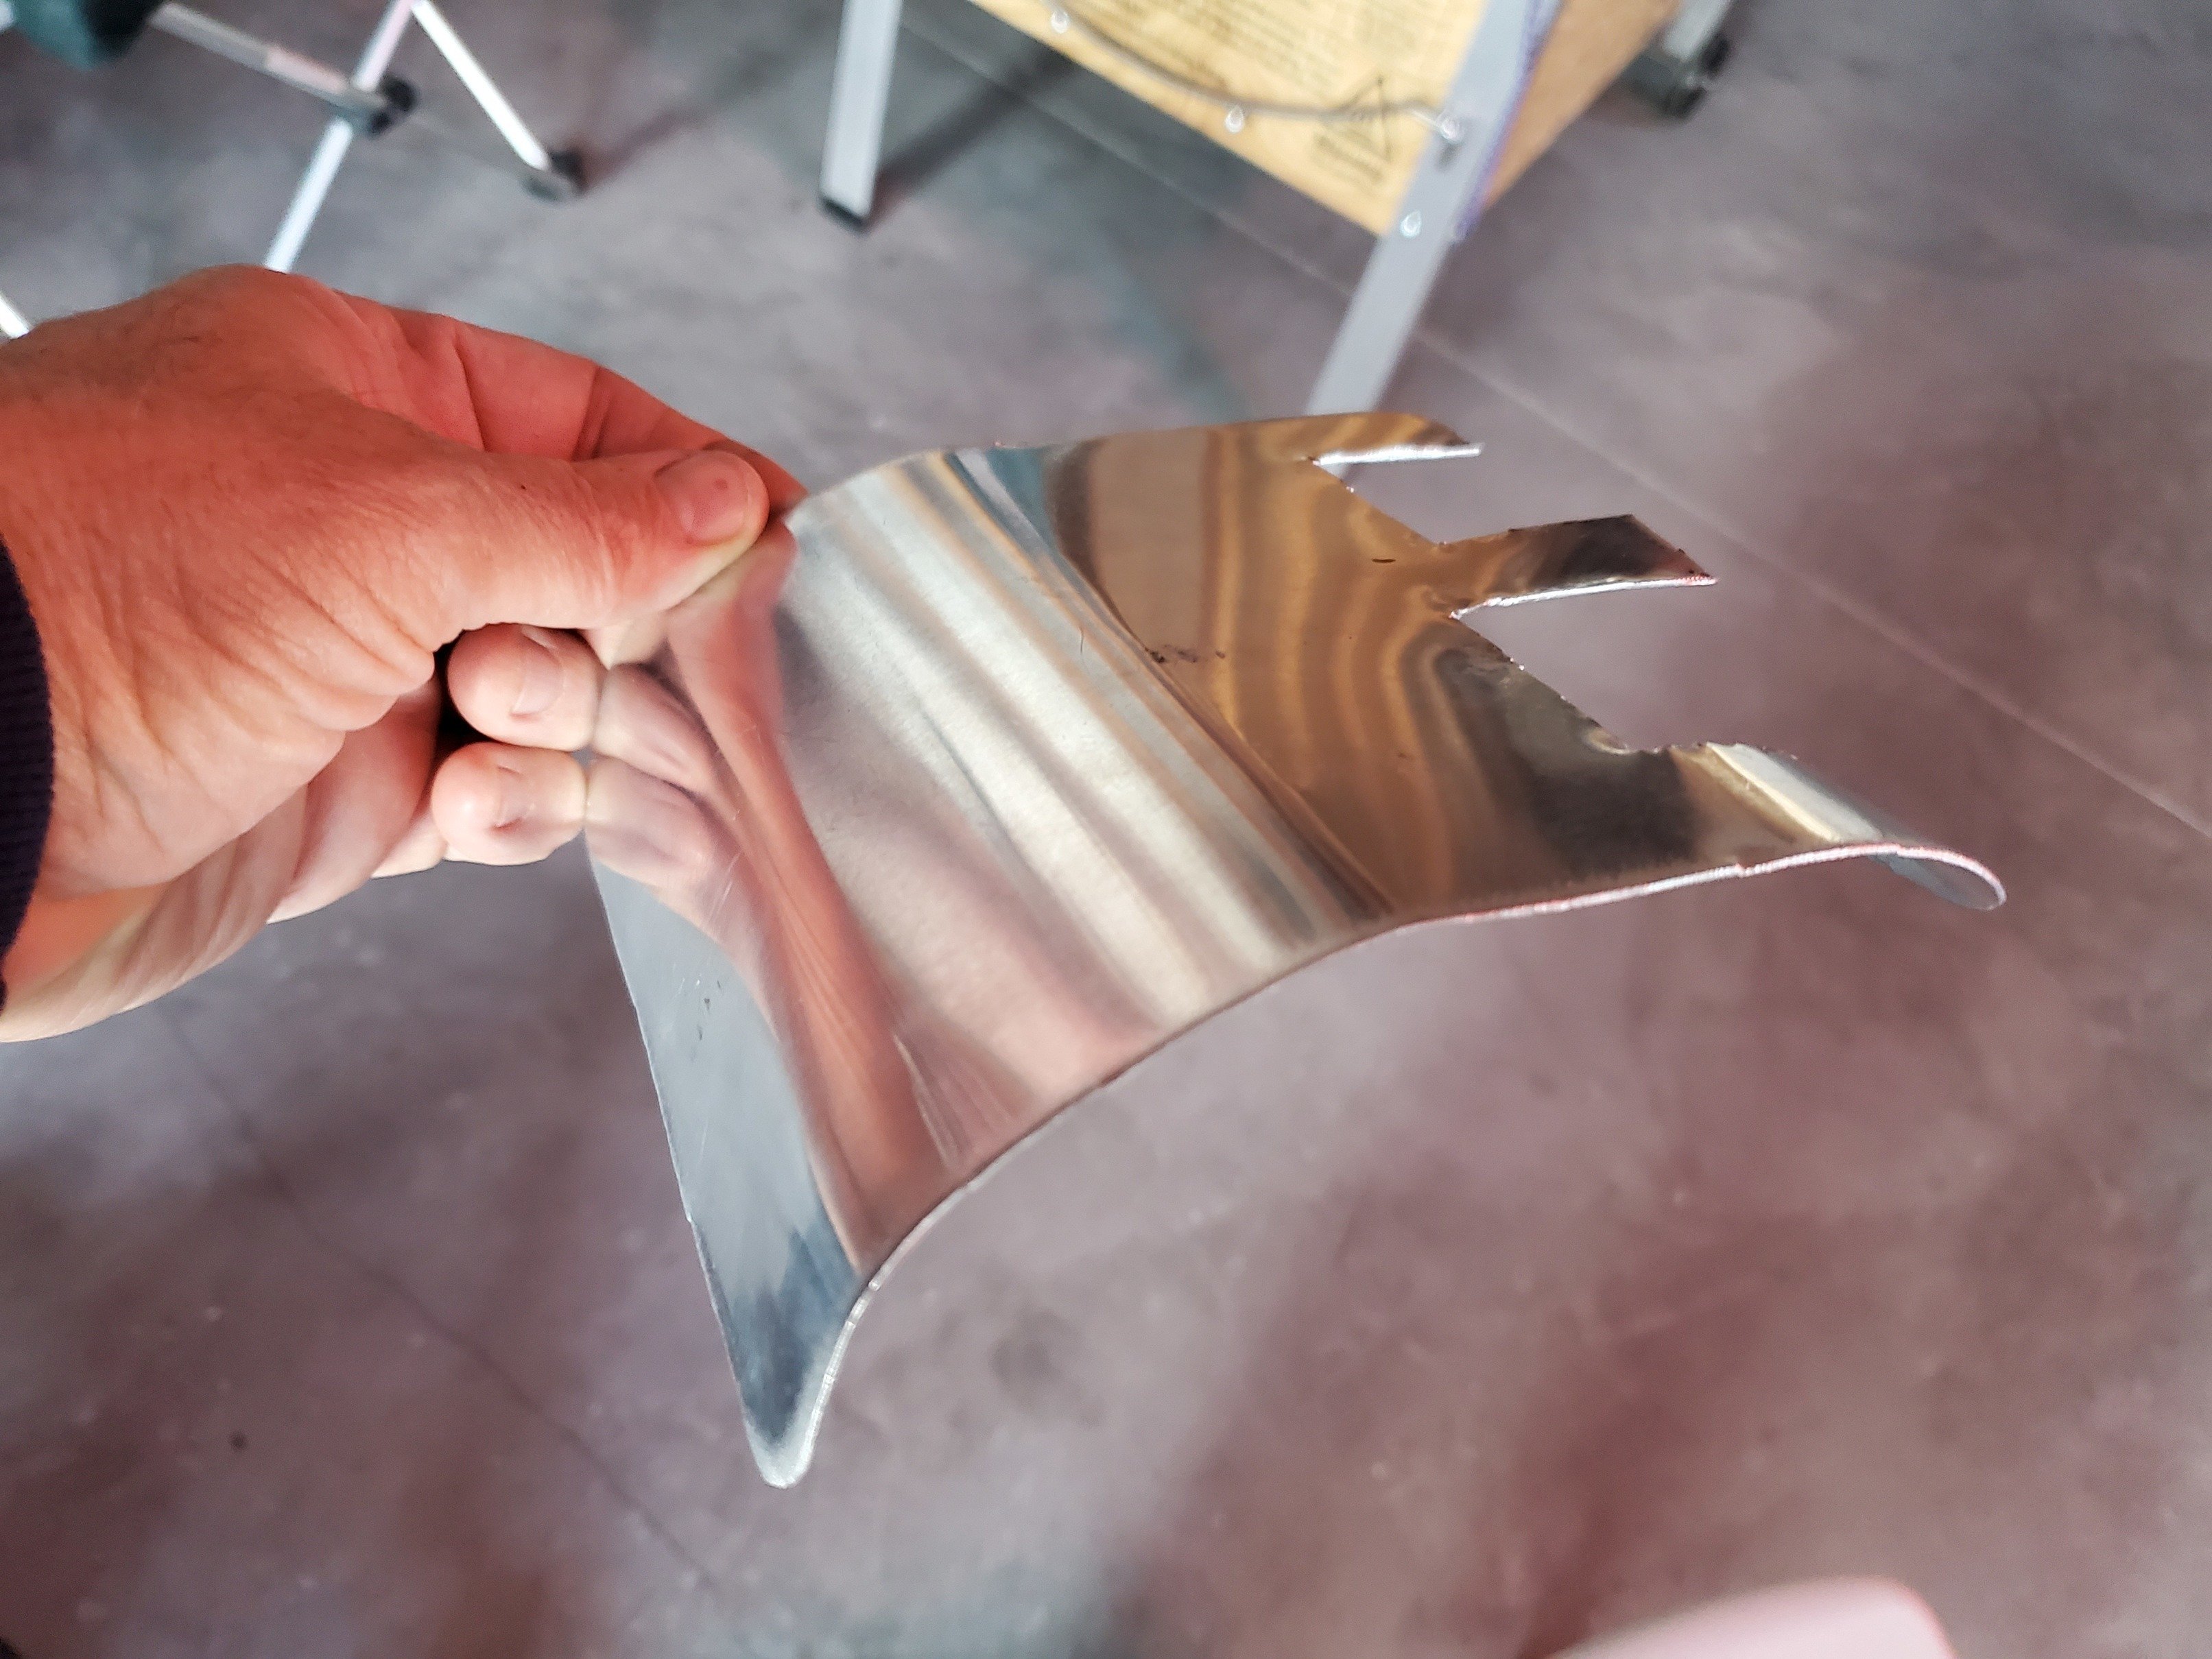
In addition to a custom work surface made from cookie sheets, I fashioned a shield for the pump motor to keep water out of it. It is made from scrap from the cookie sheets. The work surface is above the pump, but I wanted additional protection. In the first picture the work surface is removed so I could access the pump. I want to be able to spray the entire rig down if necessary (unplugged of course).
1 Like
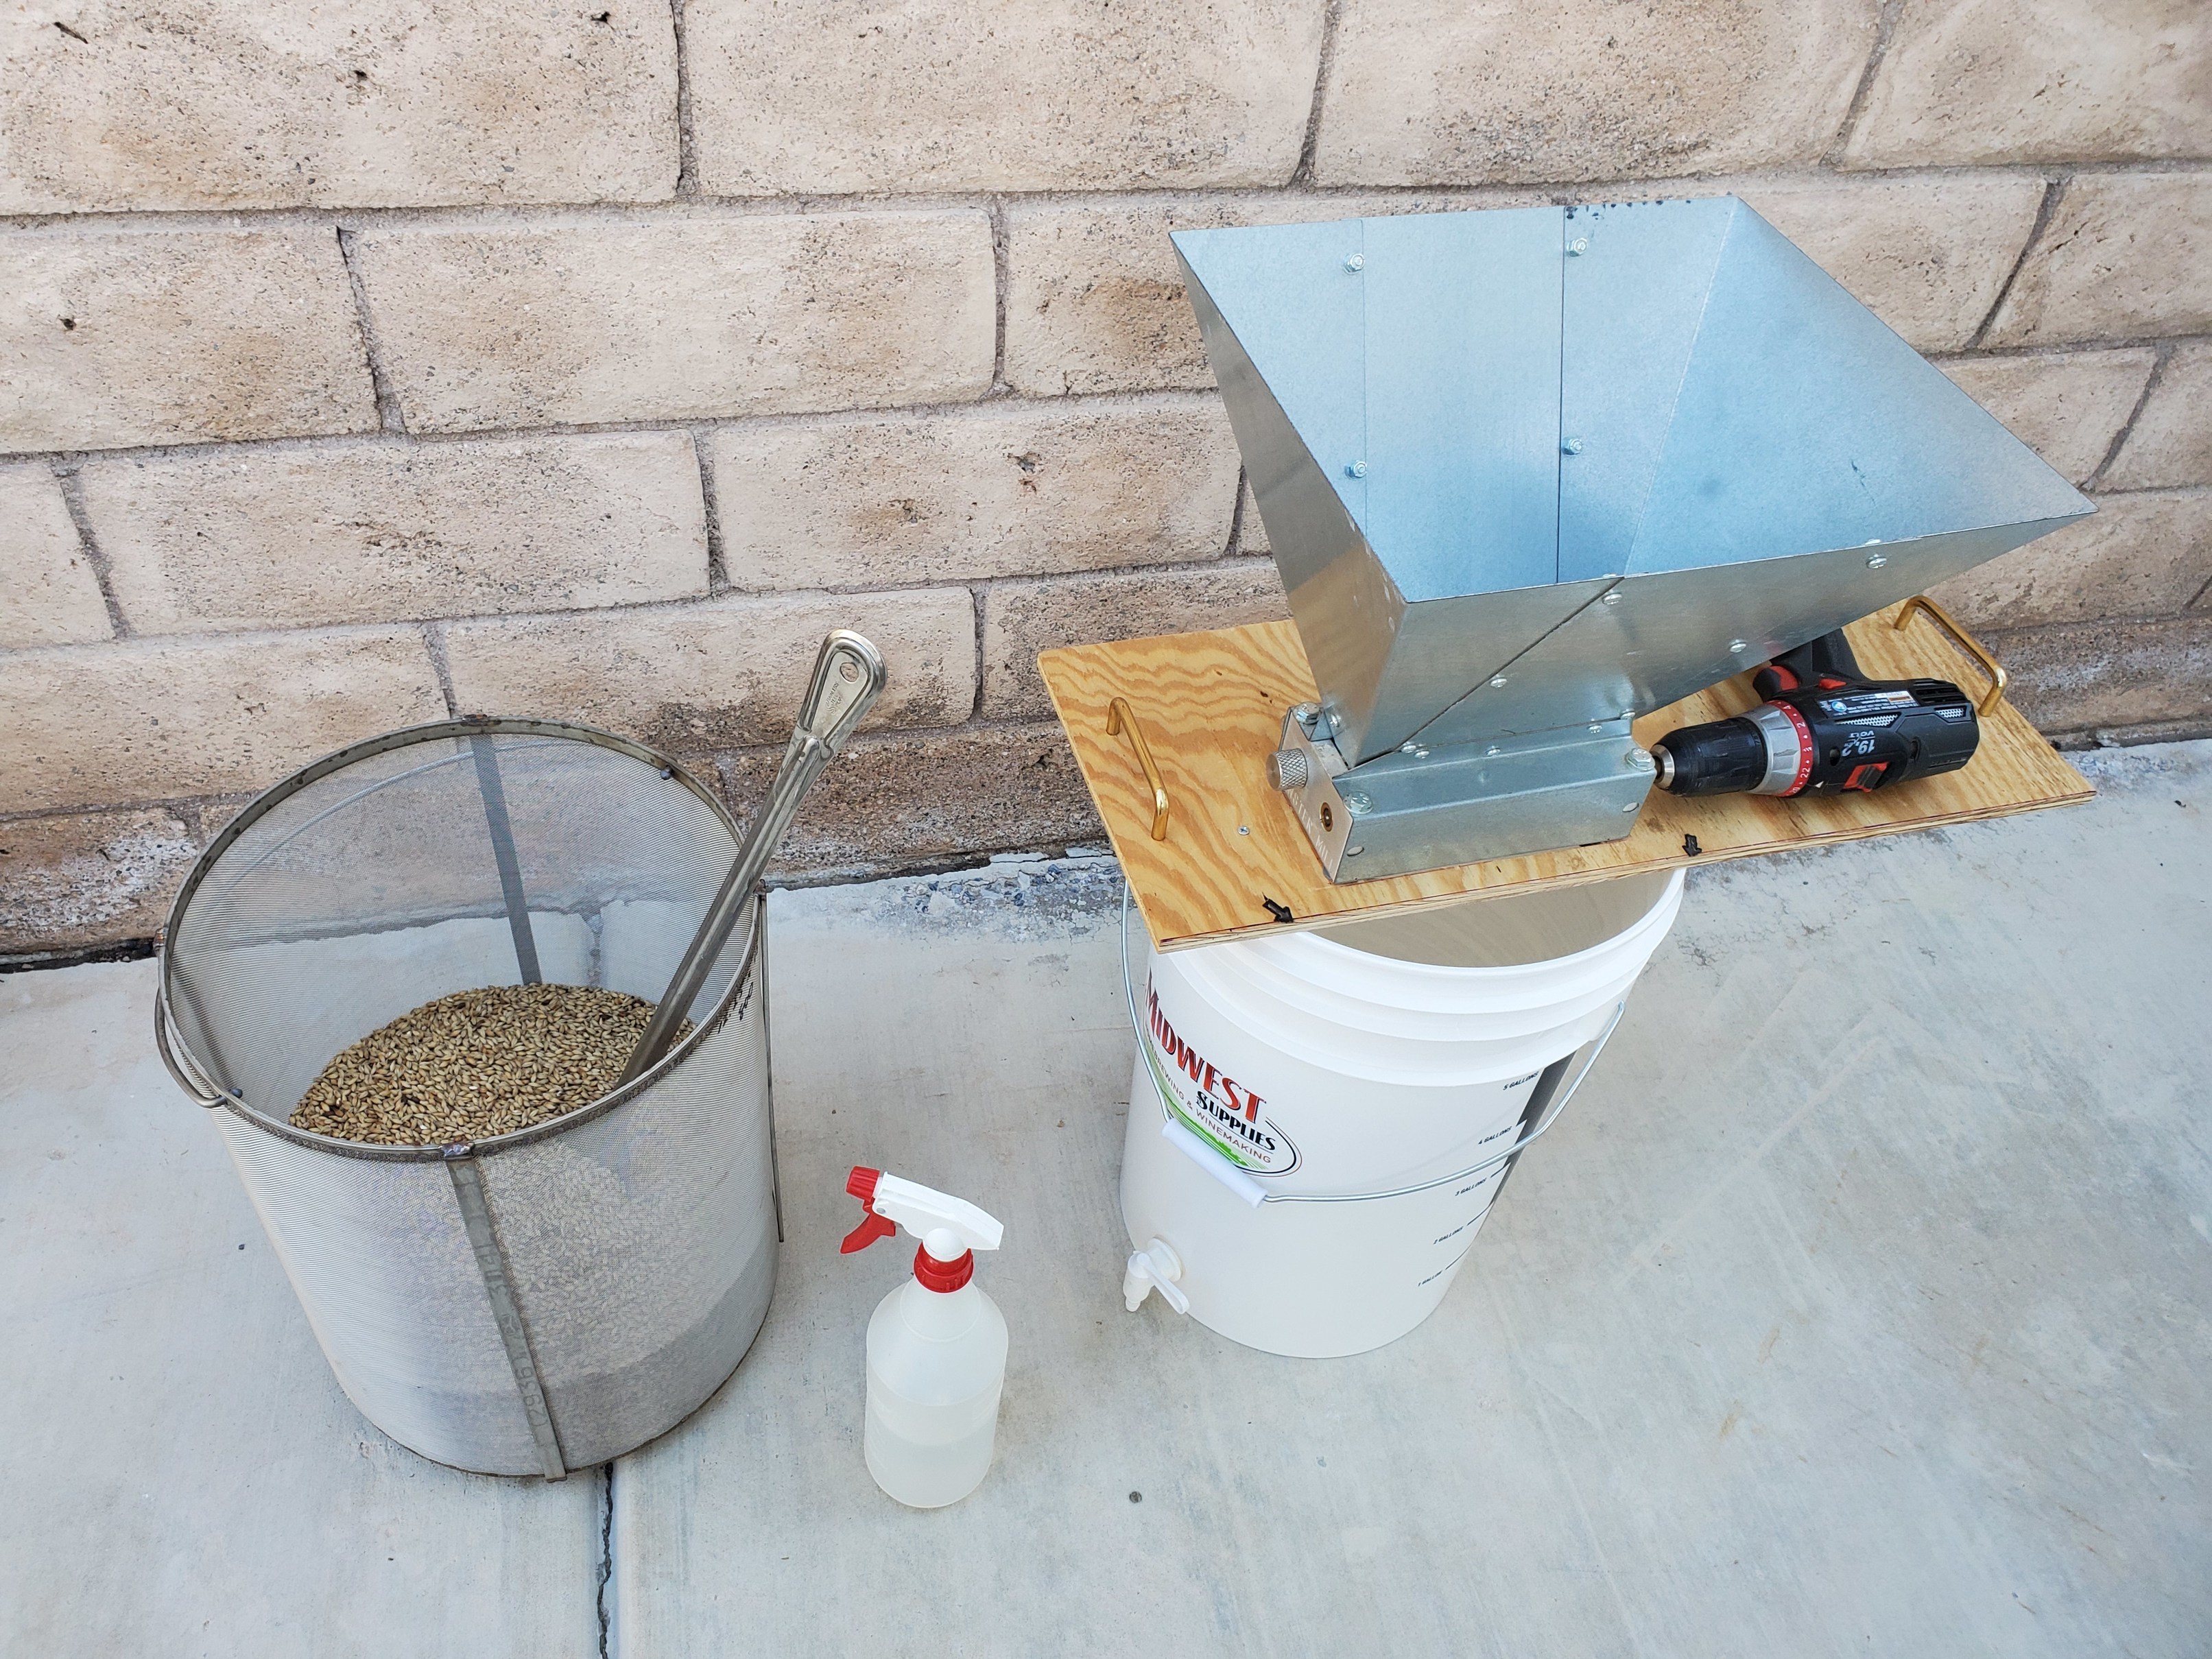
Been busy doing other things, but finally got back to this…….here is my finished BIABasket rig, and a platform for my grain mill. Everything works………so tomorrow, unless it rains, I am brewing my new recipe, Mike’s Wicked Ale, a variation on Pete’s. 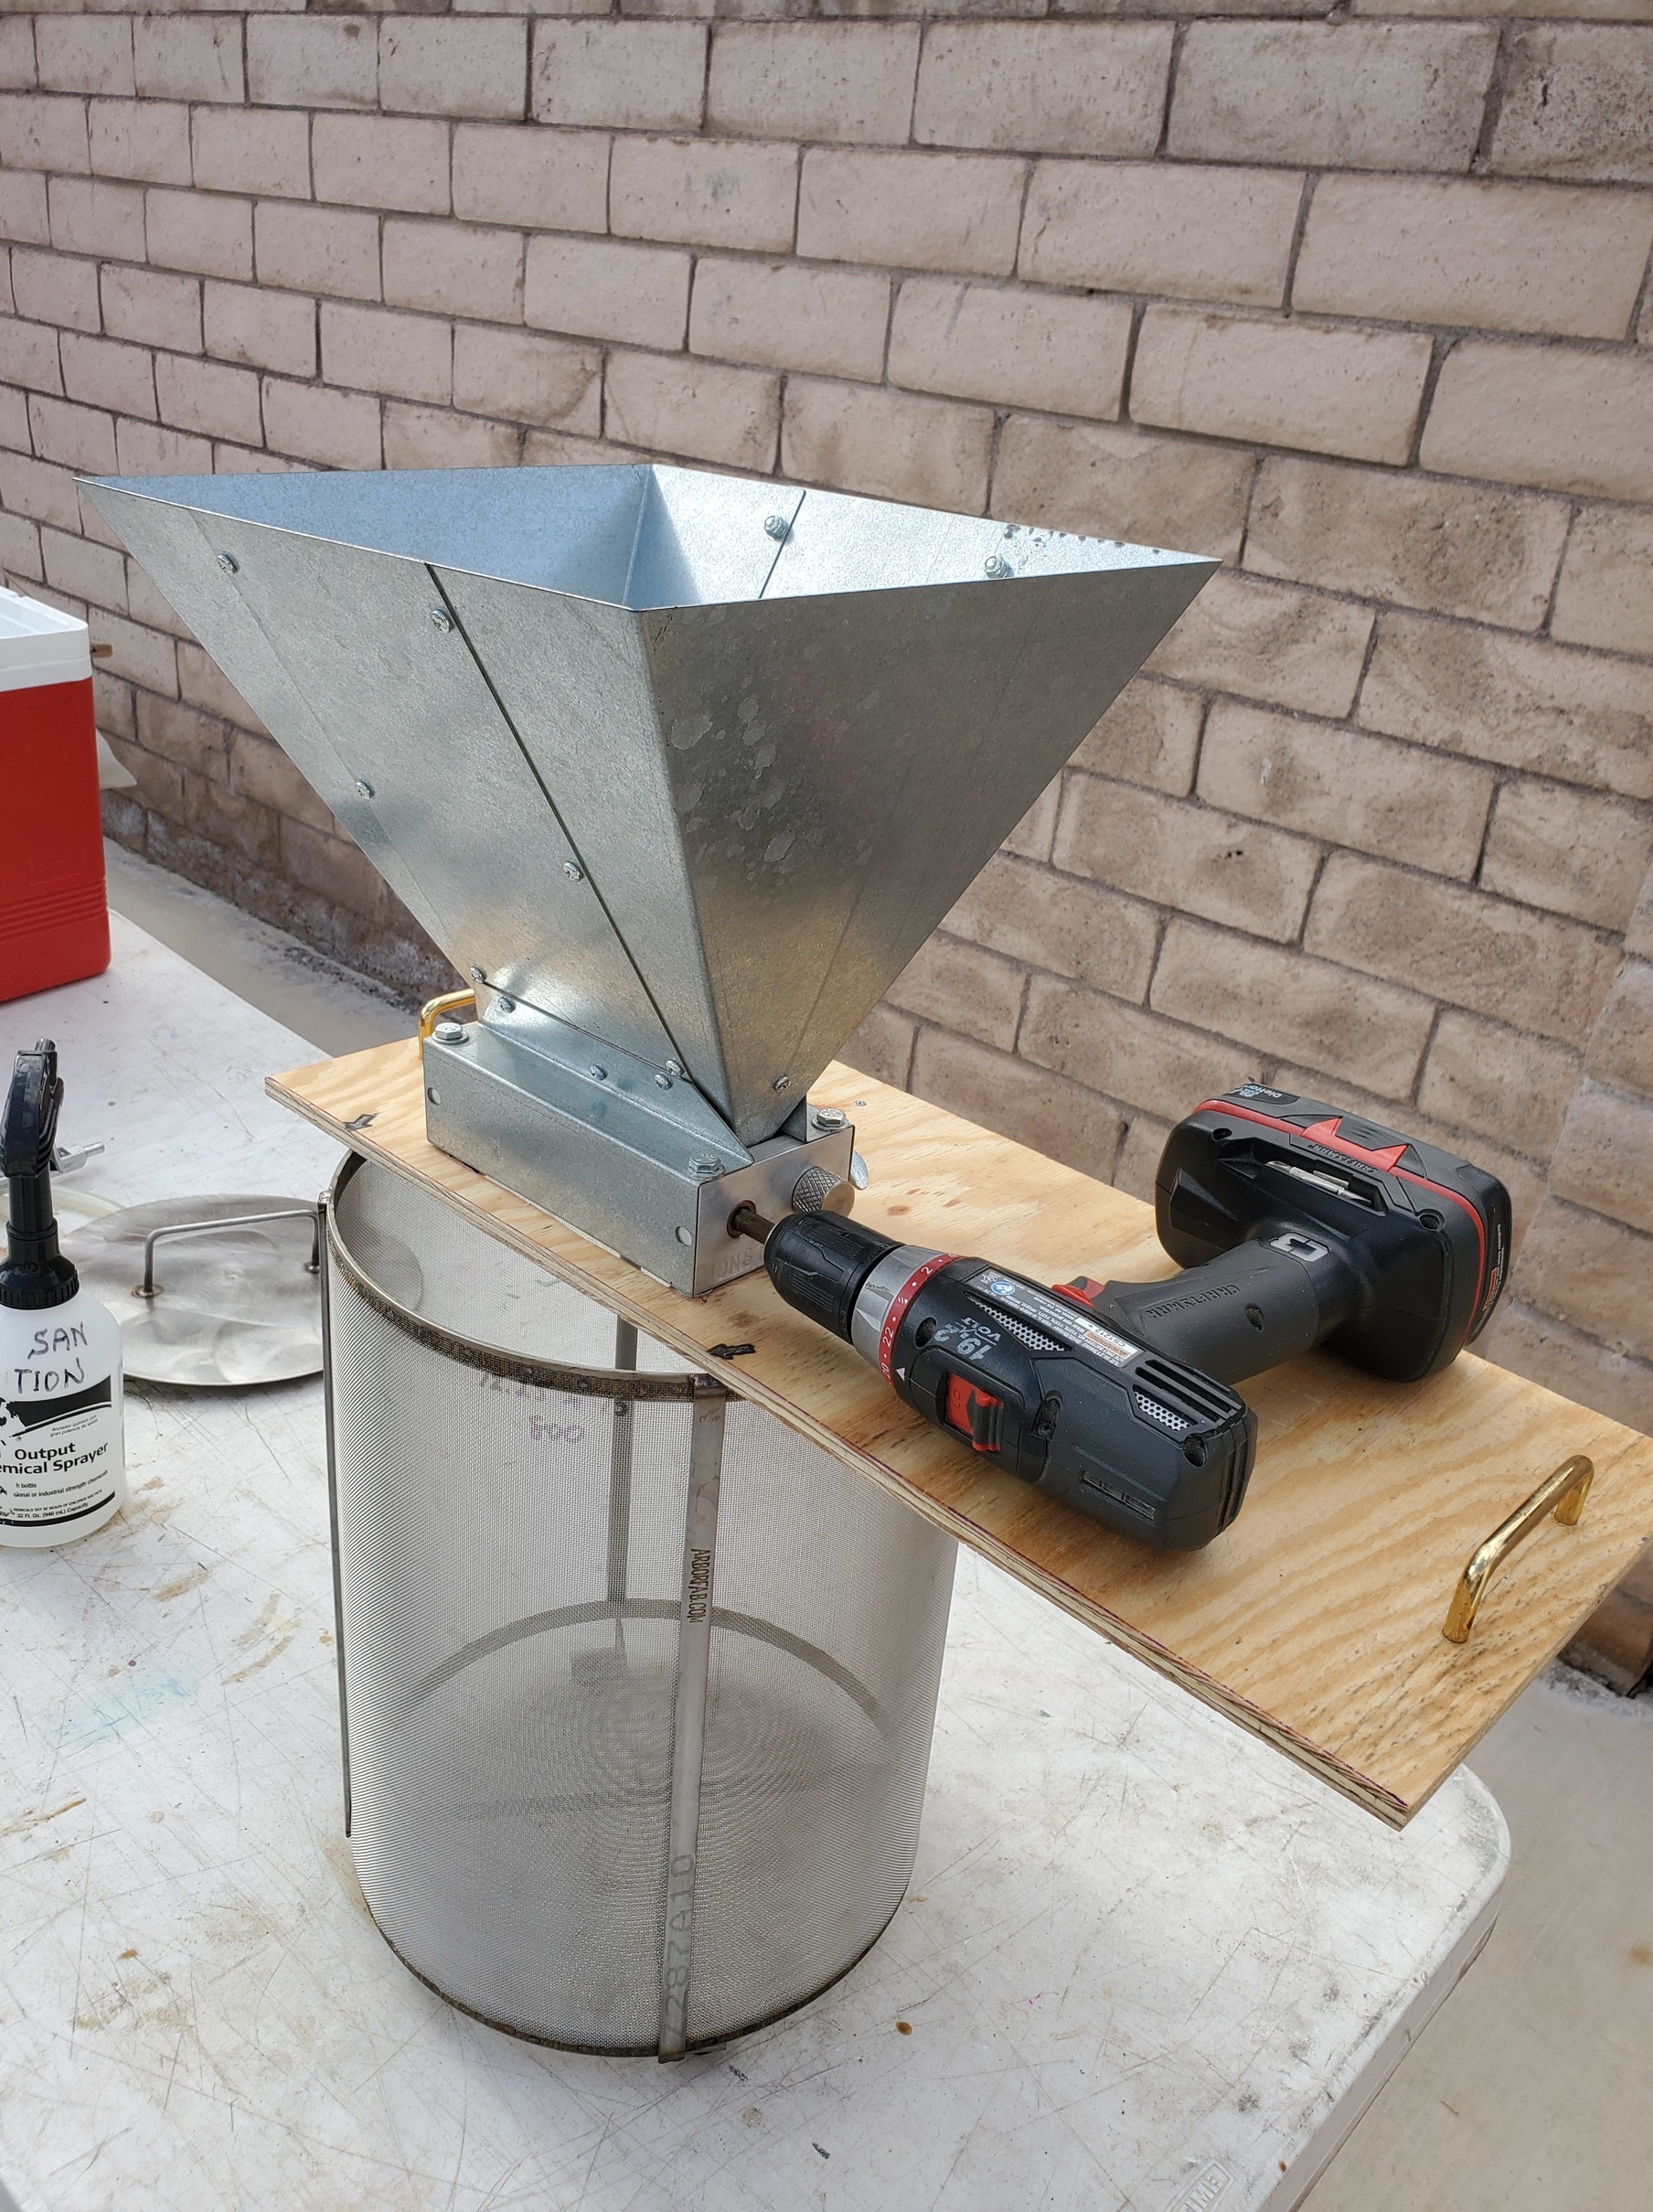


4 Likes
Looks very nice… now, how was the first brew day?
Sneezles61
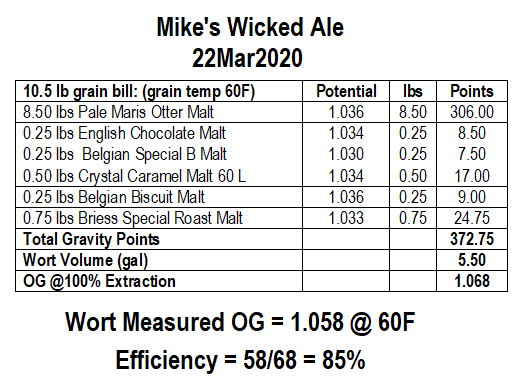
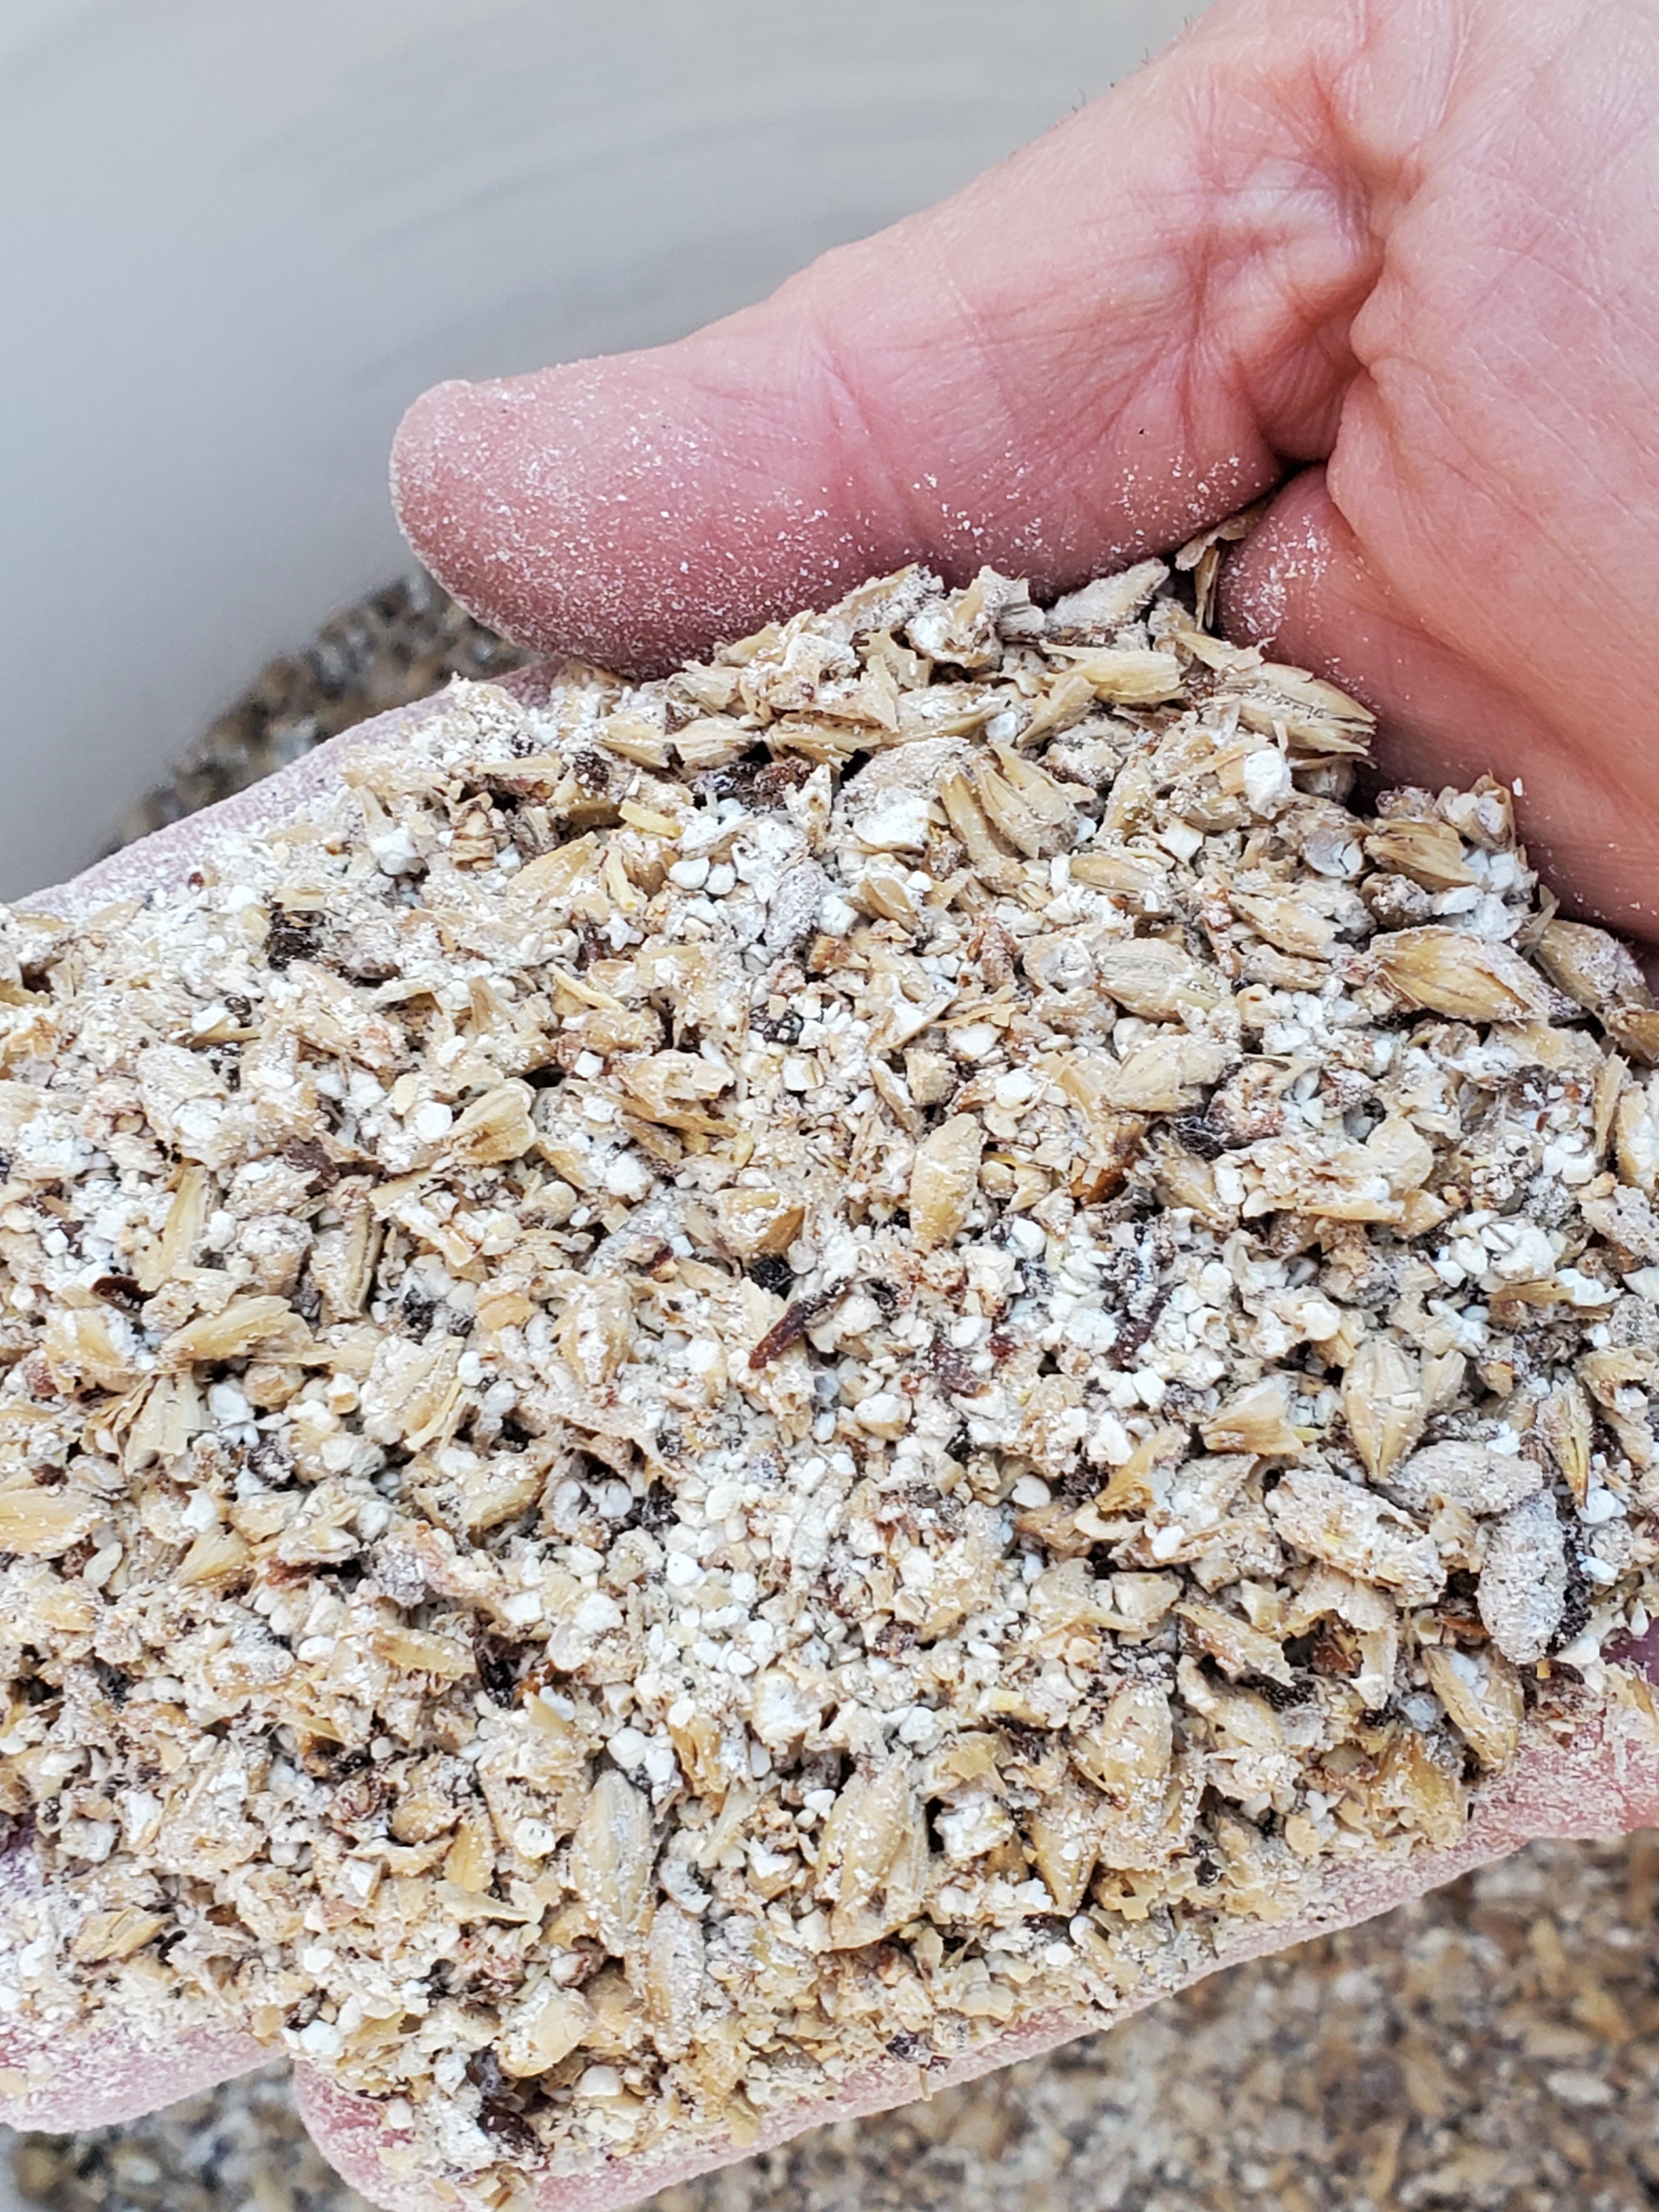
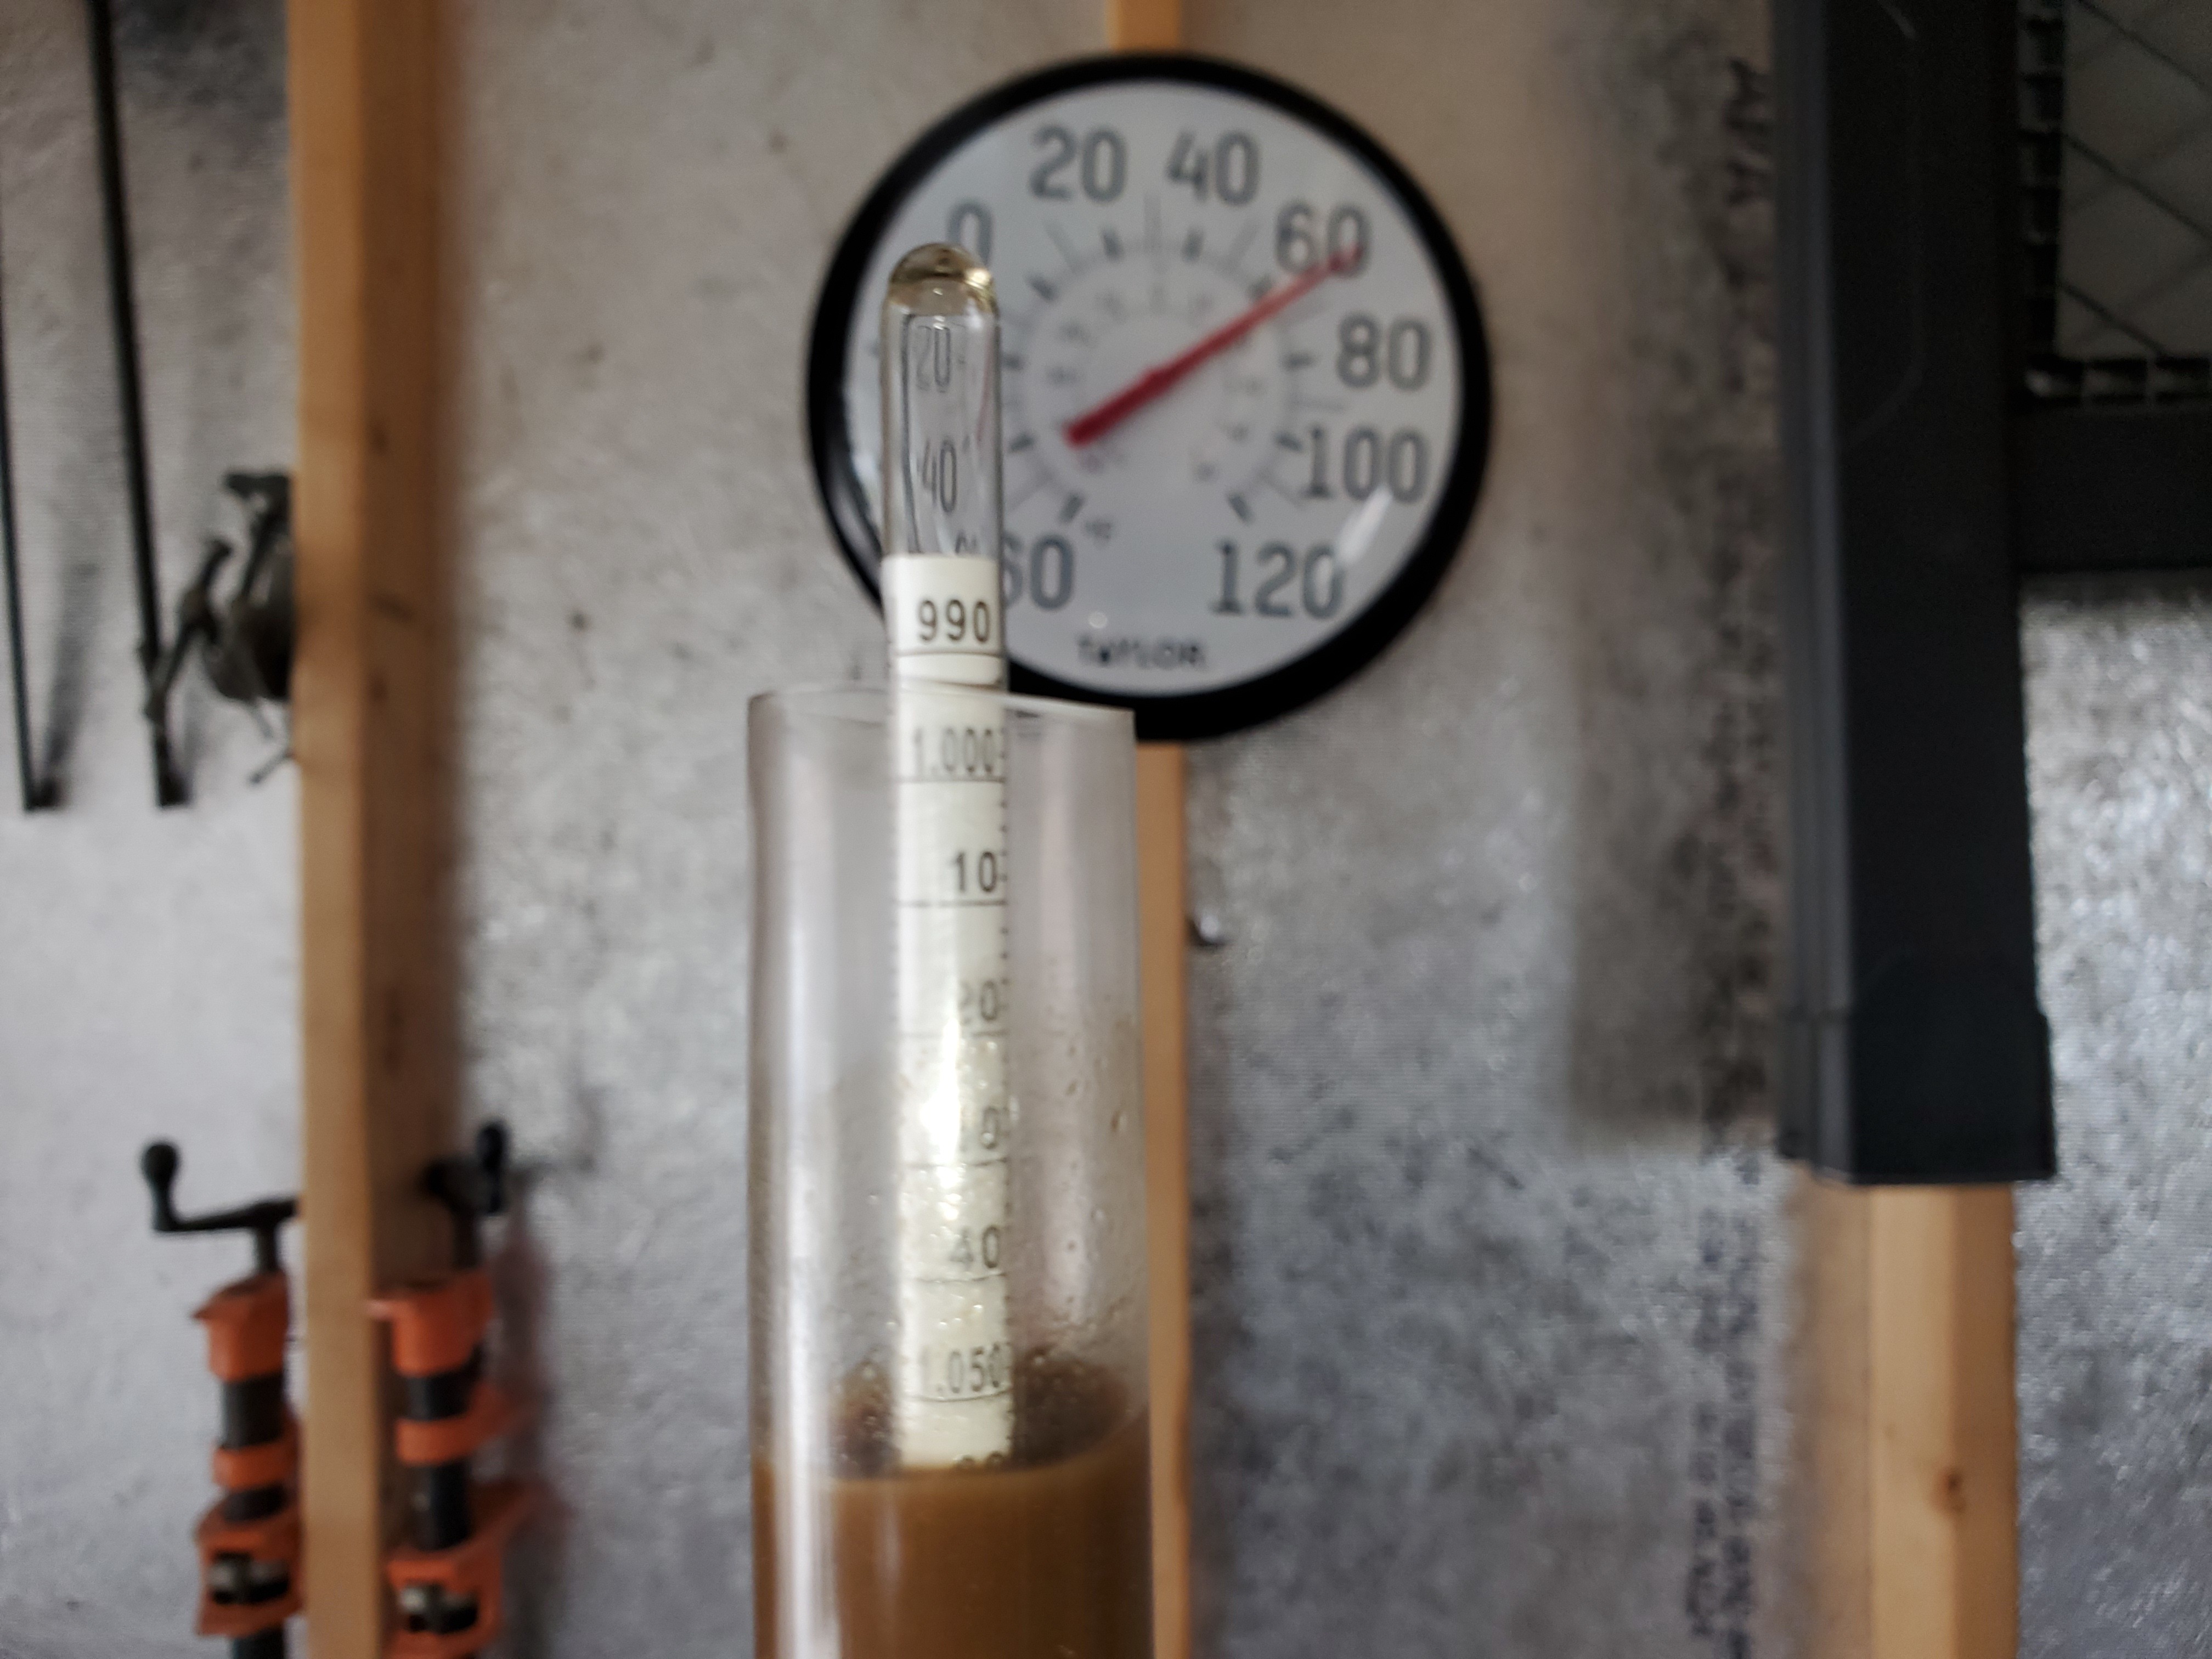
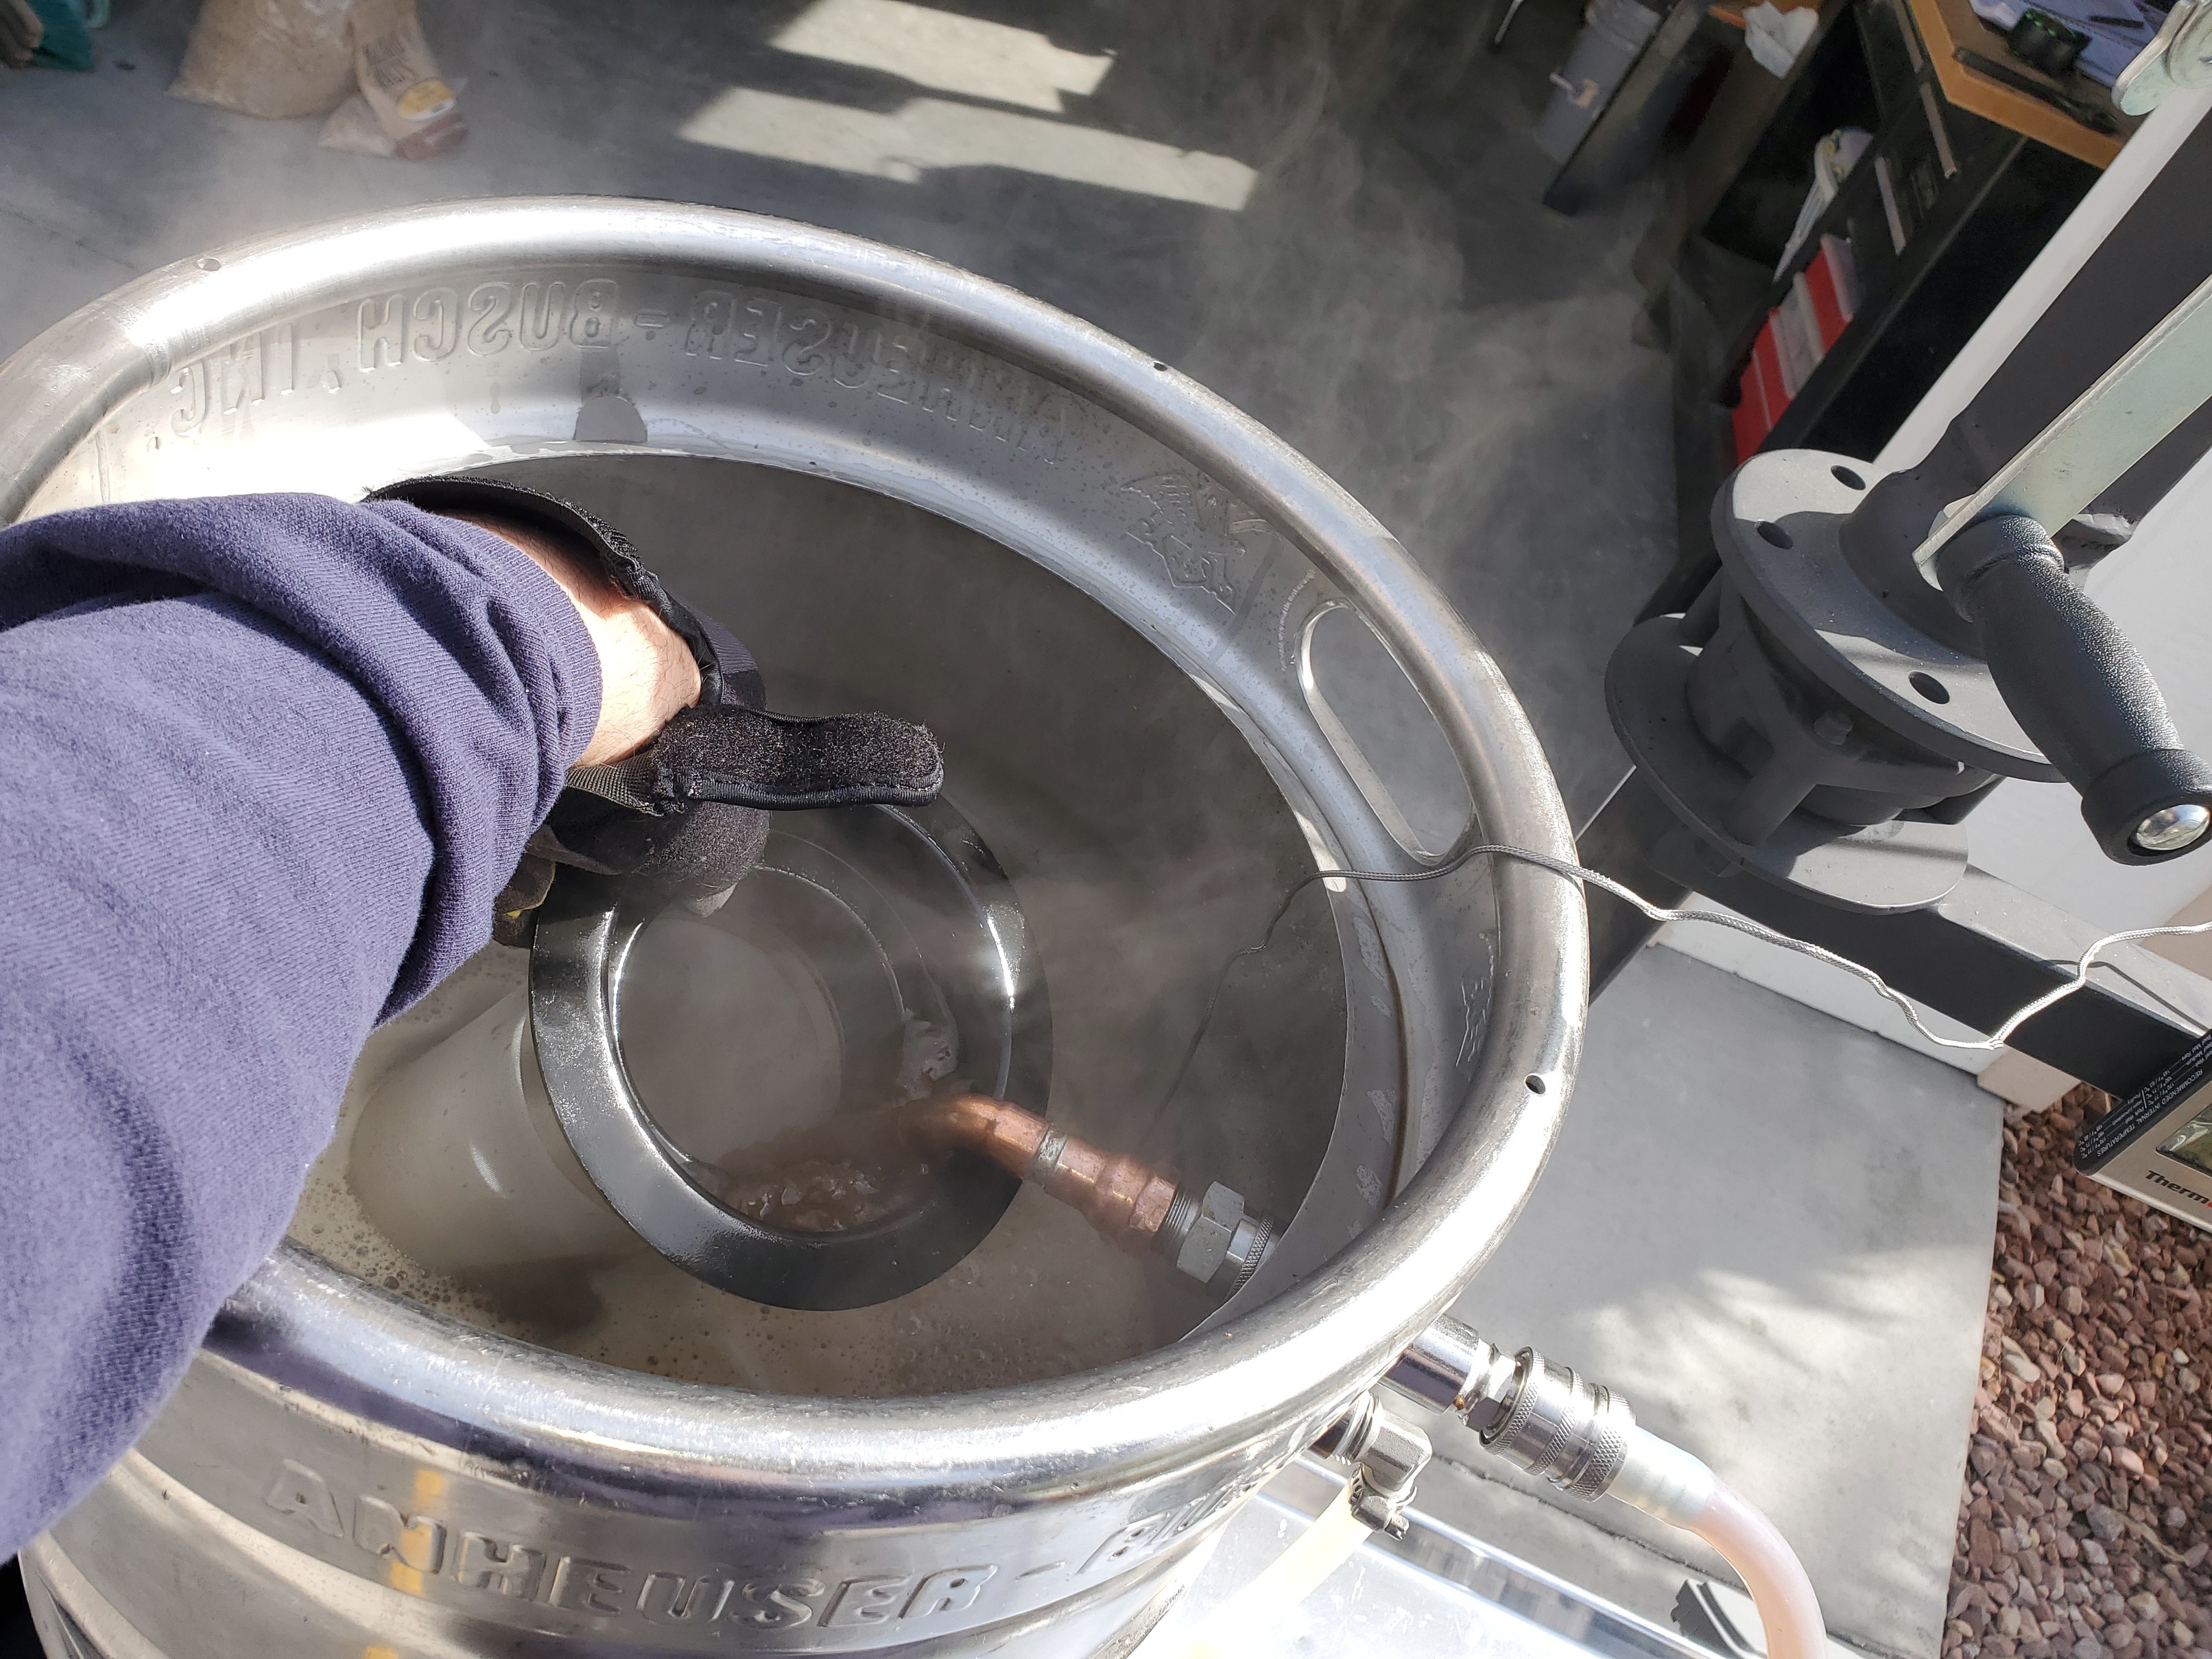
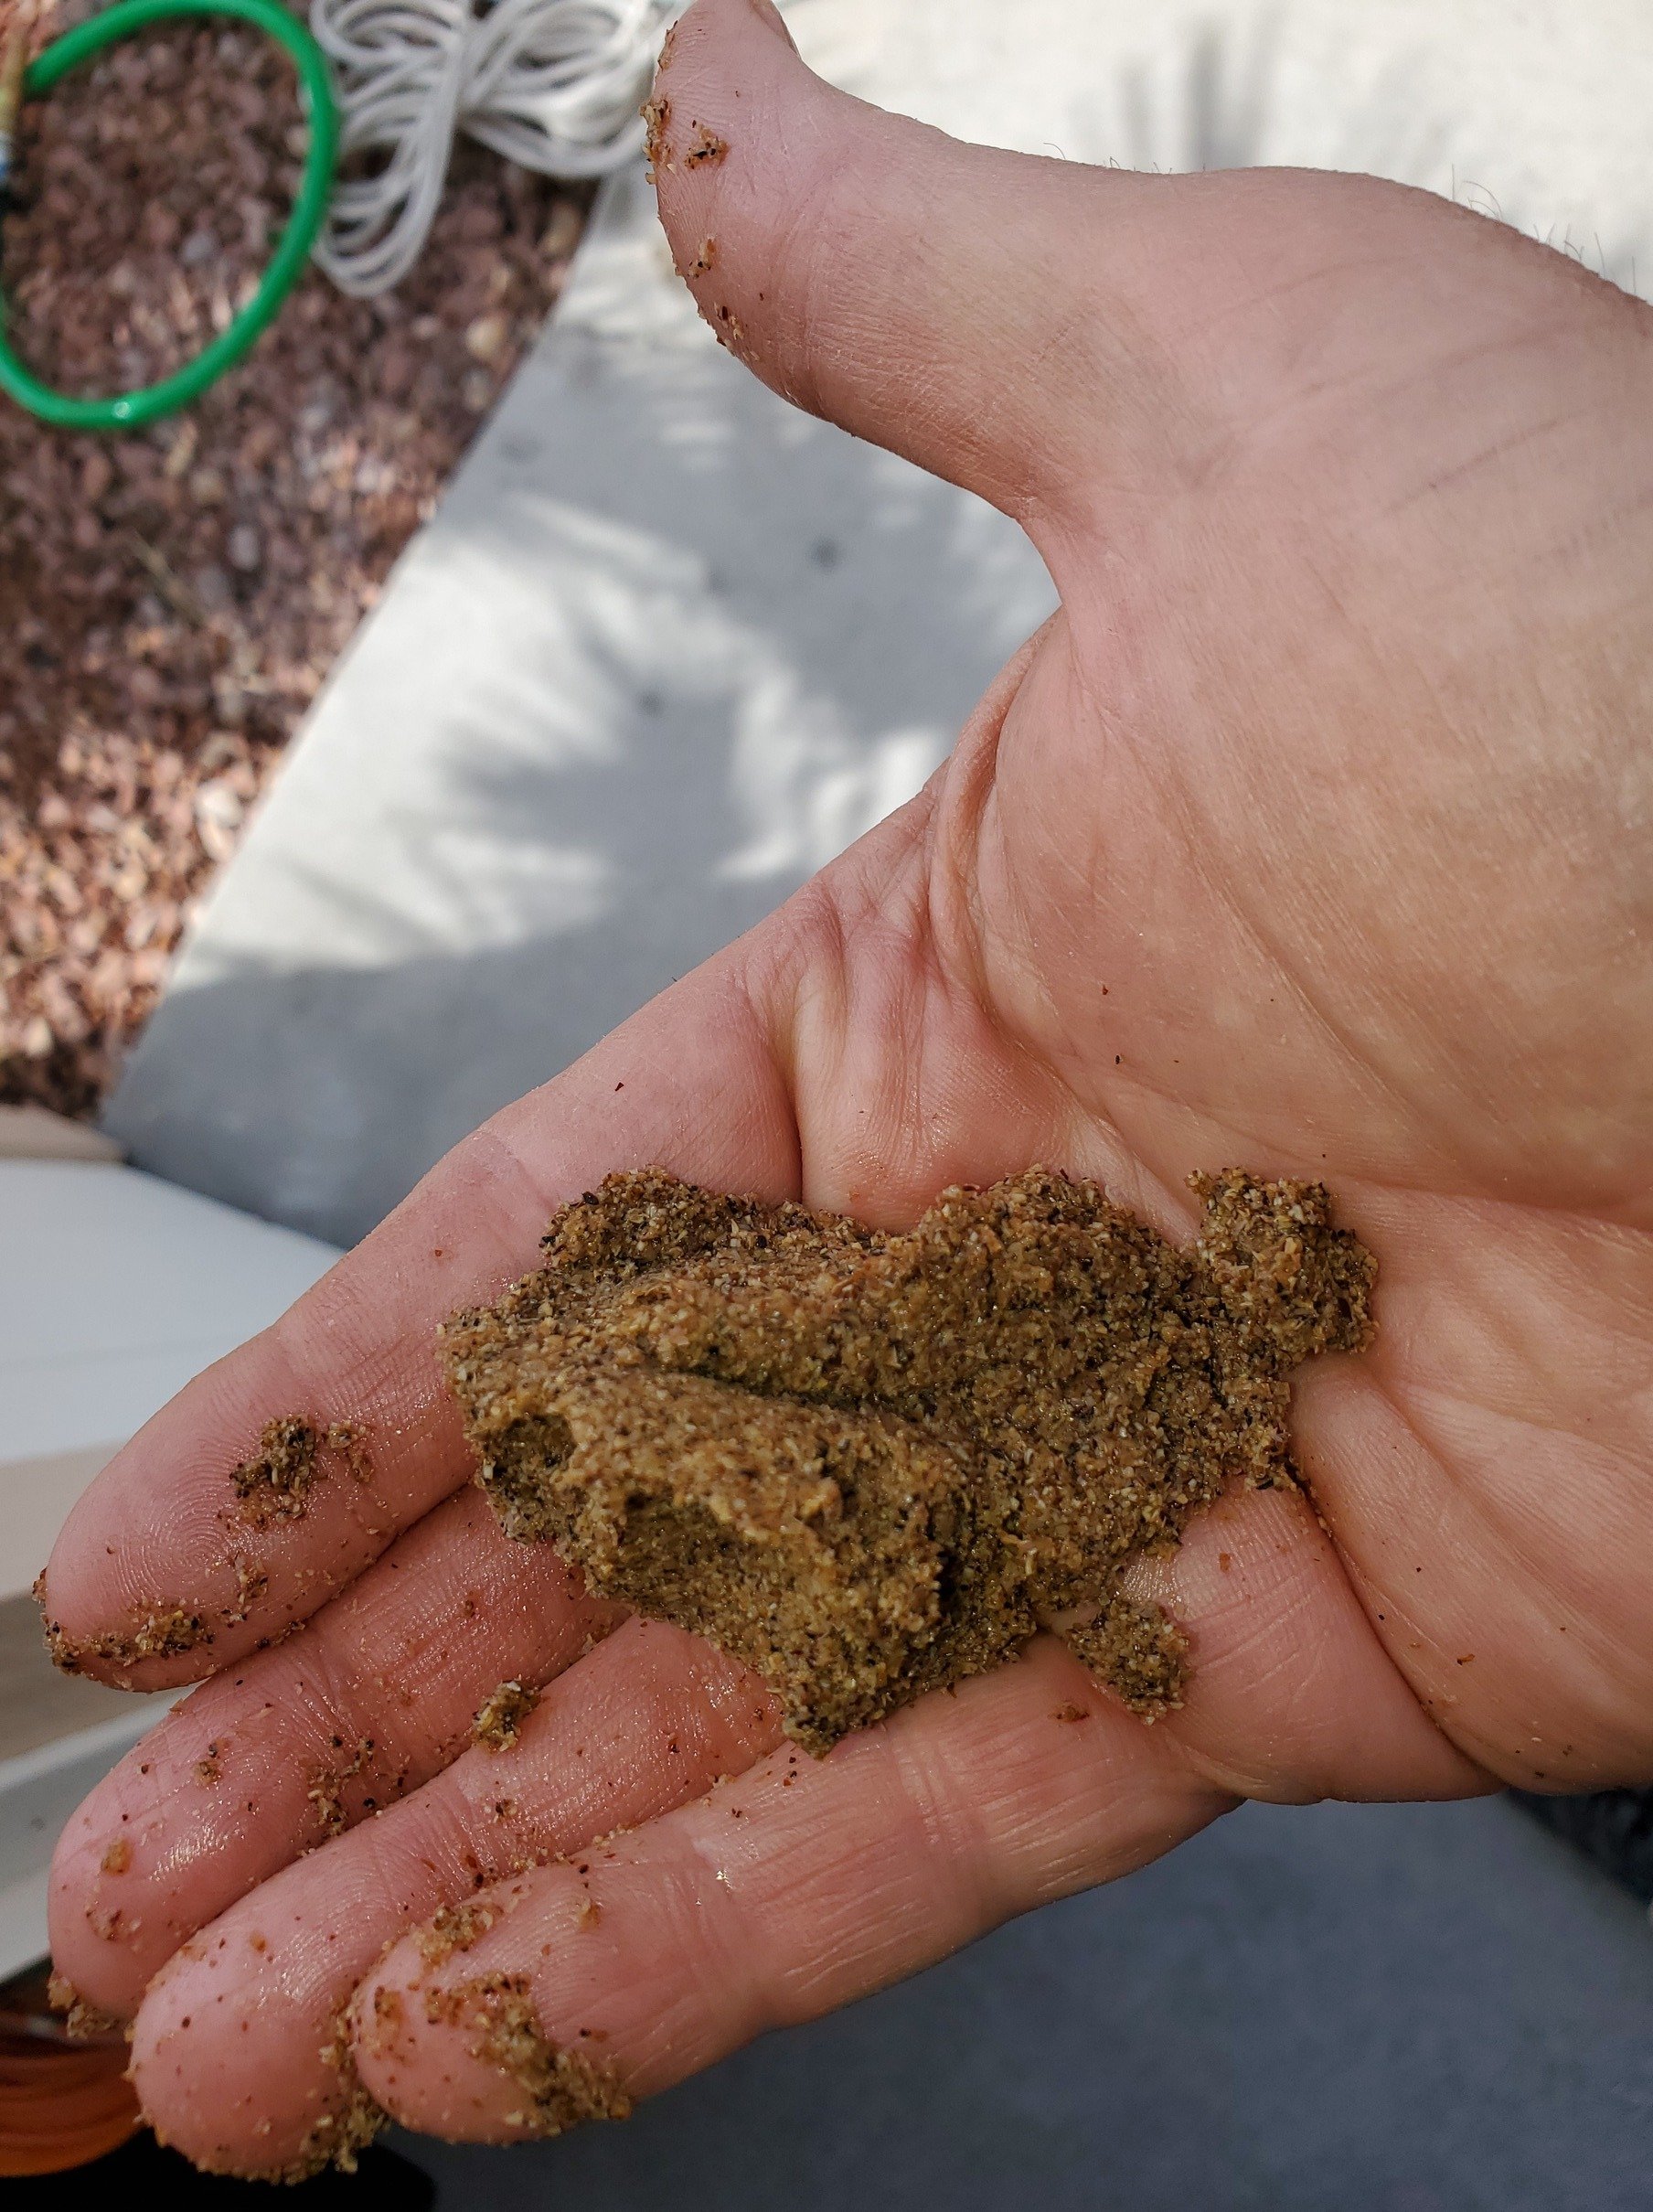
OK here I am with results of my 1st brew day with my new BIABasket rig. I think it was a huge success actually. I conditioned and milled the grain at a 0.035" gap, and it looked good so I did not run it through the mill a second time. The mash was done in 40 minutes according to the iodine test, but I let it go 60 minutes. I had to apply a little propane heat every 20 minutes or so to keep it at 153F. The handful of trub is the material that got past the 800 micron grain basket, which I caught with a 400 micron hop filter. The recirculation worked well…the injection pipe kept the wort moving throughout the mash. No problems with clogging at any time during the mash, or through the chiller. After 60 minutes I caught the bittering hop trub with the 400 micron filter, chilled the wort to 170F and did a 20 minute hop stand. I recirculated during the hop stand and the temperature dropped to 162F by the time it was done. Then I filtered out the hop trub again and chilled the wort to 65F into my fermentation vessel. I measured the cooled wort OG at 1.058, and came up with an efficiency of 85%. I am very happy with how this turned out.
Addendum of Lessons Learned;
- I did not account for the water loss during the time heating to mash out temperature, and for the hop stand, which together totaled about 40 minutes. Although not at boiling temperature, there was still some loss, which explains why my volume into the fermenter was 5.25 gallons versus the goal 5.5 gallons. I plan to top off the fermenter to 5.5 gallons. This would also mean my OG value would decrease some, and my efficiency. I think I am probably still better than 80% on efficiency.
- I added 48F grain to 163F water with a resulting mash temperature of 158F…too hot. Some stirring and fanning got it down to 153F in about 10 minutes. I’m sure this happened because my setup has a lot of mass (heavy duty burner frame and SS keggle), so there is a lot of thermal energy storage. Next time I’ll use a lower water temperature, depending on grain temperature of course.
- I have more sediment than I am happy with, which I am pretty sure is grain flower, in my end product. I believe I caught most of the hop trub with the 400 micron filter. I recirculated during the mash at full pump flow, resulting in little or no filtering of the grain bed. Next time I will slow down the recirculation rate near the end of the mash so that I can catch some more of the grain flour trub before mashing out.
4 Likes
Good on you! Sounds like your project finally come to reality.
Yes finally I am brewing with this rig. Took me about 6 months to redesign/fabricate and get everything just right. I learned a lot on brew day one, and I’ll incorporate those lessons into future brews. Overall I am happy with the outcome. I still need to make some minor adjustments. Thanks for your feedback/suggestions/advice, and everyone else that helped me. BTW, I updated my post to include the lessons learned. If anyone has any thoughts on my conclusions I am all ears. Cheers!
1 Like
Another update on my 1st brew day with my new BIABasket rig. After 4 days at 68F my Mike’s Wicked Ale primary fermentation appears to be done, with a gravity of 1.020. I stopped seeing bubbles/movement in the fermentation lock yesterday. When I opened the fermentation vessel the hop aroma (German Northern Brewer) was wonderful. I roused the yeast with a good stir and dry hopped with an ounce of Cascade pellets using my depth charge basket. Of course I tasted the sample……….amazing flavor. I’m super happy with how this is going. I’ll leave the Cascade in for 48 hours and then bottle this. Can’t wait to try the final product. If anyone is interested I’ll check in at that time with how it tastes.
2 Likes
Cool! Just a reminder to be careful with the yeast rousing - you don’t want to introduce oxygen.
2 Likes
Oh man…groaning into my coffee cup over here…again…
3 Likes
Thanks WMNoob, I was careful to stir without “churning” O2 into the wort. Thanks for the reminder.
Just dipping could introduce O2…
Sneezles61
Hey man! I am interested in a basket similar to what you have to use in my electric biab keggle. Where did you order it from, and would you mind if I borrowed your dimensions? I would need mine to sit up several inches higher to clear my element, but other than that it looks great.
Thanks,
Brian
1 Like
Utahbiodiesel has whatever kinda basket you need…
Sneezles61
Hi Brian. You can order the same basket as mine, or get it adjusted to your needs, by contacting Graydon Blair at Graydon@Utahbiodieselsupply.com. If you still need my basket dimensions, let me know and I can get that for you. Cheers!