Been reading the forums here and have realized that some of my off tastes in my beer are probably from my temps being too high. I am in California, so no basement, in the summer it’s a bit warm and in winter, the wife does not like the house less than 70 I also realize the temp swings in my house are not helping either… at night the temp can go down several degrees and during the day, the thermostat is off as well.
So, I know that most of the time, the temps on the plastic big mouth bubbler are about 73 as shown by the stick on thermometer. I was wondering what suggestions are out there to ferment and keep the temps down. I don’t have the option of getting another refrigerator to ferment in.
I don’t think it is my water as I fill from a multi stage water filter then use a campden tablet. How long should the water sit before I boil?
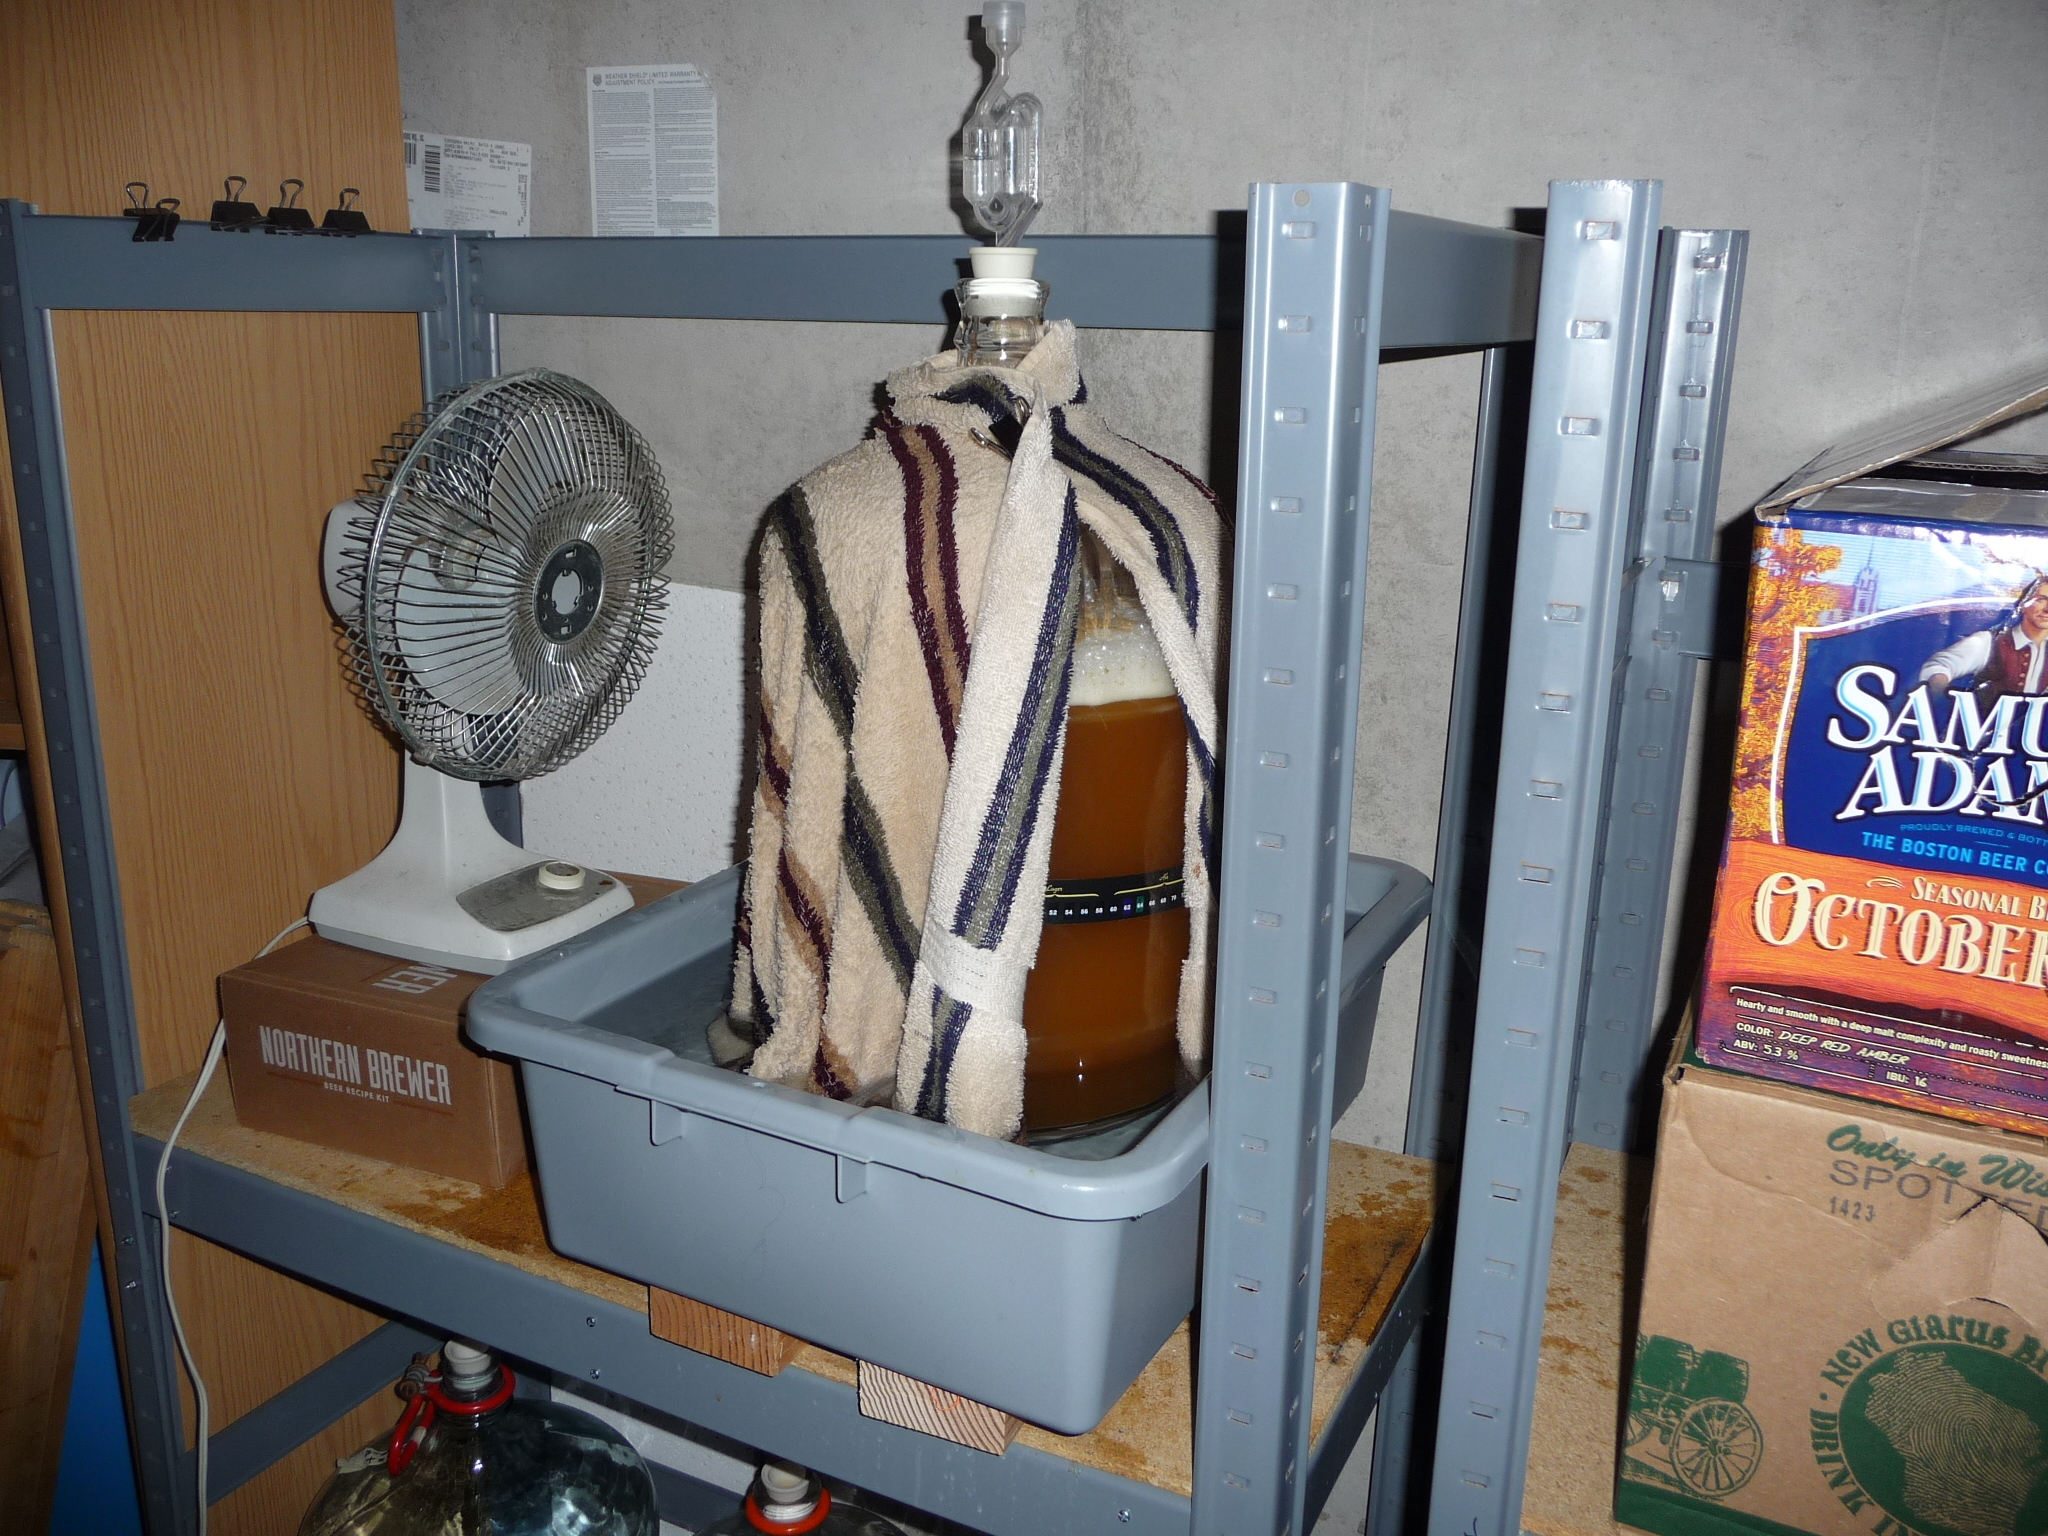
Water treatment with Campden tablets only takes minutes so you are good there. The most economical method of keeping the fermenting beer temperature regulated is a swamp cooler. Basically putting the fermentor in a tub of water. The bulk of the water volume will negate temperature swings. Further cooling can be achieved by cooling the tub of water with plastic water or soda bottles filled with ice. Another method is to have a cotton towel or sweat shirt covering the fermentor and directing the air flow of a fan on the wet cotton. The increased evaporation will cool the fermentor. This is my favorite method. I can get a 5° to 8°F temperature drop with an ambient temperature of 68°F. Don’t cover your thermometer strip with the towel or have it in the air flow from the fan. This will give a false fermentor temp reading from being cooled.
Make sure you chill your wort to the low end of the yeast temperatures range it will help to control the temp rise . its hard to lower the wort once it takes off.
thanks for the suggestions, all. I usually only get it down to 80 using my copper wort chiller. flars, I like the simplicity - do you do that the whole time it’s in the fermenter or just the beginning?
I am starting to think I might need “more power” though for summer as my house heats up to 80+ for most of the day because I am cheap and don’t want to run the AC.
Usually only use temperature control for three to seven days. Depends upon the OG. Higher OG means more yeast activity producing heat for a longer time.
You can use an aquarium or fountain pump to recirculate ice chilled water held in a bucket after you get your wort down to 80° with tap water. Chilling the wort this way would be most efficient to have two copper chillers. One in the wort and one in the ice/water bucket.
Hi, I don’t know why but I am having a hard time visualizing this one. I am sure it is simple but my mind is just not going there. I think I am stuck with the idea of the water hose screwed to my chiller and watering my plants with the discharge water.
Your feed water would enter into a copper chiller that is submerged into a bucket of ice/water. You would then hook that chiller to the wort chiller in the kettle. You could still use the waste water to water your plants.
Depending on your ground water temperature a plate chiller may not be any more effective. It can only chill to the temperature of the chilling water source.
Correct. Personally when I use an immersion chiller (usually use a CFC) I will cool with my ground water until it’s about 80°. I then use a utility pump (1500gph) in a bucket of thick ice water to pump through the IC (also do it with CFC for lagers) to bring it down further. You’ll get more efficient ice use this way. By doing this I have dropped by wort temp to 38°. That was a little to cold.
I’ve been using a short pre-chiller 60 inches of SS tube in a five gallon bucket with a small bag of ice and enough water to cover the ice. It then hooks direct to my wort chiller. I start out with a fairly high water flow then start slowing the flow as the wort gets down under 90*. This gives the incoming water time to cool in the pre-chiller. You can feel the temp changes as you slow the flow. This gets me chilled wort in 10 minutes. In St Louis summers.
Thanks for the suggestions on chilling wort. If there are pictures of these things and how they are hooked up, that would be awesome. I have been brewing for a couple years, but never got into the counter flow chillers and plates so I never saw how they would hook up and work their magic.
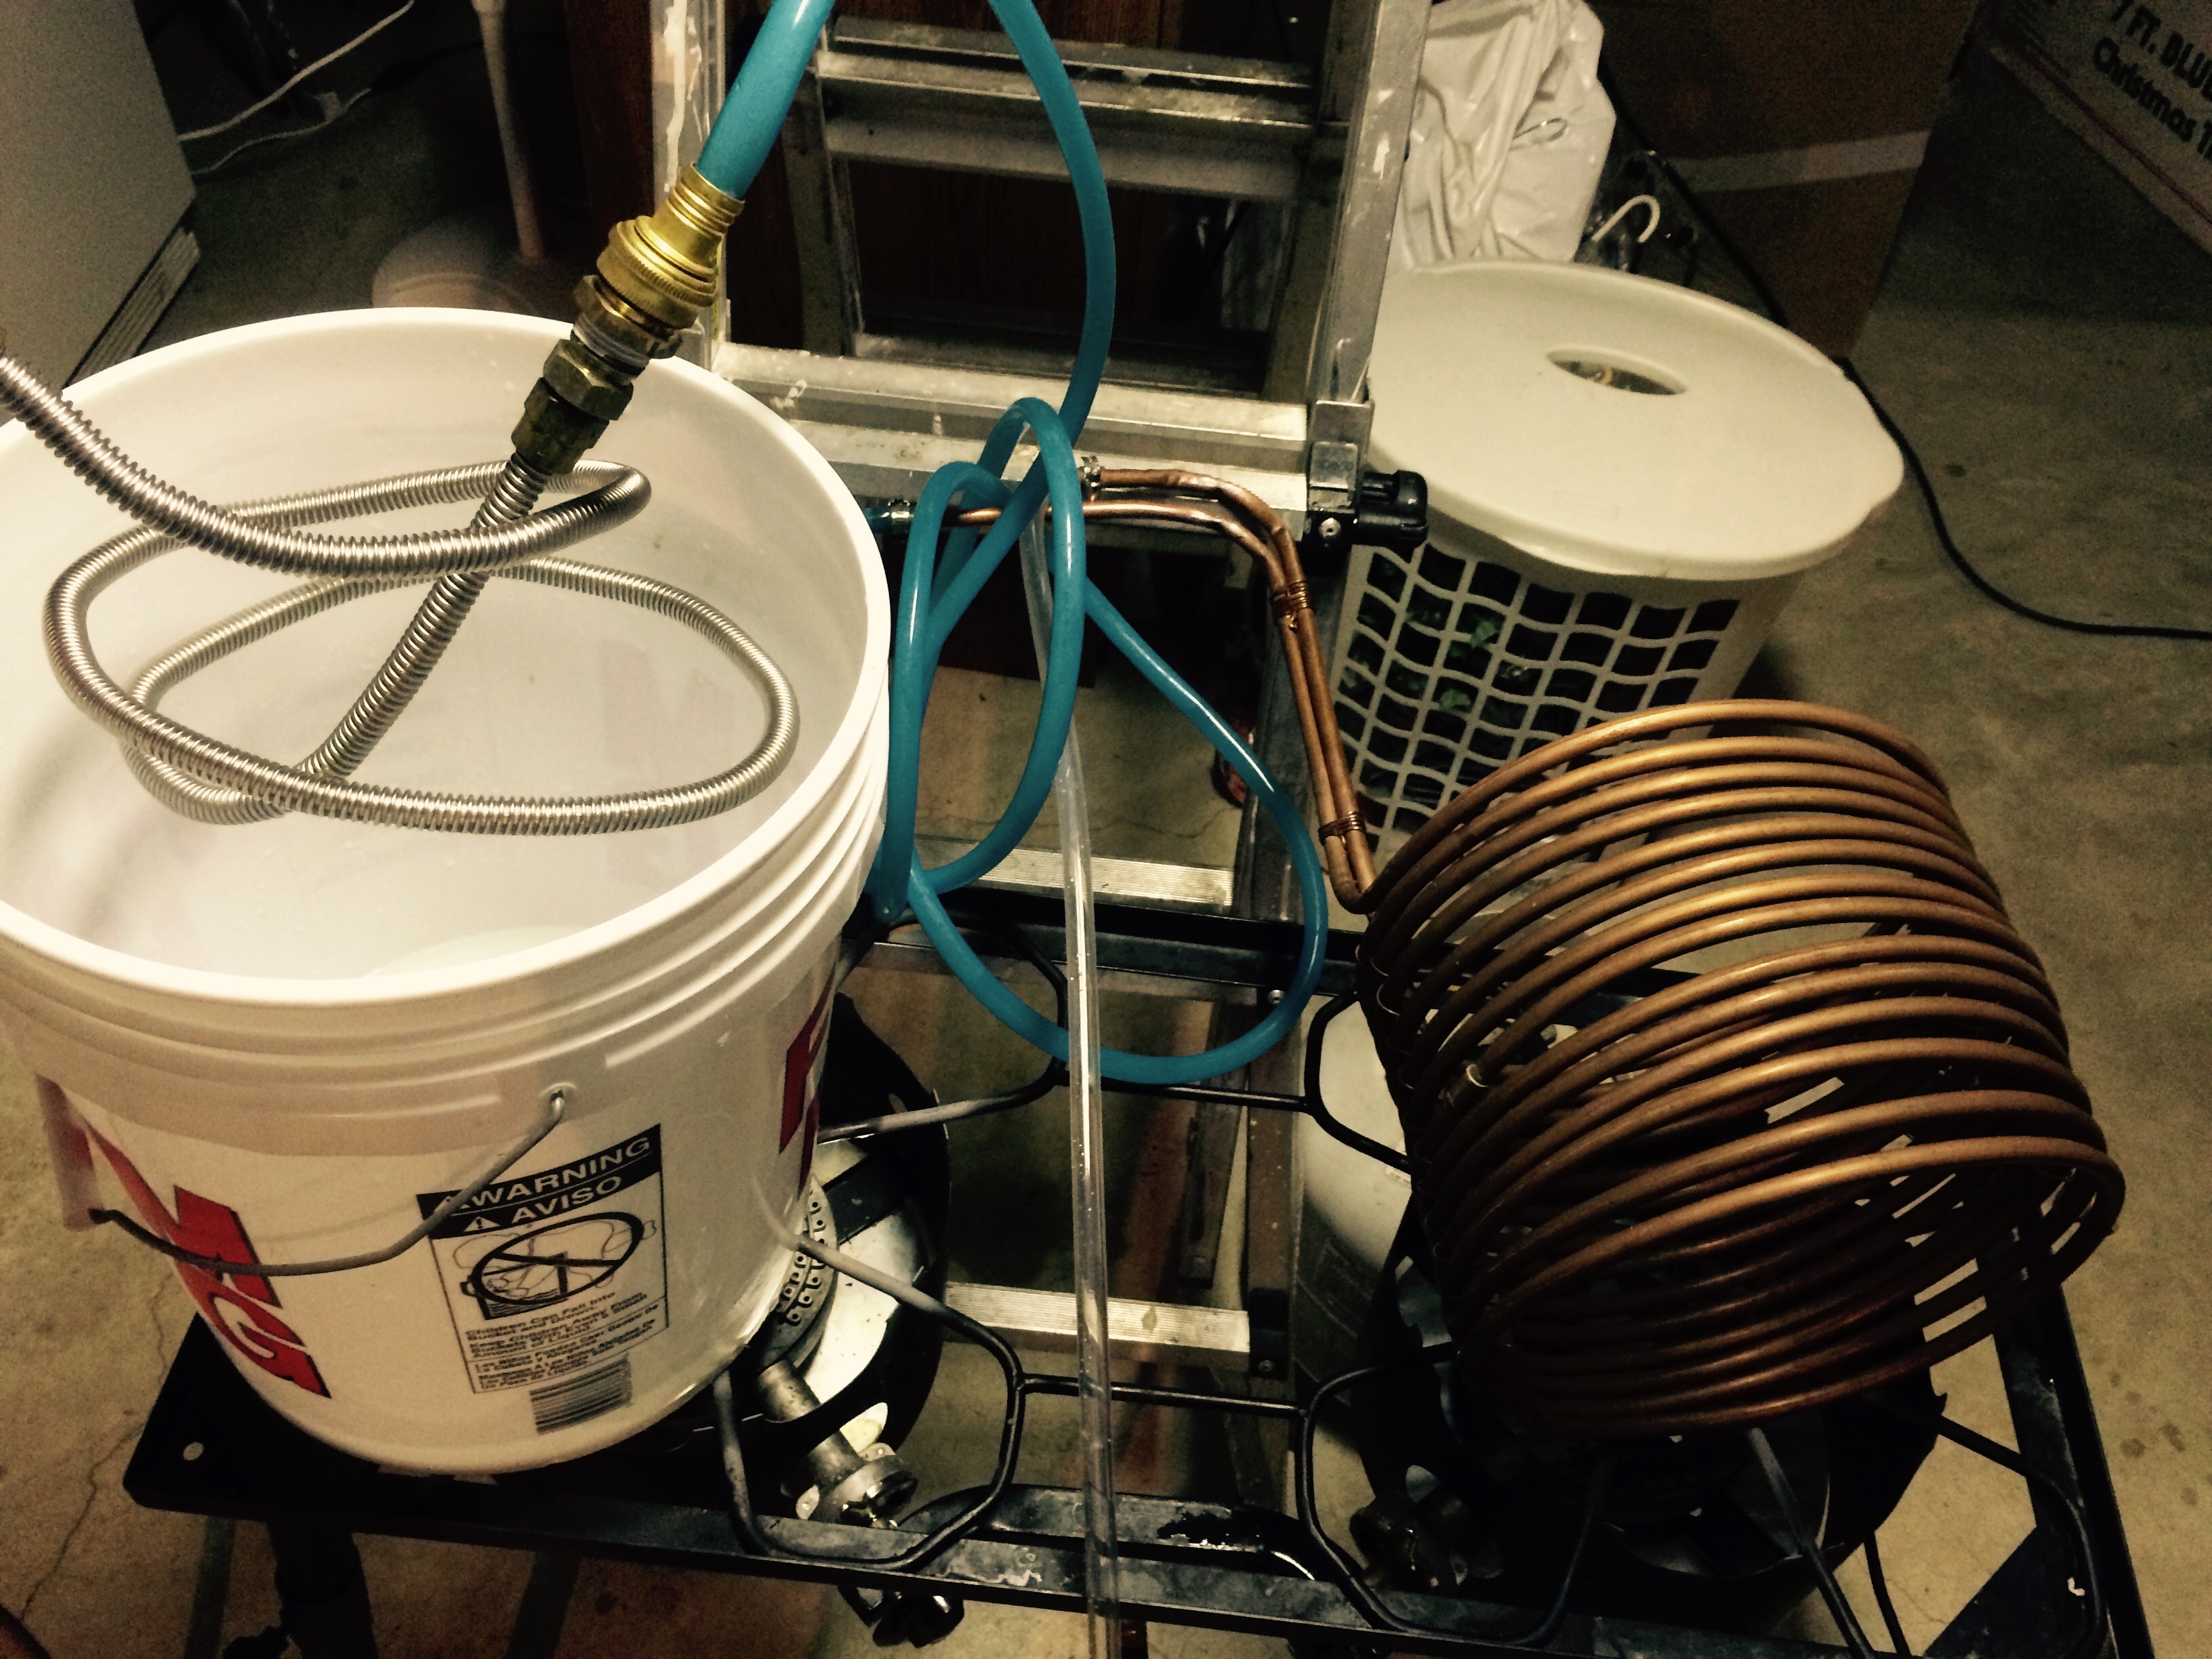
The stainless steel was surplus, yes it’s crude but it works. The copper is 50 feet of 3/8" that I coiled inside of a 5 gallon bucket as a form then used copper wire to hold it together. Garden hose feeds the pre-chiller then the blue line feeds the copper wort chiller. Then clear line goes to drain "it will be very hot at the beginning ". This copper wort chiller works really well, but if I were to buy material for the pre-chiller I would make it longer , maybe 20 feet.
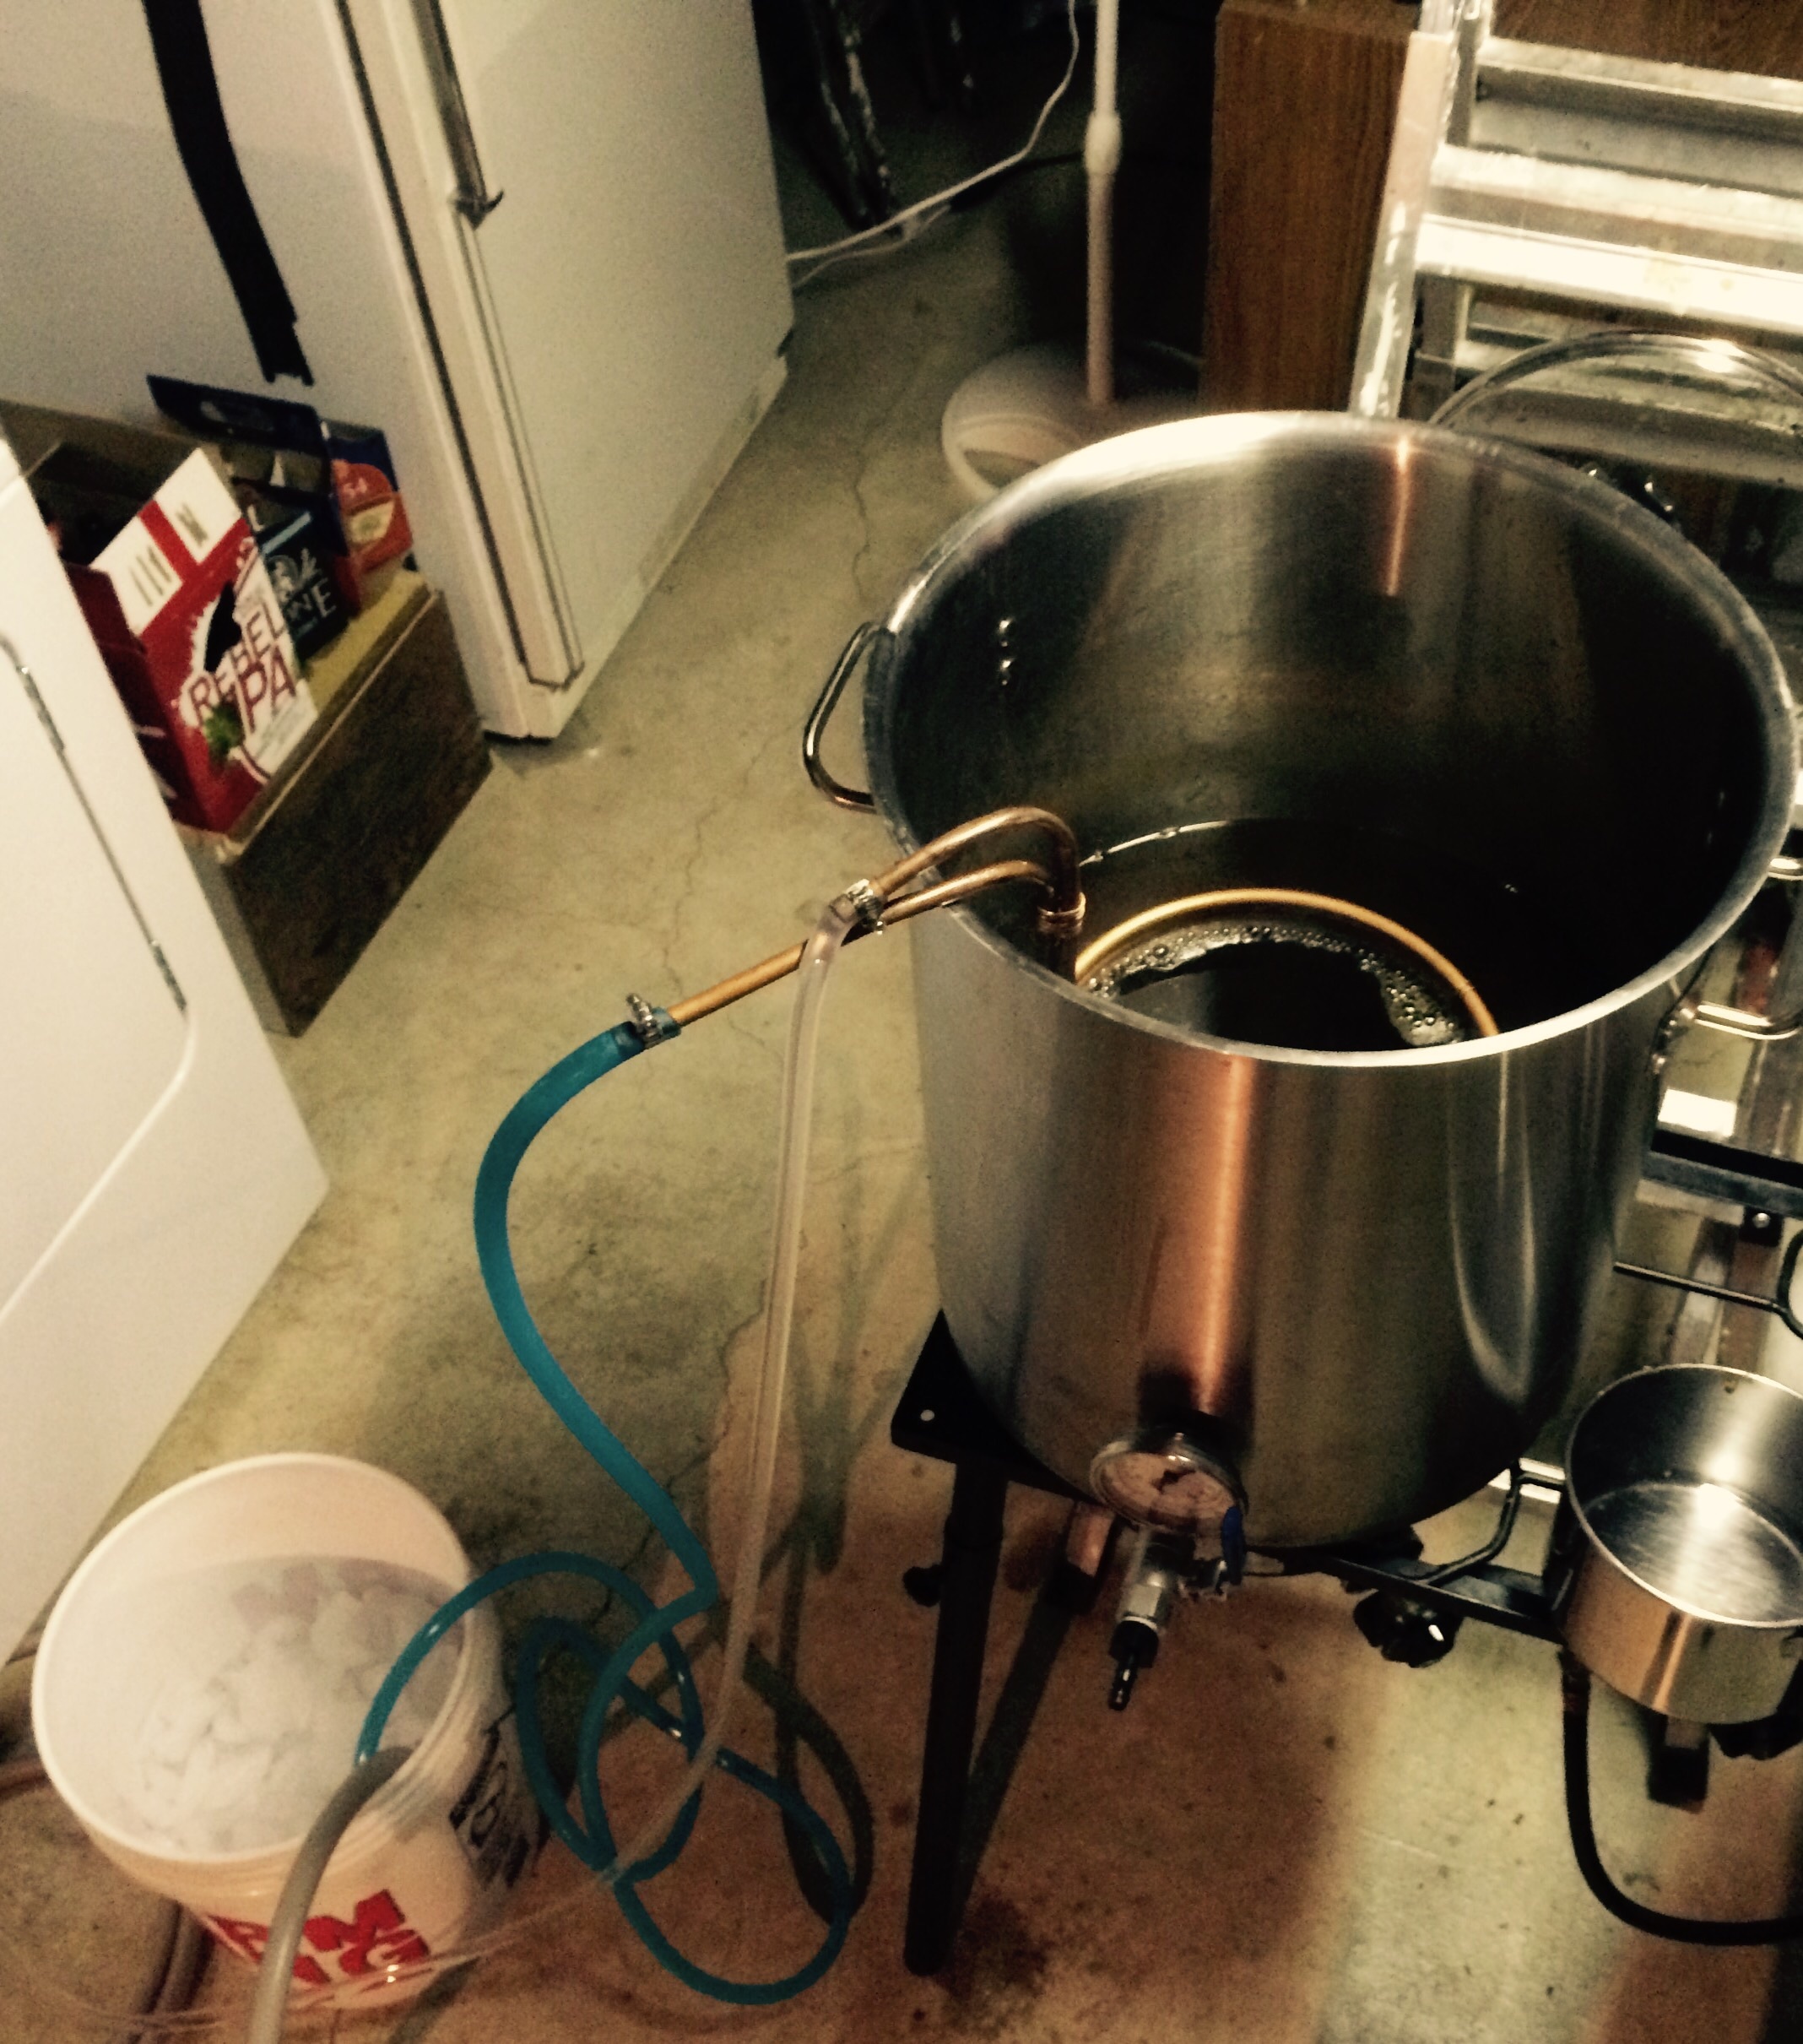
This is a pic of my setup in action, not a good pic because of the angle. That’s a 15 gallon BK on the two burner camp stove and the white 5 gallon bucket on the floor has the pre-chiller in it. The burner on the right has a 5 gallon pot used to heat sparge water then water for cleaning and sanitation as I brew.
 I also realize the temp swings in my house are not helping either… at night the temp can go down several degrees and during the day, the thermostat is off as well.