Welcome to all grain and a more efficient brew day! You cut your brew day almost in half! That’s awesome! I’ve been AG brewing for about 15 months now and love it. I also used to take many hours to get through brew day. Hauling kettles of water and wort out to the cold and windy open porch to heat up on my propane burner and then hauling it back in for mashing, etc. was a huge waste of time and never had any time to do some clean up during the process. Now I can get most of my equipment cleaned up by the end of the boil. With 15 minutes of setup the night before and 1 hour of additional cleanup after yeast pitching (boil kettle, tubing, hauling spent grains to the compost pile, etc.), I’m still looking at over 4 1/2 hours for the entire process. I’m also no longer picking up heavy kettles of liquid either. My new system transfer all liquids by gravity or pump.
I’m not one to ever leave well enough alone though. I still see some inefficiencies in my process and plan on a few more minor design modifications. The focus will be on the cooler MT this time. I currently have 1 hole in the lid where I have a piece of tubing running through it for a temperature probe (thermocouple). I plan to have 2 more: 1 for transfer of strike and mash waters directly from the HLT to the cooler MT. The other will be hooked up to the pump tubing for wort circulation (vorlauf). Tubes have a tendency to flop out of vessels and therefore have to be observed. Securing them this way frees me up to do something else such as more cleaning, or maybe have that bowl of cereal
A bit off the subject, but I read something on a different forum a number of months ago and had to try it. Somebody have drilled holes in the edges of their cooler MT lid and filled it with foam sealant like Great Stuff to improved insulation and reduce heat loss. I went from losing at least 4 degrees during the 60 minute mash to just 1. This might not sound huge to anybody, but I like fuller bodied beers and tend to not mash below 154 degrees. So being able to start at a preferred temp and keeping it there is important to me. Besides, hotter wort in the kettle means less time to boil. Every little bit helps!
My next brew day I should be pretty much exactly half of my old brew days. Of course, it ran me a few bucks to get to this point, but when my brother bought me an Edelmetall Bru Burner for Christmas, I just had to get back into it in a big way. My first brew day of this year I didn’t have a HWT/HLT, just a half-baked MT, kettle, burner, and chiller. It was a near disaster the whole way, but I saw most of what needed addressing to streamline the process as much as possible with my situation. I could really use a grain mill, a pump, and a dedicated brew sculpture, but that will come with time. For now, it’s a little more work, but it works.
My HWT/HLT is a Rubbermaid cooler from Home Depot, 45 quart. Not very well insulated, but it doesn’t have to be, it’s just to hold my strike water long enough to batch sparge. For the time being, I just clamped a piece of tubing on the drain and used a ball valve for 1/2" PEX tubing.
My MT is a Coleman Extreme cooler from Wal-Mart, 72 quart. Seems to be holding the heat well, but I think I want to get it fitted with a temperature probe so I can monitor the mash temp. I unscrewed the drain (first batch I tried clamping tubing on the existing drain but it didn’t work out well), ran a stainless pipe nipple through the hole with a stainless coupler on the inside and a lead-free brass ball valve on the outside. All 1/2" tubing. Used a 3/4 PEX to male pipe thread connector to connect up the stainless braid. Worked out well. Thought about putting a hole in the lid to run the sparge water in, but I like to stir the mash around after adding the sparge water, so I don’t think it would make much difference.
With this setup, as soon as I was done with the HWT/HLT, I took it down, opened it and let it drip-dry. Soon as I was done draining the MT, I cranked up the burner and hauled the MT down to the compost pile. Took it back and cleaned it while the boil was going. By the end of the boil, I just had the chiller and kettle to clean. Since I had the hose out, I took care of that as soon as the wort was in the fermenter.
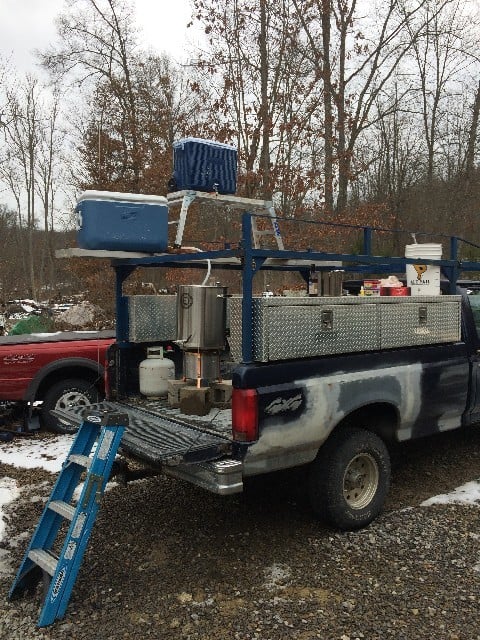
Maybe you could drive through the car wash to clean up. Looks like my old truck. 94 F250. My grandson nicknamed mine Big Blue. That was a good truck, a workhorse
lol, with the ladder rack and CB antenna, car washes are not my friend. Mine is a 95 F-150 with the 300 I-6 that I customized a bit. F-250 rear leaf packs that I rebuilt with extra leafs, heavy duty front coils with load assist shocks, ZF-5 trans out of an F-250 with a custom shifter, etc. Basically it’s a one ton F-150, lol. My work truck, I call it the Blue Ox. My playtoy is an 89 Bronco II with 7" total lift and 35’s. The red Ranger in the background was a father/son project, had a HO 5.0L, fuel injected, AWD. Awesome playtoy till someone ran a red light and totaled it for us. I also have an 88 Bronco II, 94 F-350, 00 Ranger and half of an 89 Ranger (parts truck).