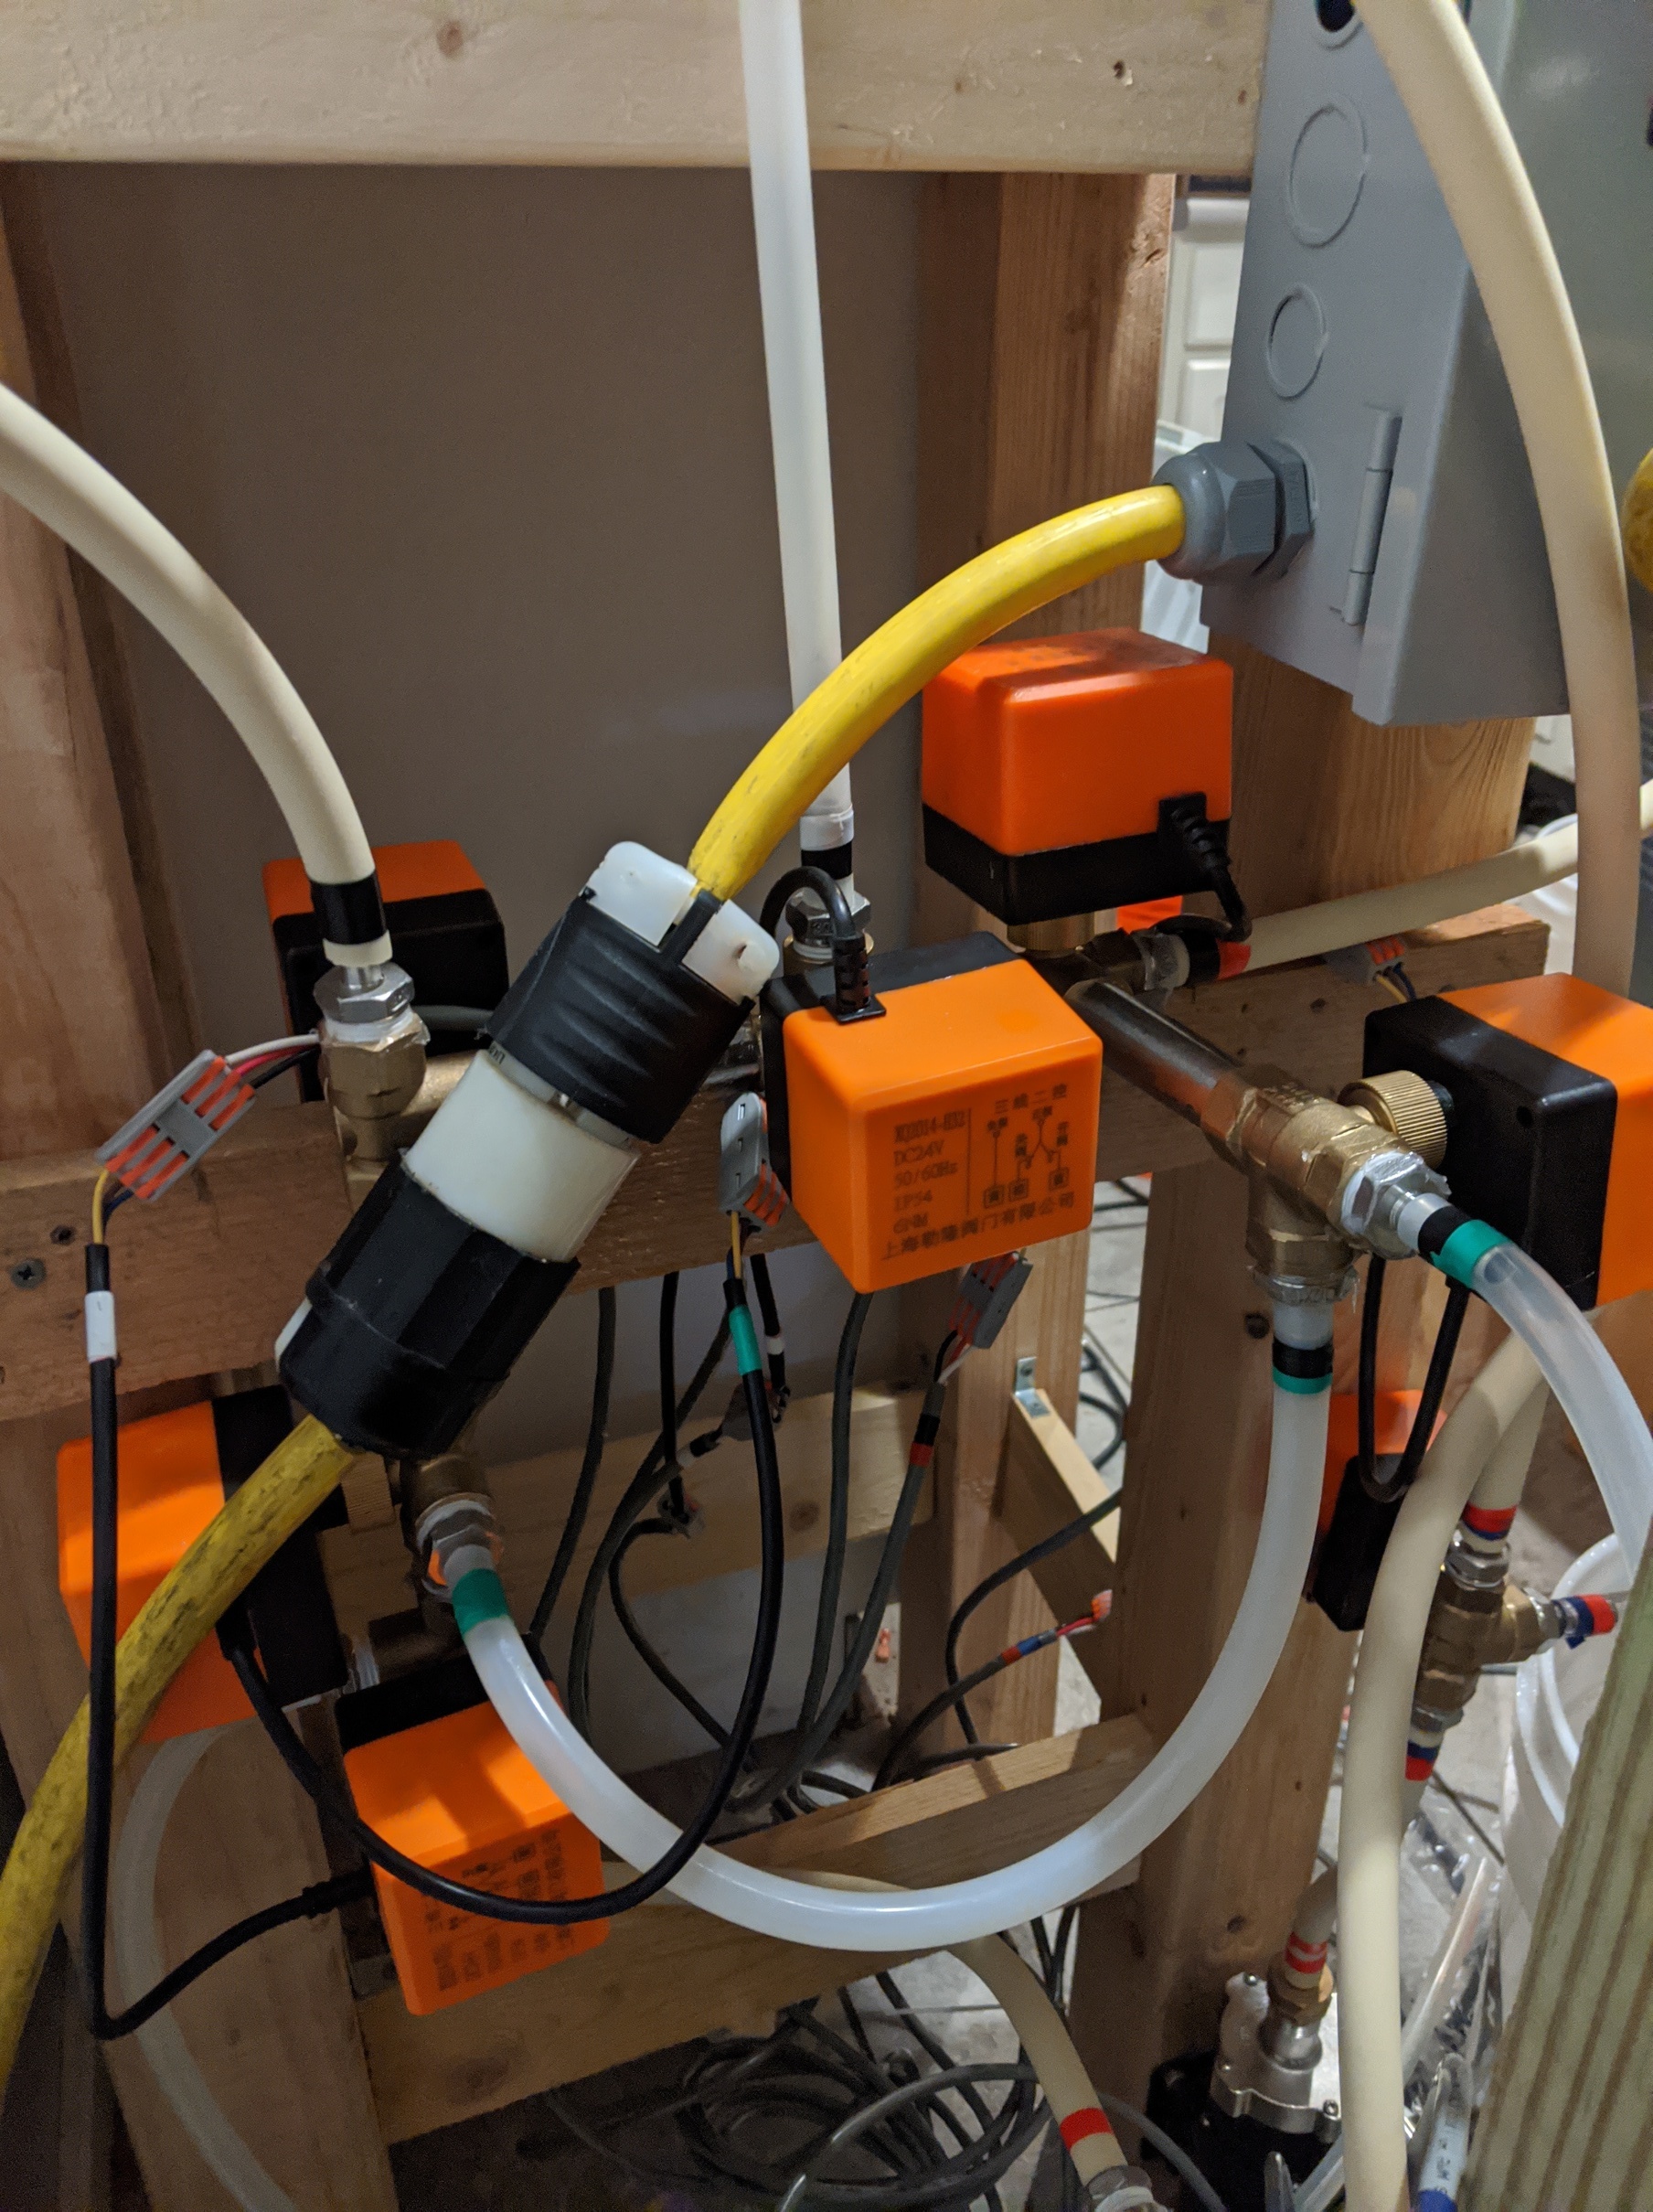
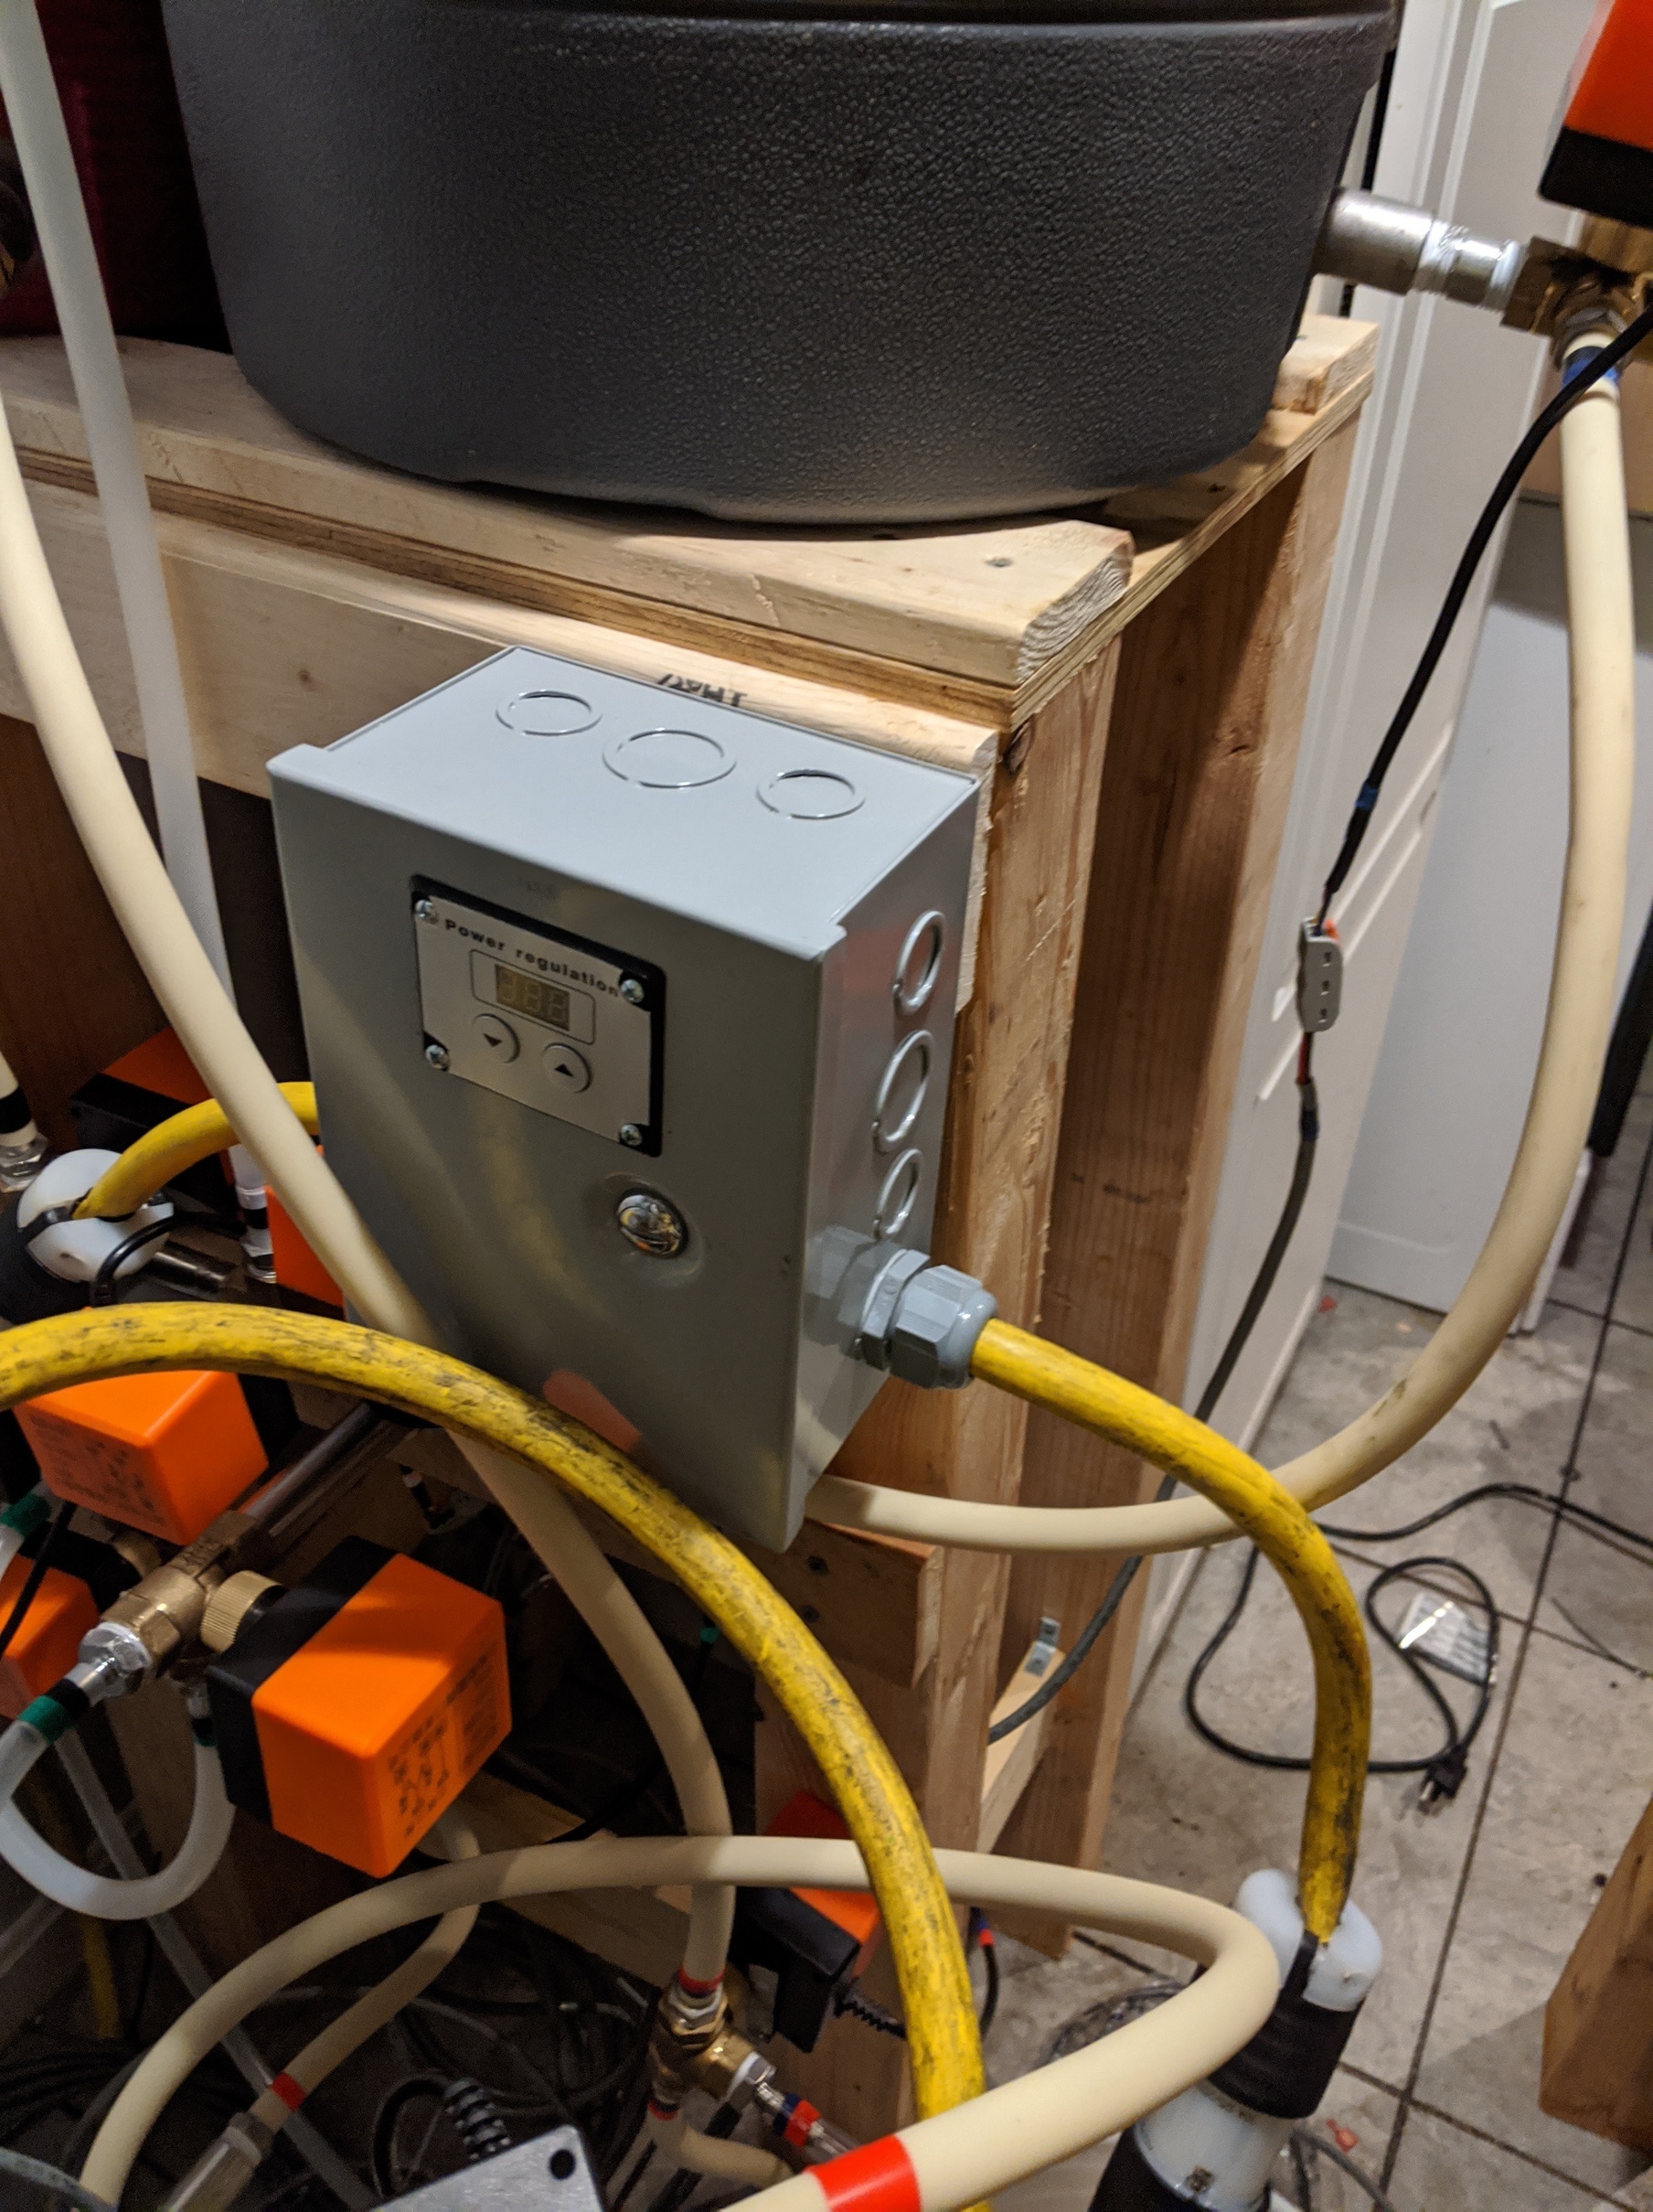
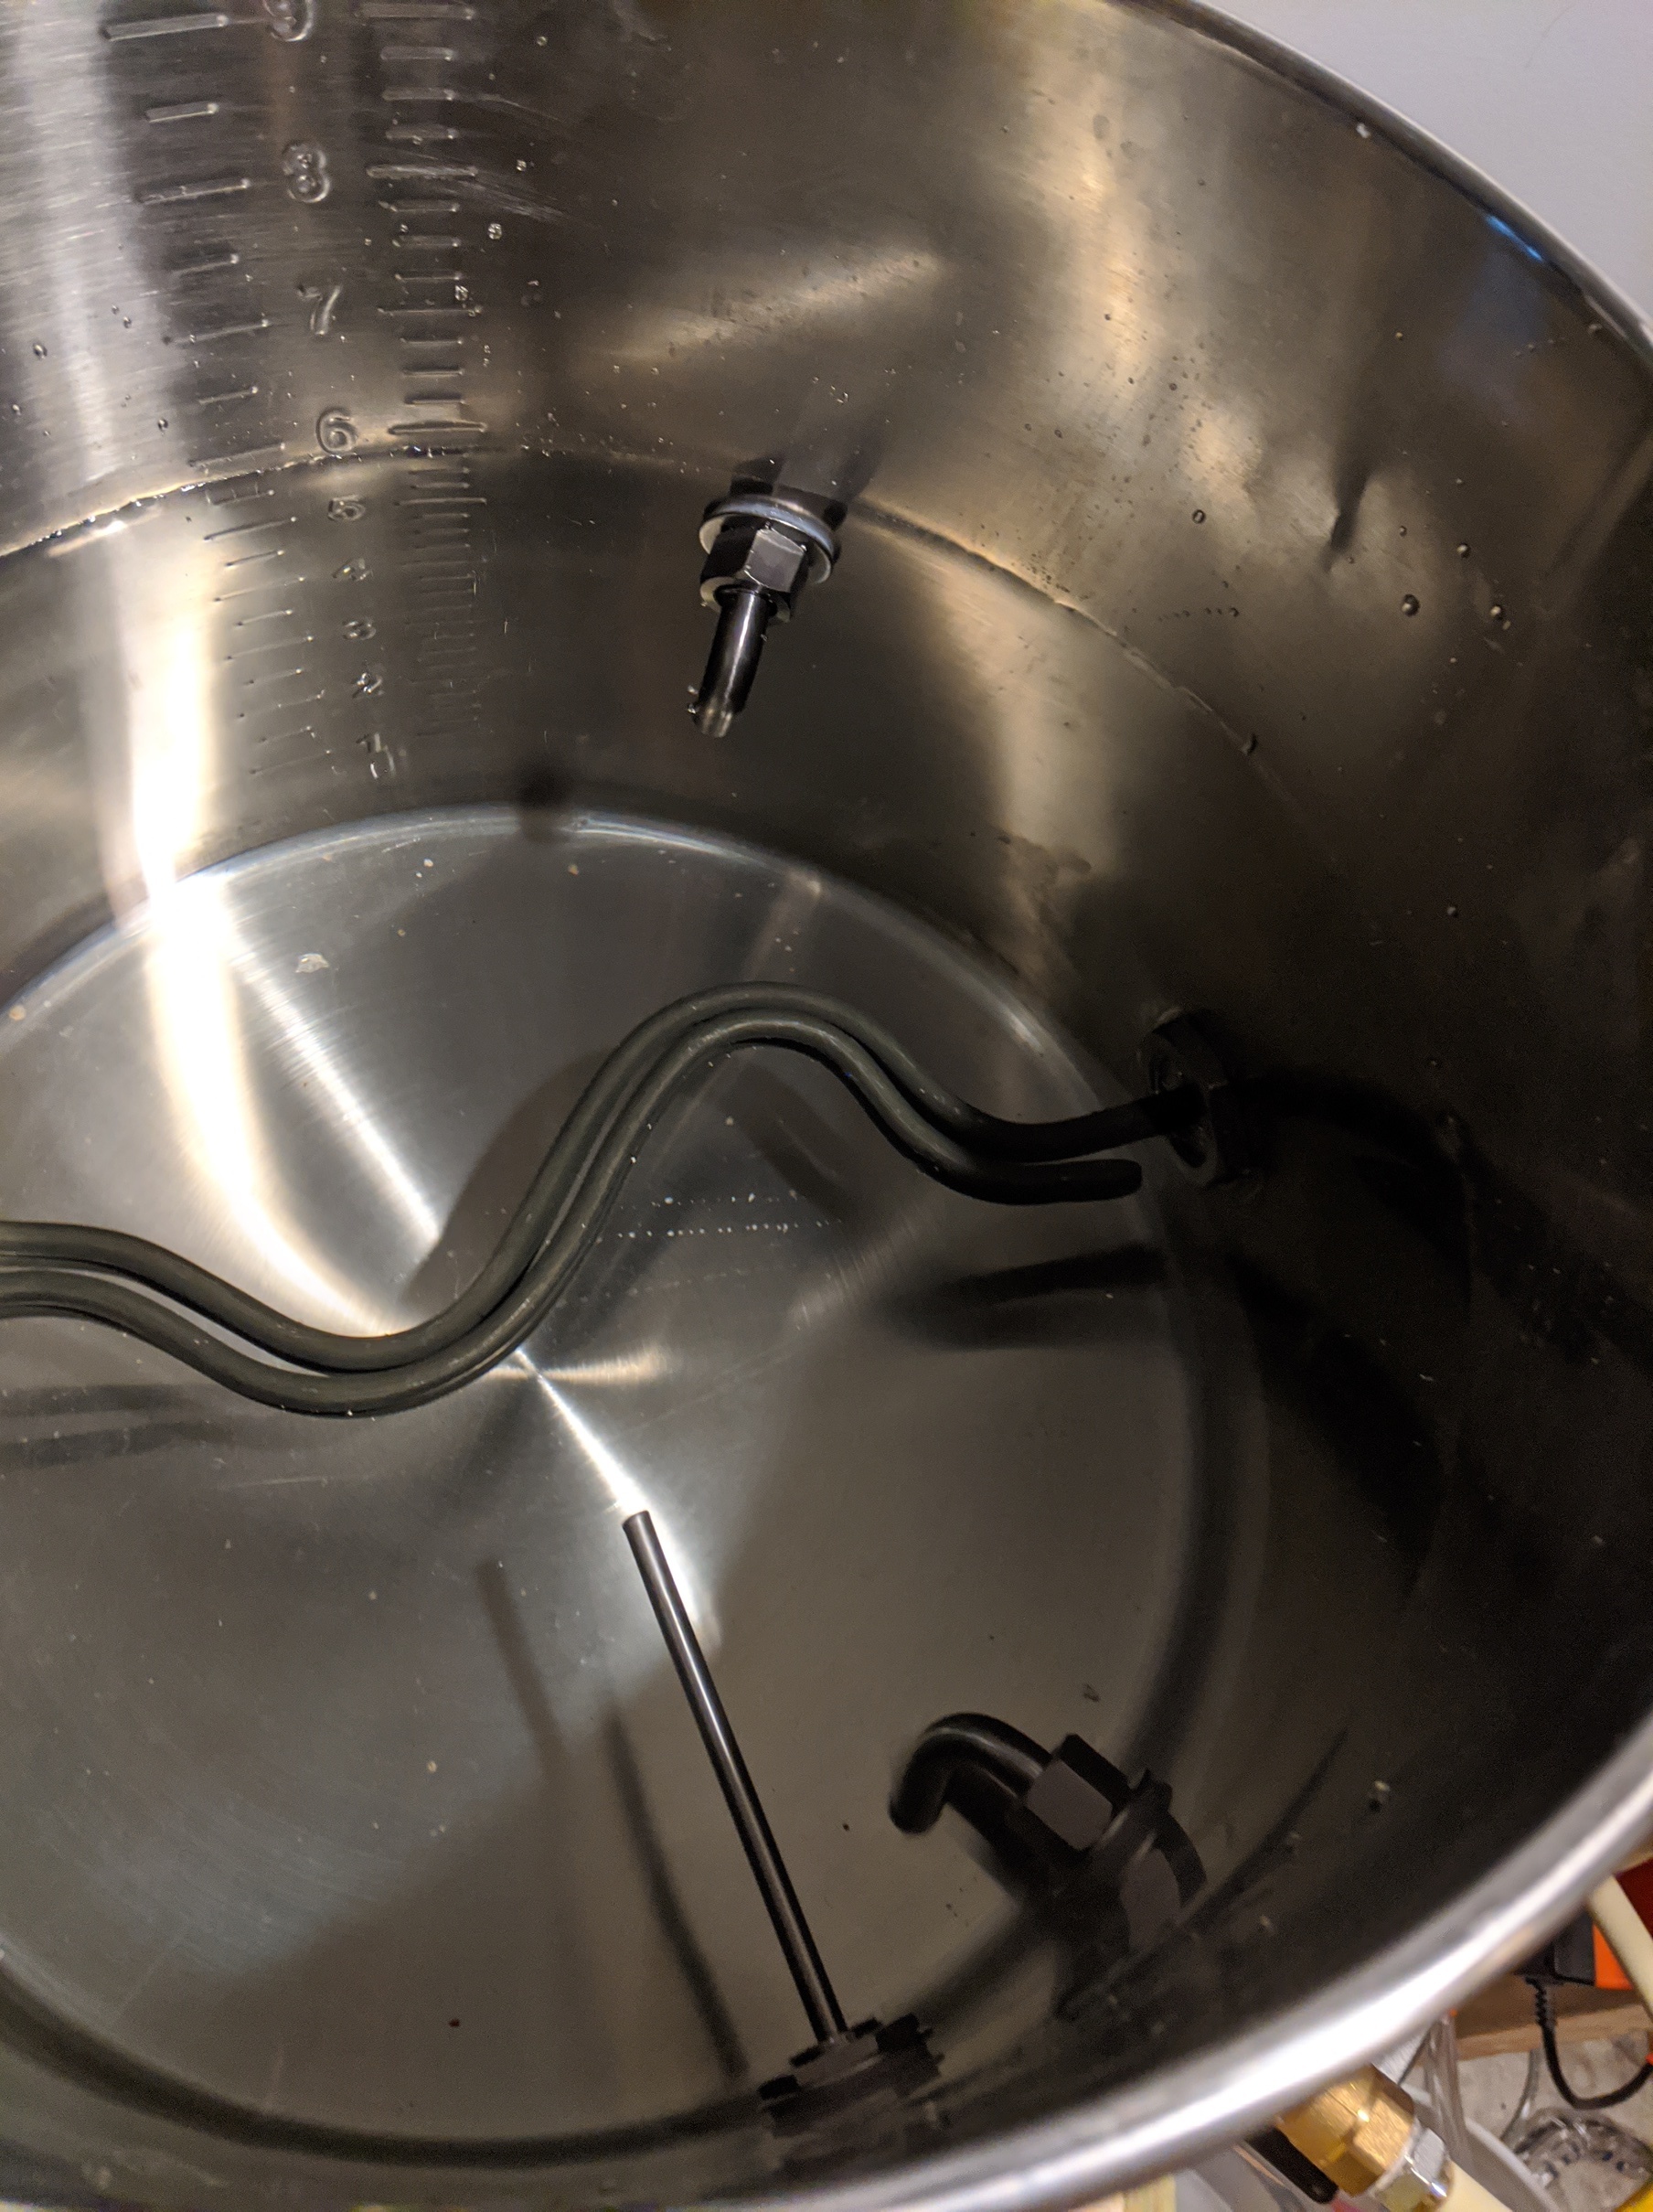
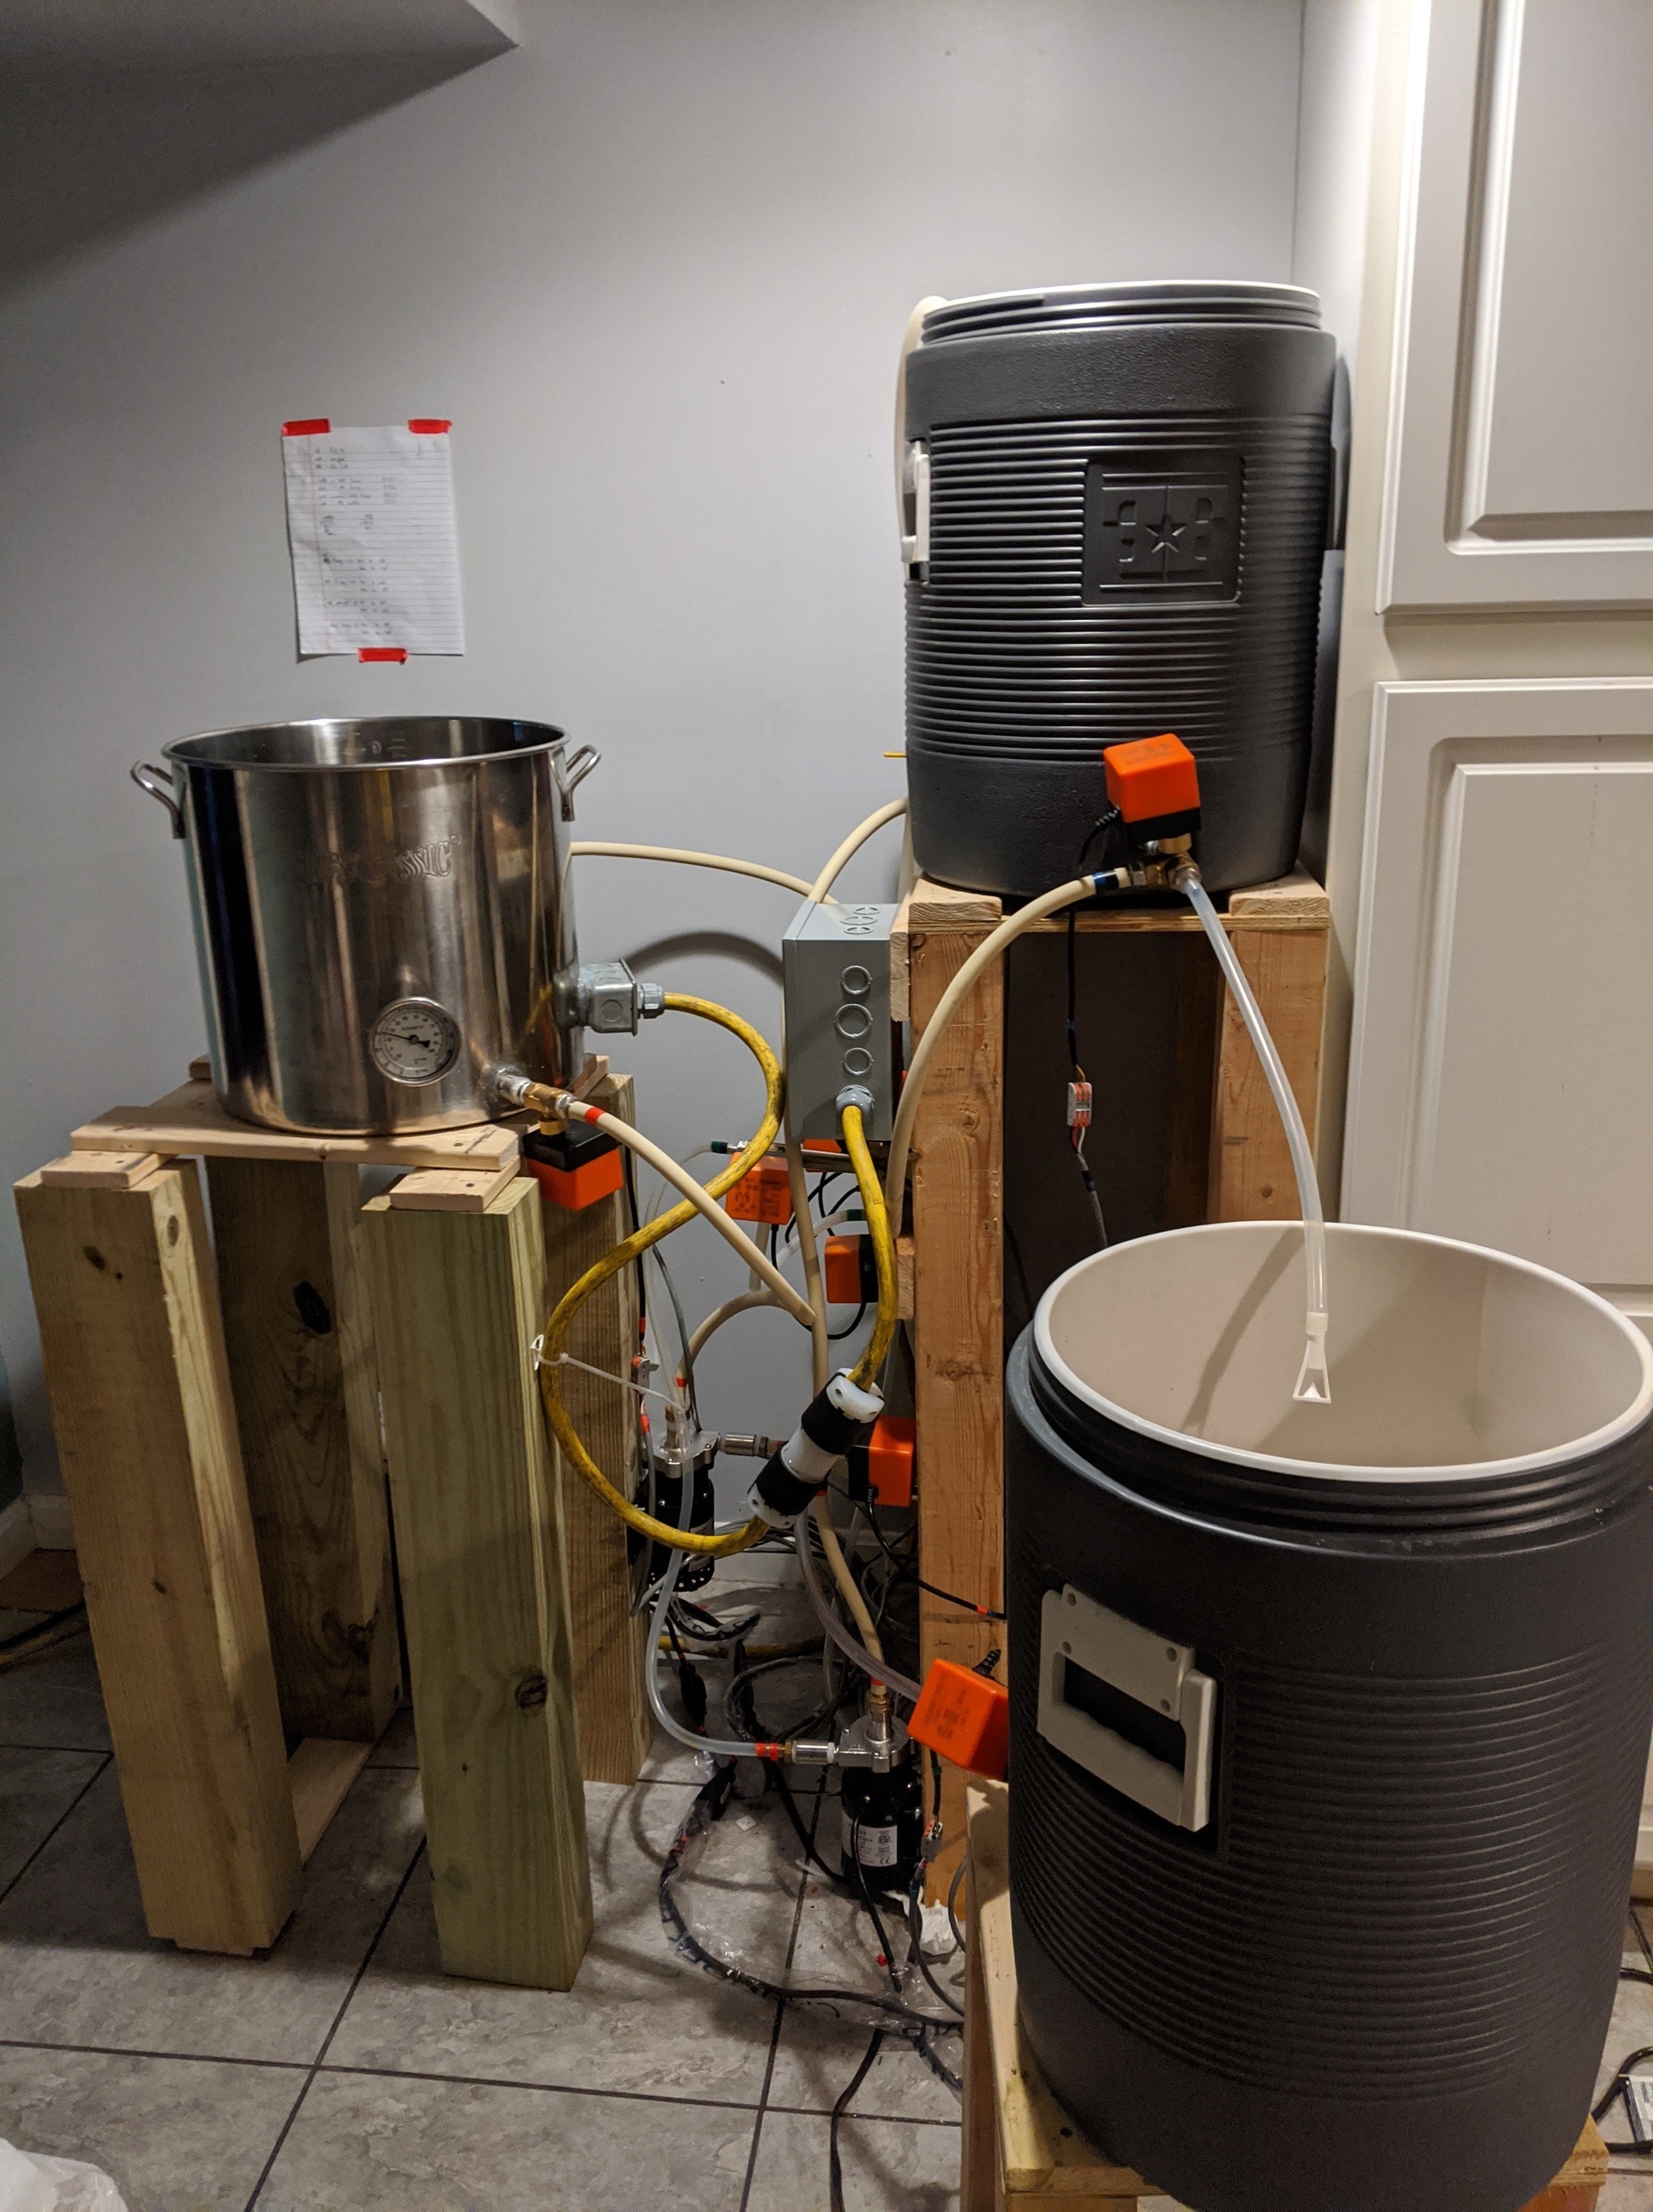
So I finally finished the second revision of my all electric brewery. 11 motorized ball valves, 2 chugger pumps, ULWD heating element with SCR control, ports with dip tubes on the kettle for outlet/inlet/whirlpool, analog thermometer on front of kettle just to double check the software.
Ability to heat water, send to MT or HLT, vorlauf, sparge, move sweet wort from MT to kettle, boil gently, and initiate a circulation for cool down (I still need to manually put in the immersion chiller for this step to speed up cooling) and send to fermenter
Custom software has been made (by me) with graphical interface, with wireless communication back to my laptop anywhere in the house. Kettle has been tested for water seal and heat. Going to test valve manifold and pump circuits with PBW this afternoon. Hopefully brewing a new batch this weekend or next! It’s a tubing/piping/electrical mess, but I don’t care about style points
HERMS on the mash side?
I thought there was a vid of a setup the guy just moved lids for his HERMS…
I bet it’d take many hours to bring the BK to close to boil…
I will say be careful using calcium chloride with the element in the kettle… I’ve scorched my second 10 batch… Great blue day in the afternoon…
Sneezles61
It didn’t take very long to make 7 gallons of 170 water, and basically that’s all I need for a herms. I have a second pot with my old heating element (the one that scorched my wort), so I will be turning the second pot into a HLT, adding an automated valve to the output, and putting a HERMS (probably just going to be an IC) in the HLT. Pump will circulate wort through the coil, back into MT. Then when done, send sweet wort to boil kettle
It will take rearranging of the valve manifold, but won’t require any additional valves. Actually it will probably result (according to my design) in me gaining an extra valve because I have designed it fully with 10 valves instead of 11.
I just didn’t want to spend that money right now. Spent enough converting to this setup, HERMS will probably be in 2021. Grain feeder/auto water/agitator are long term down the line
Haha I think we all suffer from the same problem… We just attack it in different ways. I mean I would LOVE a brew shed like yours rather than in my basement
I share the laundry room… It all works good here…
HERMS for the mash would actually be cool to use… Stepped mashing?
I like to watch someone building their idea…
Sneezles61
But without you guys, I wouldn’t have thought about a new heating element/scr control to save from scorching. Once I decided to do that work, I couldn’t resist ripping my entire brew setup apart and just rebuilding in a better fashion. Wasn’t super expensive but more than I wanted to spend (had to buy more I/O for my controller, lot of mechanical parts and tools for kettle alterations, and of course the 6 valves to add to my collection of 5 that I already owned). Lot of time on Amazon and ebay, lots of stuff from china, and luckily I owned a lot of spare parts that I collected over the years for my job. Still MUCH cheaper than getting an automated system already built. Plus since I designed and programmed it, I can alter and expand at will. Sometime in the near-ish future, I’m actually going to have a real mini brewery! Then I can only blame myself for bad beers…
I’m with Loopie… Now pat yourself on the back… Some peeps can’t build these types of things in their heads… A few are lucky they can get the vision…
A couple of brews and the wheels start spinning… What a great compliment to an exciting hobby!
Sneezles61
Where did you get the motorized ball valves? Are they actually solenoid valves? Are they food safe at the temperatures of the liquids they will be exposed to? I’ve been working on my next step of automation with a solenoid valve on my HLT that will open up at a specified time to drain the mash water to my cooler MT. Haven’t tried it yet, but it worked fine on the dry run. Thanks for posting!
They aren’t solenoids, they are actually motorized. The orange boxes on top of each valve is a motor housing. They take a little bit of time to open or close, about 5 seconds in either direction. A DN15 is as close to 1/2 NPT as you can get, just need to use some teflon tape.
I bought them on eBay from some manufacturer in china. I know pandemic stuff has made that sorta taboo, but whatever. I use 24VDC, and that variety is a little more expensive but only by a few bucks. The 220VAC variety is a little cheaper, but I wanted to keep all control power the same. Roughly $30 per valve.
They told me the valves are potable water safe, so that’s good enough for me. They are made of a brass housing with a stainless ball inside. They’re only rated for ~200 degrees F, so it works for almost all parts of brewing. I just need to let my IC run a little bit during cool down before opening up the valves. I believe this is because the ball sits on a plastic seat, I imagine the plastic could warp if it gets too hot. Luckily, when full closed, it doesn’t look like water touches the plastic. The plastic seat looks “contained” until medium flows through when open. If it becomes a problem, I can take the motors off the top of the valves and find a way to install them on fully stainless valve bodies instead.
I am using a Siemens PLC to control all of my process, so I can open or close any/all of them at will. I set up a program where you select which “mode” of brewing you want to do (heat, move strike, vorlauf, etc), and then all appropriate valves open or close to create that route. Then my graphical interface will display that route only, and allow for pump or heat control as long as it won’t run dry.
You are correct, if power goes out, then the valve doesn’t move. It has two “commands”, you send 24VDC to one wire to open it, and 24VDC to another wire to close it. In order to save I/O, I wired each valve to a Changeover (C.O.) relay. The normally-open is connected to the valve-open wire, and the normally-closed is connected to the valve-close wire. In theory, if the PLC craps out, the valves will “fail closed”, which is ideal. On a 3-way valve, that doesn’t do much but the straight-through valves on the kettle will do so.
The only downfall of this is that I can never stop-paying attention to the valves. What I mean is, if my software had a bug in it where it said “we aren’t even using valve G, so stop sending the signal”, it will then close. Not the biggest deal, I wrote the software to account for this, but in theory I couldn’t have a “maintain position” signal or even “rotate further to create a full-close 3-way valve”. All valves are either fully open or fully close, and there’s no in between. I say it’s a fair trade off to save on I/O, especially because I already owned the necessary relays, so they didn’t cost me anything.
I like the part you have to be there “hands on”… that’s a piece of brewing I enjoy… What few valves I have… They are off or on… Although… one after the CFC would be nice…
Sneezles61
Yea during the software test, I must have spilled at least 2 gallons of heated PBW all over the basement floor over the course of it all. I thought everything was good and wasn’t paying attention, the valve that leads from the kettle to the fermenter or further into the valve manifold… it was set on fermenter, and there was no fermenter at the end of that hose. It just kept happening in different ways, small volumes at a time. When I was done and trying to drain all liquids out of the manifold, it all just came flying out the lowest open valve… ya know, gravity? Except I had already taken the hose off that valve.
Wouldn’t be so bad, but you know… water and electricity aren’t the best of friends. No harm done, just frustrating. Lesson learned, even when automated, I still need to pay attention
So one of the main features of your automation is opening/closing valves. Interesting. Exactly what I want to do to automate my pool, along with turning on/off the pump and heater.
Yep. It’s not so hard, almost everything is digital I/O so that requires the least amount of internal calculation. The only analog feedback I have is a temperature probe, everything is on/off. PLC’s are the best
I also use my automation to turn on both chugger pumps, the heating element, and the pumps that will send cold water through my IC. Basically, anything that needs an on/off, I control via software