Looking for a few tips / advice on how to get a ball valve on my shiny new kettle.
I recently purchased an 8 Gallon Tall Boy kettle to transition from 1 gallon small batches, to 3 gallon BIAB. I really want to put a valve on this sucker and I already have a nice 3-piece ball valve that I have on a cooler tun setup that I never ended up using. After browsing forums and YouTube for some guidance on drilling a hole in the kettle I thought to myself, ‘Piece of Cake!’ Well that was hardly the case. The night before my first ever BIAB day I set out to the garage to pop a hole in that sucker. Equipped with two cordless drills (battery packs charged all day), some drill bits for a pilot hole, a step bit, and a hammer and nail to punch a dent to keep the bits from wandering. I also grabbed a bit of WD-40 for lube. Now I have zero to little handywork skills and experience, but the internet made this sound like with the supplies I had on hand, and little elbow grease, I would be able to pop through the kettle in no time. I also have a very limited arsenal of tools, I had to order the step bit just for this project.
Long story short, I now have 3 snapped drill bits, a scratched kettle with a little dent where the desired hole should be, and a nice circular bruise on the base of my palm from adding pressure to the drill (my pride hurts too). As much as I tried, I could not make any progress to get through the darn wall of the kettle. I tried low speed high pressure, high speed high pressure and everything in between with no success. I did my best to avoid building up any heat as to avoid further hardening the steel. I gave up on the hole, hoping that I didn’t just ruin the new kettle with my attempt (Luckily I didn’t and the brew day was still a success!)
Does anyone have any other suggestions to how I can make this hole happen with my available resources OR can anyone suggest some kind of professional that would be able to assist with this? Would a local welder be able to do this with ease? I am not yet a homeowner so I don’t yet know the world of contractors or skilled laborers and have never had the need for any metal work or anything. But now that I’ve been obsessed with homebrewing for the past year, I’ve got a whole list of DIY projects that I want to eventually accomplish. Good thing I do know of this great forum full of friendly brewers who love to help out fellow brewers! I sincerely appreciate any help anyone can offer!
What kind of bit are you using? For SS they need to be carbide. Weaker bits will just snap. If they are carbide it should be pretty simple.
A welder would easily punch through the SS. And if that’s the case have them weld the coupler in. I had a coupler welded in to my BK for a whirlpool attachment for $30. Welded couplers are leak free, so well worth the money, IMO. If you go this route, I would suggest this coupler.. It will allow you to add a ball valve on outside while allowing you to add an attachment in the inside.
Start with small drilbit. Than move bigger. Dont aplly to much pressure let the drill bit do the work. Its stainless steel. Keep the bit cool with some water helps as well. Than once you got the size hole remove sharp edges. Or what loopie says. Let a metal shop do the work for you. The can tig weld the valve easy with no leaks.
I would have a hard time drilling a brand new kettle and I consider myself to be pretty good with tools. I would almost tell you use it as is before you make any changes to it yet.
I’ve done many kettle conversions and haven’t had that problem. First, is the drill motor spinning clockwise? Maybe a funny question but with thin SS sheetmetal you should’ve popped right through. Second, are drill bits new, so they will be sharp? I’ve bought some as of recently with the yellow titanium coating, and they just bent over! Didn’t break, so they were junk from the get go. Maybe you have a saw horse you could clamp/fasten a 2x4 so it hangs over just far enough to get it under the point yer drilling yer hole, maybe grab a friend to keep yer saw horse from over turning on you. Sneezles61
I did mine starting with a small carbide bit and then a step bit. If I ever do another I will use a carbide hole saw. The step bit worked but left a rough edge on the inside of the pot around the hole that I then had to file down. It all worked out. Main thing is having the right kind of bits to use, keep the metal cool, and take your time.
Thanks for all the replies - I’m pretty sure that the drill bits I that snapped were both old, and of poor quality. They were from a drill set that belongs to my girlfriend and her mother most definitely picked up it up from a garage sale sometime back. They could have been very dull too. @sneezles61 the drill was most definitely spinning clockwise and I had the kettle firmly secured using a few towels on the floor.
I’m considering purchasing some new bits and giving it another go considering some of the other suggestions mentioned, but I’m also not against the idea of welding if I can find someone nearby that does quality work (I’m in the west burbs of Chicago if anyone has a guy). @loopie_beer would full couples work too so that it’ll accept Male NPT from both sides? If I go the weld route then I’m gonna have to go all out and get 3 holes welded: valve, thermometer, whirlpool (thinking about down the road, can always plug in the meantime).
You should be able to find someone in the CHI area to weld those for you.
If you want to be able to add an attachment to the outside as well as the inside use the coupler I posted above. If you want to just put in a thermometer use a half coupler.
Also be VERY careful when using a step bit. If you make the hole even a little to big a weldless valve will leak substantially. It’s very easy to make the hole to big with a step bit.
Edited to add: also think about what you want your kettle to be. Do you want or need a thermometer in a BK? Will it get caught on an immersion chiller? Doing BIAB? Will it tear your bag? Things like this are important. Personally, I would spend my money on a thermopen rather than a coupler/thermometer in my BK. Dial thermometers need calibrated and can easily be off. Thermopen confirms sparge water, mash, and wort temps.
As opposed to welding, silver solder? I agree whole heartedly with Loopie about a thermometer port, I put a tee on my output and then the thermometer has a place to go. Yup, calibrating IS mandatory… Sneezles61
Thanks again for the suggestions. I got a reply from a welder who said he could weld the couplings but it’d need to have the holes drilled first. So I making more calls to try to find services. I will call around to some LHBS’s and see if they can recommend anyone.
Also, thanks for the feedback regarding the thermometer port. I do currently BIAB and use a nice Thermapen-like digital hand held stick probe thermometer with fine results.
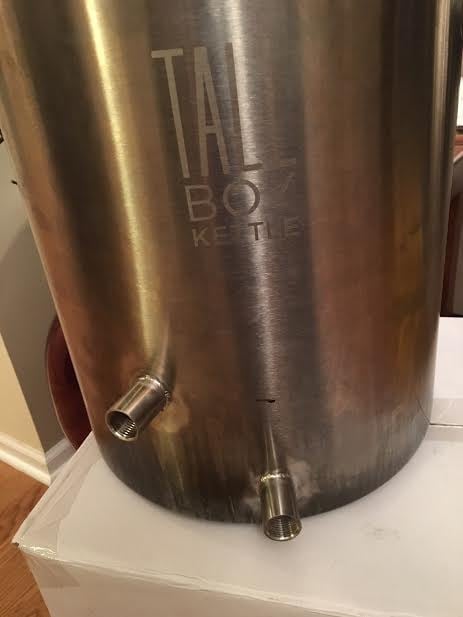
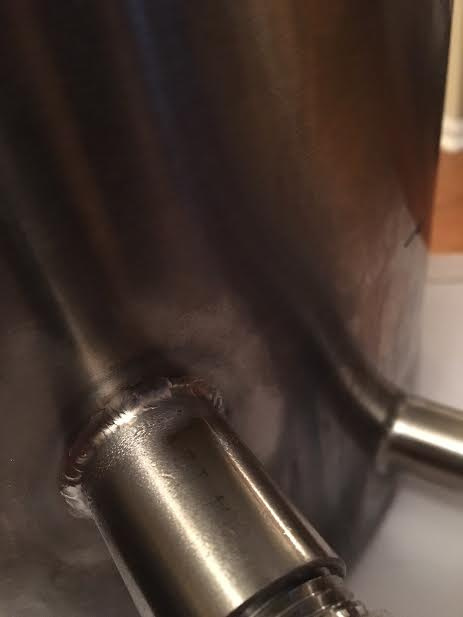
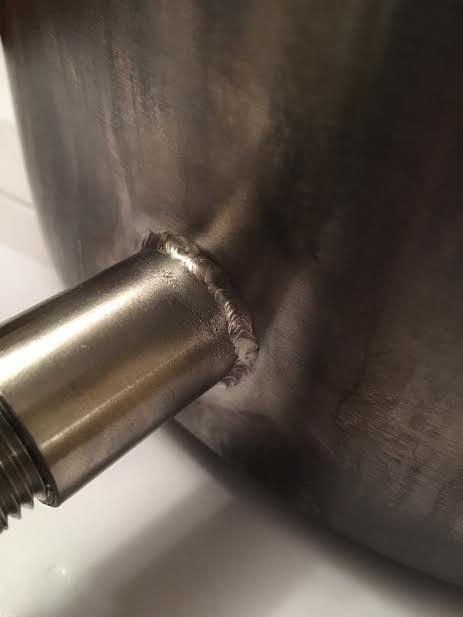
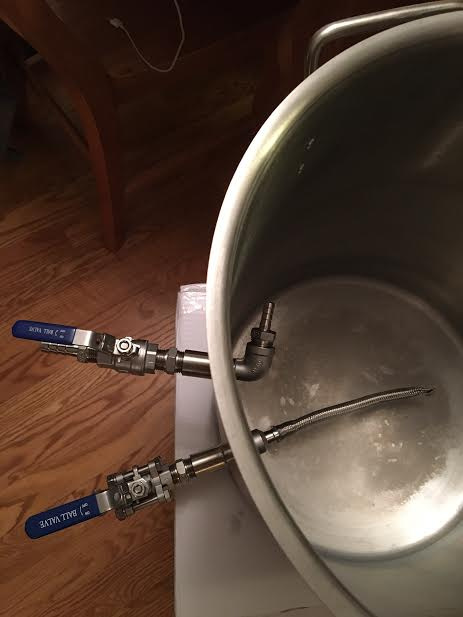
UPDATE!! I finally put out a craigslist ad in request of a welder and some pics of what I hoped to achieve and had a guy respond that he could handle the job. Took the kettle along with a pair of 1/2" NPT full couplers and went over to the guy’s garage. There was a bunch of machining equipment and the welder was a union pipe fitter who used to work with food grade welding in stainless food processing. Anyways the price was right and i got to watch him work, which I’m sure was annoying for him but I found it interesting. The inside weld seems rough but is smooth to the touch and the male fittings fit in there no problem. Here are the pics of the final product along with some fittings I’ve ordered in anticipation of getting the kettle work handled.
You’ll be very happy with yer mods! I took the barbed nipple off mine on the whirlpool elbow and it seems to move the wort fine. Not as much splashing. Sneezles61